A chicken egg incubator is a device used to artificially create the optimal conditions for eggs to hatch. It provides a controlled environment of temperature, humidity, and ventilation to simulate a mother hen’s nest.
With its automated functions, the incubator takes care of turning the eggs and maintaining the necessary conditions for successful incubation. This technology is particularly useful for chicken farmers and breeders as it improves the chances of a higher hatch rate and reduces the reliance on natural broody hens.
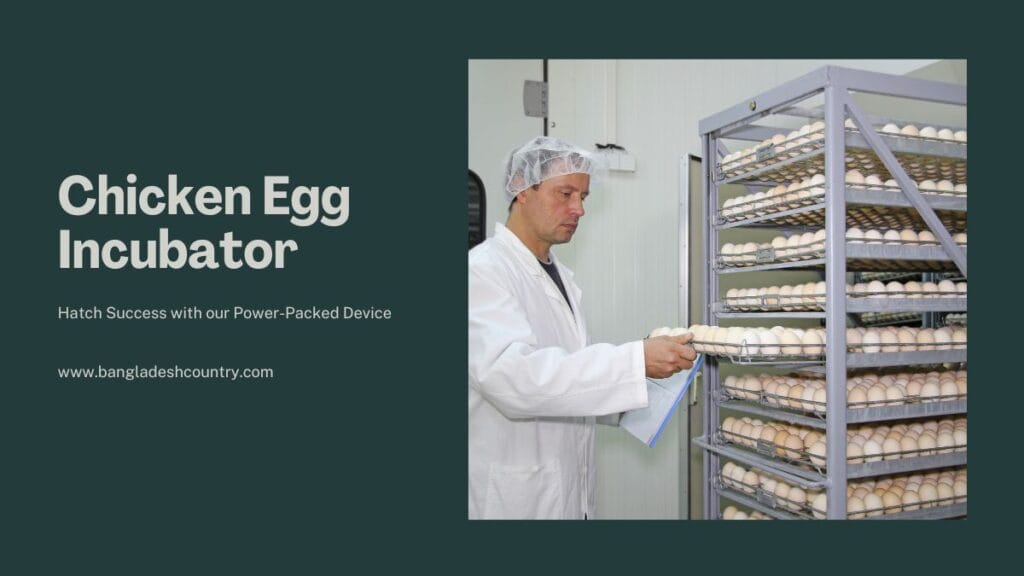
Moreover, it allows for the incubation of a larger number of eggs at the same time, increasing efficiency and productivity in poultry operations.
Key Features Of Our Chicken Egg Incubator
If you are in the business of hatching chicken eggs or simply a backyard enthusiast, having a reliable and efficient chicken egg incubator is essential. Our Chicken Egg Incubator boasts a range of key features that ensure optimal conditions for successful egg incubation. From automatic temperature control, humidity regulation, to a built-in turner, this incubator is designed to provide the ideal environment for your eggs to hatch.
Automatic Temperature Control
One of the standout features of our Chicken Egg Incubator is its automatic temperature control. Keeping a consistent temperature is crucial for the healthy development of chicken embryos. Our incubator is equipped with advanced technology that constantly monitors and adjusts the temperature, ensuring a stable and precise environment for your eggs. This means you can confidently set the desired temperature and let the incubator take care of the rest, providing you with peace of mind.
Humidity Regulation
Proper humidity levels play a vital role in the successful incubation of chicken eggs. Our Chicken Egg Incubator includes a humidity regulation feature that takes the guesswork out of maintaining the ideal humidity levels. With our incubator, you can easily monitor and adjust the humidity to create the perfect conditions for your eggs to hatch. This precise control over humidity helps ensure healthy development and improves the chances of a successful hatch.
Built-in Turner
Another key feature of our Chicken Egg Incubator is the built-in turner. The turner automatically rotates the eggs at regular intervals, mimicking the natural behavior of mother hens. This rotating motion prevents the embryo from sticking to the eggshell and promotes even development. With our incubator’s built-in turner, you can be confident that each egg receives equal attention and optimal conditions for hatching. Say goodbye to manually turning each egg and let our incubator take care of this important task.
Setting Up The Chicken Egg Incubator
Setting up the chicken egg incubator is a crucial step in ensuring the successful hatching of chicken eggs. It involves carefully selecting the right location, preparing the incubator, and adding the eggs. Let’s take a closer look at each of these steps.
Choosing The Right Location
Before setting up the chicken egg incubator, it’s important to choose the right location. The location should be free from direct sunlight, drafts, and extreme temperature changes. Ideally, it should be a well-ventilated and stable area that maintains a consistent temperature between 99 to 101 degrees Fahrenheit (37 to 38 degrees Celsius).
Preparing The Incubator
Once you’ve found the perfect location, it’s time to prepare the incubator. Start by thoroughly cleaning the incubator using a mild detergent and warm water. Rinse it well and allow it to dry completely. This step is crucial in creating a clean and hygienic environment for the eggs.
Next, set up the incubator according to the manufacturer’s instructions. This typically involves assembling the various components, such as the heating element, thermostat, and water reservoir. Ensure that every part is properly installed and securely in place.
Once the incubator is set up, it’s important to calibrate the temperature and humidity levels. Use a reliable thermometer and hygrometer to ensure accurate readings. Adjust the settings as needed to maintain the recommended temperature and humidity levels throughout the incubation process.
Adding The Eggs
With the incubator prepared and calibrated, it’s time to add the chicken eggs. Before placing the eggs, mark each one with an ‘X’ on one side and an’O’ on the other. This will help you keep track of their rotation during the incubation process.
Place the eggs gently in the incubator, making sure they are positioned with the ‘X’ side facing up. It’s important to maintain proper spacing between the eggs to allow for adequate airflow and prevent them from touching each other.
Remember to only add fertile eggs to the incubator. Candling the eggs before incubation can help determine their fertility. Discard any eggs that show signs of damage, cracks, or infertility.
Once all the eggs are in place, close the incubator and avoid opening it unnecessarily. Consistency is key in maintaining the ideal environment for the eggs to develop and hatch.
Monitoring And Maintaining Incubation Conditions
To effectively monitor and maintain the incubation conditions for chicken eggs in an incubator, it is essential to ensure proper temperature, humidity, and ventilation. Regular monitoring and adjustment of these conditions are necessary to maximize hatch rates and ensure healthy development.
Introduction
Welcome to our blog post on chicken egg incubators! Monitoring and maintaining optimal incubation conditions are crucial for a successful hatch. In this section, we will discuss the essential tasks of checking temperature and humidity levels, as well as regular turning of eggs. Let’s dive in!
Checking Temperature And Humidity Levels
Temperature and humidity play a vital role in the development of chicken embryos. It is crucial to ensure these conditions are within the recommended range throughout the incubation period. Here’s how you can monitor and maintain these conditions effectively:
Temperature
The correct temperature is key for proper embryonic development. To ensure consistent temperatures:
- Place a reliable thermometer inside the incubator, preferably at the same height as the eggs.
- Check the temperature regularly, aiming to keep it at a constant 99.5°F (37.5°C). This temperature mimics the natural heat provided by a broody hen.
- If the temperature fluctuates, adjust the incubator settings accordingly to maintain the desired temperature.
Humidity
Appropriate humidity levels are crucial for the successful incubation of eggs. Follow these steps to maintain optimal humidity:
- Place a hygrometer inside the incubator to measure the humidity levels accurately.
- For the first 18 days, maintain a humidity level of around 50-55%. This moisture prevents excessive egg weight loss.
- During the final 3 days, known as lockdown, increase the humidity level to about 65-70%. This increase helps the chicks to easily break out of the shell.
Regular Turning Of Eggs
Turning the eggs is essential for a healthy development of the embryo. Here’s why and how to turn the eggs:
Why is turning necessary?
- Turning the eggs prevents the embryo from sticking to the shell, ensuring proper circulation of nutrients and oxygen.
- It helps prevent deformities by ensuring even weight distribution and muscle development.
How to turn the eggs?
- Mark one side of each egg with an ‘X’ and the other side with an ‘O’ using a pencil or a marker.
- Gently rotate the eggs by 180 degrees, from ‘X’ to ‘O’ and vice versa, three to five times a day.
- Turning should be done consistently until the last three days before hatching, allowing the chicks to position themselves for hatching.
By adhering to these turning techniques, you ensure that the embryos inside the eggs have the best chance of developing properly.
Caring For Developing Embryos
Caring for Developing Embryos:
When it comes to chicken egg incubation, caring for developing embryos is crucial for their successful development into healthy chicks. Proper nutrition, maintaining an ideal environment, and avoiding common mistakes are essential factors that contribute to the overall well-being of the developing embryos.
Importance Of Proper Nutrition
Providing the developing embryos with proper nutrition is of utmost importance. A well-balanced diet ensures that the embryos receive the necessary nutrients for their growth and development. It is recommended to use a high-quality commercial feed specifically formulated for incubating eggs.
In addition to commercial feed, you can supplement their diet with nutritious treats like finely chopped greens or mealworms. However, it’s crucial to avoid overfeeding as it can lead to excessive weight gain in the embryos and hinder their development.
Maintaining Ideal Environment
Maintaining an ideal environment within the chicken egg incubator is vital for the optimal development of the embryos. Here are some key factors to consider:
- Temperature: Maintain a consistent temperature between 99.5°F and 100.5°F (37.5°C to 38.1°C) throughout the incubation period. Fluctuations in temperature can negatively impact the embryos.
- Humidity: Keep the humidity levels between 50% and 55% during the incubation process. This level of humidity helps prevent the eggs from drying out and aids in the successful hatching of the chicks.
- Turning the Eggs: Regularly turn the eggs to prevent the embryos from sticking to the inner membrane. Gently tilt the eggs from side to side a few times each day.
- Adequate Ventilation: Ensure proper air circulation within the incubator to prevent the buildup of harmful gases. This can be achieved by using an incubator with ventilation holes or by periodically opening the incubator for a few minutes.
Avoiding Common Mistakes
While caring for developing embryos, it’s essential to be aware of the common mistakes that can hinder their growth. Here are some mistakes to avoid:
- Opening the Incubator Often: Frequent opening of the incubator can cause temperature and humidity fluctuations, which are harmful to the embryos. Avoid unnecessary opening and only open the incubator when necessary.
- Using Dirty Eggs: Dirty eggs are more susceptible to contamination and can harm the developing embryos. Always ensure that the eggs used for incubation are clean and free from any dirt or debris.
- Failure to Remove Unviable Eggs: Unviable eggs, which are unlikely to hatch, can affect the healthy development of other embryos. Remove any eggs that show no signs of development or have stopped developing after the first week.
- Improper Egg Storage: Improper storage of eggs before incubation can lead to reduced hatch rates. Store the eggs in a cool and dry place, preferably at temperatures around 55°F (13°C), with the pointed end down.
Preparing For Hatching
Getting ready for the arrival of fluffy little chicks is an exciting moment for any poultry enthusiast. By preparing properly for the hatching process, you can ensure a successful and healthy start for your new feathered friends.
Candling The Eggs
One crucial step in preparing for hatching is candling the eggs. Candling is a technique that involves shining a bright light through the eggshell to assess the development and viability of the embryo inside. This process allows you to separate fertile eggs from infertile ones, ensuring that only potentially viable eggs proceed to the incubation stage.
When candling, start by creating a dark environment and holding the egg against the light. Look for signs of development, such as visible veins, a dark spot or shadow indicating the embryo, and any unusual liquid movement inside the egg. Mark any eggs that show signs of life, so you can monitor their progress during the incubation period.
Preparing The Brooder
Creating a comfortable and safe brooder is essential for the well-being of the chicks once they hatch. The brooder serves as their temporary home until they are ready to adapt to the external environment. To prepare the brooder, ensure it provides adequate space, warmth, ventilation, and protection from predators.
Choose a brooder box or container that is spacious enough to accommodate the number of chicks you expect to hatch. Line the bottom with clean and absorbent bedding material, such as wood shavings or straw, to provide a soft and warm surface for the chicks to walk on. Remember to clean and change the bedding regularly to maintain hygiene.
Install a heat source, such as a heat lamp or a heating pad, to maintain the brooder’s temperature around 95°F (35°C) during the first week. Gradually reduce the temperature by 5°F (2.8°C) each week until reaching room temperature.
Timing The Hatch
Timing is crucial when preparing for hatching. Depending on the chicken breed, eggs typically require an incubation period of 21 days. Therefore, it is essential to determine the exact date when you should start incubating the eggs. This way, you can plan for a smooth transition from the incubator to the brooder, ensuring optimal care and warmth for the newly hatched chicks.
Mark the desired hatch date on your calendar and count back 21 days. This will give you the incubation start date. Consider the incubation period and allow a few extra days for preparation and adjustment.
By following these steps, you can efficiently prepare for hatching and provide a nurturing environment for the chicks to grow and thrive. Remember to monitor the eggs’ progress, maintain the brooder’s temperature, and plan accordingly to ensure a successful hatching experience.
Welcoming Your Chicks
After waiting patiently for the incubation period to complete, it’s time for the exciting moment of welcoming your
adorable new chicks into the world. Caring for these fragile creatures requires attention and care, but with the
right knowledge, anyone can successfully raise healthy chickens from hatchlings. Here are some essential tips
and steps to assist you in this wonderful process.
Assisting Weak Hatchlings
Some chicks may hatch weaker than others, and it’s crucial to provide them with extra support during their early
stages. Here’s what you can do to help:
- Provide a warm and quiet environment for weak hatchlings to recover.
- Ensure they have access to fresh water at all times to prevent dehydration.
- Consider using an electrolyte solution to support their hydration and energy levels.
- Offer small, highly nutritious food sources, such as scrambled eggs, to help boost their strength.
Providing Post-hatch Care
Once your chicks have completed hatching, it’s important to continue providing optimal care to ensure their
healthy growth. Here are some tips for post-hatch care:
- Transfer the chicks to a clean and well-prepared brooding area to ensure their safety.
- Monitor the temperature of the brooder, as chicks require a consistent heat source to stay warm.
- Provide a suitable bedding material, such as wood shavings or rice hulls, to keep the brooder clean and
comfortable. - Install a feeder and waterer at an appropriate height to make it easily accessible for the chicks.
- Observe the chicks for any signs of sickness or distress and take appropriate action if needed.
Tips For Raising Healthy Chickens
As your chicks grow, you’ll want to ensure they stay healthy and thrive. Here are some essential tips for
raising healthy chickens:
- Provide a balanced diet that includes a combination of commercial chicken feed and appropriate treats.
- Offer fresh water in a clean container at all times.
- Ensure they have access to a suitable outdoor space for exercise and foraging.
- Regularly clean the coop and bedding to maintain a hygienic environment.
- Implement a predator-proof enclosure to keep your chickens safe from harm.
Frequently Asked Questions Of Chicken Egg Incubator
How Does A Chicken Egg Incubator Work?
A chicken egg incubator creates an optimal environment of temperature, humidity, and ventilation to mimic a hen sitting on eggs. This helps in the successful hatching of eggs.
What Is The Ideal Temperature For Incubating Chicken Eggs?
The ideal temperature for incubating chicken eggs is 99. 5°F (37. 5°C), which should be maintained consistently throughout the incubation period for healthy embryo development.
How Long Does It Take For A Chicken Egg To Hatch In An Incubator?
A chicken egg takes approximately 21 days to hatch in an incubator, but slight variations in temperature and humidity may affect the timeline.
Can I Incubate Eggs Without An Incubator?
While it is possible to hatch eggs without an incubator, it requires precise temperature and humidity control, which can be challenging to achieve without a specialized device.
How Often Should I Turn Chicken Eggs In The Incubator?
Chicken eggs should be turned at least three to five times a day in the incubator. This helps to prevent the embryo from sticking to the eggshell and ensures even development.
What Is The Role Of Humidity In Egg Incubation?
Humidity plays a crucial role in egg incubation as it prevents the eggs from drying out. The correct humidity level ensures proper moisture exchange for the embryos’ growth and prevents complications.
How Do I Maintain Humidity Levels In The Incubator?
To maintain humidity levels in the incubator, you can add water to the provided reservoirs or use a hygrometer to monitor and adjust the humidity as necessary.
What Should I Do If An Egg Doesn’t Hatch In The Incubator?
If an egg doesn’t hatch within a reasonable time frame, it may be best to remove it from the incubator to prevent potential contamination and focus on the healthy eggs instead.
Conclusion
To sum up, a chicken egg incubator is an essential tool for hatching and raising healthy chicks. It provides a controlled and optimal environment for eggs to hatch, ensuring a higher success rate. With its automated features and user-friendly design, it makes the incubation process easier and more efficient.
Investing in a reliable chicken egg incubator is a smart choice for breeders and enthusiasts alike, guaranteeing a higher chance of successful hatching and thriving chicks. Read more article.
- Online resources:
- Incubator Warehouse: https://incubatorwarehouse.com/
- Another
- Backyard Chickens: https://www.backyardchickens.com/
- Chicken Forum: https://www.chickensmoothie.com/Forum/

