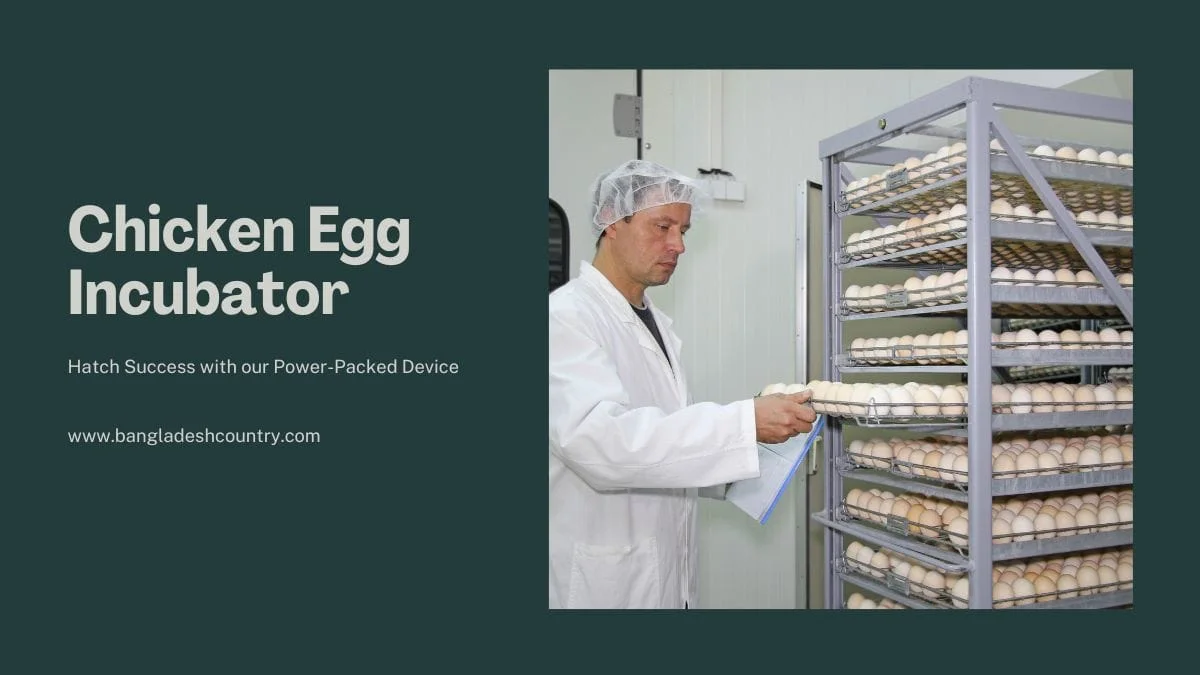
Bringing new life into the world, especially on your own terms, holds a unique satisfaction. For many backyard chicken enthusiasts and small-scale poultry keepers across the United States, that satisfaction often comes from successfully hatching chicks using a chicken egg incubator. Gone are the days when a broody hen was your only option; modern poultry incubation equipment offers precision, efficiency, and consistent results, transforming a collection of fertile eggs into a vibrant flock of fluffy chicks.
Why a Chicken Egg Incubator is Essential for Modern Poultry Keepers in 2026
The allure of hatching your own chicks goes far beyond simply expanding your flock. It offers control, genetic selection, and the sheer joy of witnessing new life emerge. In 2026, the technology embedded in a quality chicken egg incubator makes this process more accessible and reliable than ever before.
Beyond the Broody Hen: The Case for Controlled Incubation
While a natural mother hen is an ideal incubator, she isn’t always available or cooperative. A dedicated automatic egg hatcher machine ensures you can:
- Hatch chicks on your schedule, regardless of the season.
- Incubate eggs from multiple hens or different breeds simultaneously.
- Achieve higher, more consistent hatch rates by eliminating variables like a hen abandoning her nest or breaking eggs.
- Quarantine new hatches from your main flock, crucial for biosecurity.
This level of precision is invaluable, particularly for those passionate about specific genetics or seeking to grow their flock efficiently.
Technological Advancements: Smart Hatching in 2026
Today’s chicken egg incubators are far removed from simple heated boxes. They often feature:
- Advanced Digital Controls: Precise temperature and humidity regulation, often accurate to within 0.1 degrees Fahrenheit.
- Automatic Egg Turning Systems: Eliminating the need for manual intervention, ensuring consistent development.
- Integrated Candlers: Making embryo development checks easy without disturbing the incubation environment.
- Smart Connectivity: Some high-end models even offer Wi-Fi connectivity, allowing you to monitor and adjust settings from your smartphone. This means real-time data and peace of mind, even when you’re away.
- External Water Ports: Simplifying humidity adjustments without opening the incubator.
These innovations make the process more user-friendly and significantly increase the chances of a successful hatch, even for beginners.
Understanding the Core Mechanics: How a Chicken Egg Incubator Orchestrates Life

A chicken egg incubator replicates the conditions a broody hen provides, creating a stable, optimal environment for embryonic development. Success hinges on mastering four key parameters: temperature, humidity, ventilation, and egg turning.
Temperature: The Master Controller of Development
Temperature is, without question, the most critical factor. Slight deviations can result in deformities, premature deaths, or delayed hatching.
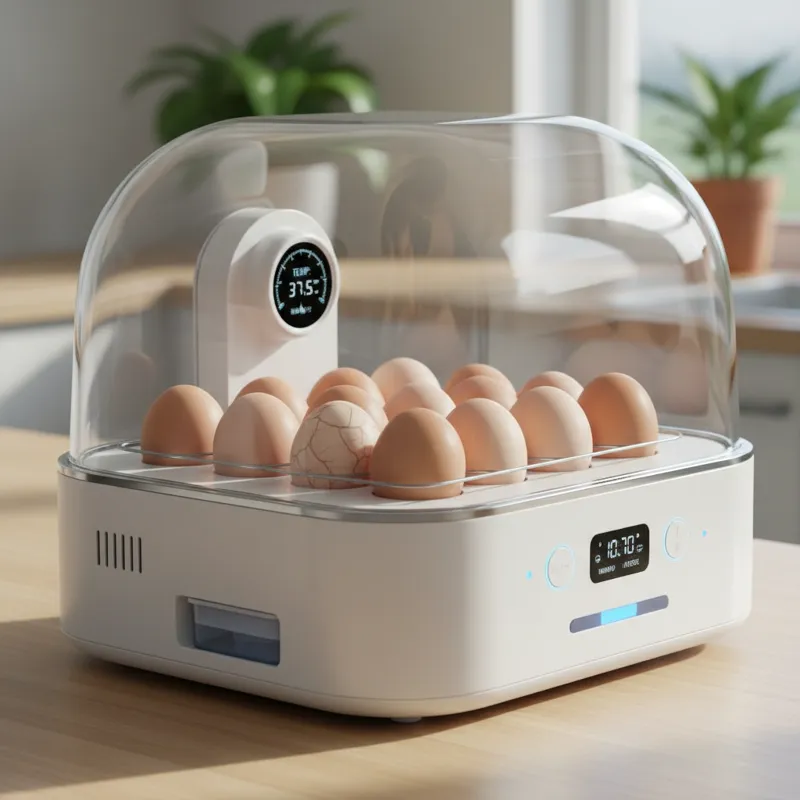
- The Ideal Range: For chicken eggs, the sweet spot is typically 99.5°F (37.5°C) for forced-air incubators and 101.5°F (38.6°C) for still-air units (where temperature is measured at the top of the eggs).
- How it Works: Incubators use heating elements (often resistive coils) controlled by a thermostat and sensor. A fan in forced-air models circulates this warmth evenly throughout the chamber, preventing hot or cold spots. Without consistent heat, embryonic development will stall or go awry.
Humidity: The Unsung Hero of Hatching
Often underestimated, humidity plays a vital role in proper chick development and a successful hatch.
- Purpose: It prevents excessive moisture loss from the egg through evaporation, which can lead to a ‘shrink-wrapped’ chick unable to break free from its shell. Conversely, too much humidity can lead to “drowning” or difficulty absorbing the yolk sac.
- Levels: Typically, you aim for 45-55% relative humidity during the first 18 days of incubation. This increases significantly to 65-75% during the final “lockdown” period (days 18-21) to soften the shell membranes, making pipping and hatching easier.
- Mechanics: Water trays or reservoirs within the incubator, often with sponges for increased surface area, provide the necessary moisture. A hygrometer measures the relative humidity, allowing you to adjust water levels as needed.
Ventilation: The Breath of Life
Just like any living organism, a developing embryo needs oxygen and produces carbon dioxide.
- Gas Exchange: Eggs breathe through their porous shells. Proper ventilation ensures a constant supply of fresh air and removal of waste gases.
- Mechanism: Incubators have vents, often adjustable, to facilitate this crucial air exchange. Too little ventilation can suffocate embryos, while too much can make maintaining temperature and humidity challenging.
Egg Turning: Preventing Sticking and Promoting Health
Regular turning is vital to prevent the embryo from sticking to the inside of the shell membrane and to ensure proper development of all parts.
- Natural Process: A mother hen turns her eggs frequently throughout the day.
- Incubator Solution: Modern incubators feature an automatic egg turner for sale that gently rotates the eggs at set intervals (typically every 1-2 hours). Manual turning requires marking eggs and rotating them at least 3-5 times a day. This ensures even heat distribution and proper nutrient absorption.
Types of Chicken Egg Incubators: Choosing Your Hatch Partner

Selecting the right poultry incubation equipment involves understanding the different types available and matching them to your specific needs, budget, and desired level of involvement.
Still Air vs. Forced Air Incubators
This is a fundamental distinction impacting temperature consistency.
- Still Air Incubators: These are typically the most basic and least expensive. They lack a fan, meaning warm air stratifies, with hotter temperatures at the top and cooler at the bottom. This necessitates measuring temperature at the top of the eggs and manually rotating eggs regularly. They demand more attention but can be effective for small batches.
- Forced Air (Fan) Incubators: The majority of modern chicken egg incubators fall into this category. A built-in fan circulates air evenly, maintaining a consistent temperature throughout the entire chamber. This reduces hot and cold spots, generally leading to higher and more reliable hatch rates. They are easier for beginners to manage.
Manual vs. Automatic Turning Incubators
Your commitment to daily interaction will dictate this choice.
- Manual Turning: Requires you to physically turn each egg multiple times a day. This is labor-intensive and easy to forget, potentially impacting hatch rates. Often found in still-air or very basic forced-air models.
- Automatic Turning: The hallmark of most quality incubators today. A motor-driven mechanism gently rotates the eggs at programmed intervals, ensuring optimal embryo development without constant supervision. This feature is a game-changer for convenience and consistency.
Tabletop vs. Cabinet Incubators
Capacity is the main differentiator here.
- Tabletop Incubators: Designed for smaller batches, typically holding 7 to 60 eggs. They are compact, fit on a counter, and are ideal for hobbyists or those wanting to hatch a few dozen chicks annually.
- Cabinet Incubators: Larger, floor-standing units capable of holding hundreds or even thousands of eggs. These are for serious breeders, commercial operations, or those with very large flocks. They offer greater capacity but come with a higher price tag and require more dedicated space.
Key Features to Prioritize in a 2026 Chicken Egg Incubator
When you’re looking for a home egg hatching guide and device, these features can make all the difference:
- Digital Temperature & Humidity Display: Absolute must-haves for accurate monitoring and adjustment.
- Automatic Egg Turning: Non-negotiable for convenience and consistent success.
- Integrated Candler: Saves you from buying a separate tool and disturbing eggs.
- Audible Alarms: Alert you to critical temperature or humidity deviations, offering a safety net.
- External Water Fill Port: Allows you to add water without opening the incubator, preventing humidity drops.
- Clear Viewing Window: Essential for observing the eggs and, most excitingly, the hatching process without opening the unit.
- Durability and Ease of Cleaning: Look for sturdy construction and accessible components for sanitation between hatches.
- Smart Features (Optional but great for 2026): App connectivity, data logging, and remote monitoring offer unparalleled control and peace of mind.
Setting Up Your Chicken Egg Incubator for Success
Proper setup is foundational to a high hatch rate. Don’t rush this step; precision here pays dividends.
Optimal Placement Matters
Your incubator needs a stable environment to thrive.
- Location: Choose a room with a consistent ambient temperature, ideally between 70-75°F (21-24°C). Avoid areas near windows (sunlight fluctuations), external doors (drafts), or heating/cooling vents.
- Surface: Place the incubator on a sturdy, level surface that won’t be bumped or moved.
Calibration: Trust, But Verify
Even the best digital egg turner for sale and incubator can have slight sensor discrepancies.
- Why Calibrate: The internal sensors are critical, but independent verification ensures accuracy.
- How To: Purchase a reliable, separate digital thermometer/hygrometer (often referred to as an “incubation thermometer”). Place it inside the incubator and let it run for at least 24 hours to compare readings with your incubator’s display. Adjust your incubator’s settings as needed to match your calibrated external device.
Pre-Heating and Stabilization
Don’t put eggs in a cold incubator.
- The Run-Up: Set up your incubator at least 24-48 hours before you plan to add eggs. Fill the water channels, set your target temperature (99.5°F for forced air), and let it stabilize. This allows the internal environment to reach a consistent equilibrium.
Collecting and Storing Eggs for Incubation
The quality of your eggs directly impacts your hatch rate.
- Selection: Choose clean, fresh, medium-to-large eggs from healthy, well-fed flocks. Avoid eggs that are excessively dirty, cracked, misshapen, or very small/large. Ideally, collect eggs from a pen with a good rooster-to-hen ratio (1:8 to 1:12).
- Storage: Store eggs pointed-end down in cartons at 50-60°F (10-15°C) and 70-75% humidity for no longer than 7-10 days. Turn them daily if storing for more than a few days to prevent the yolk from settling and sticking.
The Incubation Journey: A Day-by-Day Guide to Hatching Chicken Eggs
The typical incubation period for chicken eggs is 21 days. This journey is generally divided into two main phases: the incubation phase and the lockdown phase. Understanding the subtle shifts required for each is key to success.
Days 1-18: The Incubation Phase
This is the period of active embryonic development.
- Temperature: Maintain a steady 99.5°F (37.5°C) in a forced-air incubator. Consistency is paramount here.
- Humidity: Aim for 45-55% relative humidity. Use your hygrometer and adjust water levels in the incubator’s reservoirs.
- Egg Turning: If you have an automatic egg turner, ensure it’s functioning. Manual turning requires rotating eggs at least 3-5 times daily (e.g., morning, noon, evening). A common technique is to mark one side with an ‘X’ and the other with an ‘O’ to track turns.
- Candling: Candling is the practice of shining a bright light through the egg to observe the embryo. A small, bright LED flashlight works perfectly.
- Day 5-7: You should see spider-like veins and potentially a small, dark embryo.
- Day 10-14: The embryo will be larger, and you’ll see more extensive vascularization. The air cell should also be clearly defined. Remove any infertile or “blood ring” (early death) eggs at this stage to prevent contamination.
- Avoid Opening: Resist the urge to open the incubator frequently. Each time you do, you lose vital heat and humidity, which takes time to recover.
Days 18-21: The Lockdown Phase
This is the critical final stage where chicks prepare to hatch.
- Stop Turning: On day 18, cease all egg turning. The chick needs to orient itself for hatching.
- Increase Humidity: This is crucial. Raise the humidity to 65-75%. Higher humidity softens the inner membranes of the egg, making it easier for the chick to pip and break free. Without enough humidity, chicks can get “shrink-wrapped” and exhaust themselves trying to hatch.
- Temperature: Maintain 99.5°F (37.5°C) or slightly lower to 99°F.
- Do NOT Open: This is perhaps the most important rule during lockdown. Opening the incubator, even for a moment, causes a sudden drop in humidity which can dry out the membranes and trap chicks. Be patient and observe through the viewing window.
A great resource for understanding the intricate development process day-by-day can be found on Wikipedia’s chick development page.
Troubleshooting Common Incubation Issues
Even with the best poultry incubation equipment, issues can arise. Knowing how to diagnose and address them can save a hatch.
No Hatch, or Low Hatch Rate
- Infertility: The most common reason. Ensure your eggs came from a fertile flock and were stored correctly.
- Incorrect Temperature: Too high or too low for too long can kill embryos. Refer to your calibration notes.
- Incorrect Humidity: Too low early on can dehydrate, too low during lockdown can shrink-wrap.
- Poor Egg Quality: Old eggs, cracked eggs, or eggs from stressed hens have lower viability.
Pipped But Not Hatched (Stuck in Shell)
- Low Humidity during Lockdown: This is the primary culprit. The membranes dry out and become tough, trapping the chick.
- Weak Chick: Genetic issues or inconsistent incubation conditions can result in a chick too weak to escape.
- Intervention? Generally, avoid assisting. It’s often more harmful than helpful and can introduce bacteria. If you do consider it, research extensively and proceed with extreme caution, knowing the risks.
Early or Late Hatches
- Early Hatching: Often indicates the incubator temperature was slightly too high. Chicks may be smaller and weaker.
- Late Hatching: Usually points to the incubator temperature being slightly too low. Chicks are often fine but the overall hatch takes longer.
Deformed or Malformed Chicks
- Temperature Fluctuations: Spikes or drops, especially during early development, are a common cause.
- Genetic Issues: Some deformities are simply genetic and unavoidable.
- Nutritional Deficiencies: Poor diet of the parent flock can impact embryo development.
What Most People Get Wrong with Chicken Egg Incubators
Hatching chicks can feel like magic, but common pitfalls often derail a promising hatch. Avoiding these typical mistakes can dramatically improve your success rate.
1. Not Calibrating Sensors
Relying solely on your incubator’s built-in thermometer and hygrometer without independent verification is a rookie error. Factory settings can be off by a degree or two, and that’s enough to cause problems. Always use a second, trusted device to cross-reference your readings.
2. Opening the Incubator Too Often (Especially During Lockdown)
Every time you open the lid, you dump critical heat and, more importantly, humidity. During lockdown, a sudden drop in humidity causes the inner membrane to dry and harden around the chick, acting like superglue. Resist the urge to peek! Use the viewing window.
3. Ignoring Room Temperature Stability
Your incubator works best in a consistent ambient temperature. Placing it in a drafty room, near a window with direct sunlight, or where temperatures fluctuate wildly (e.g., a garage) forces the incubator’s heating element to work overtime and can lead to internal temperature swings despite its controls.
4. Using Old or Poorly Stored Eggs
The freshest, cleanest, and most viable eggs yield the best results. Don’t expect miracles from eggs that are two weeks old, have been washed aggressively (removing the protective bloom), or stored in unfavorable conditions. Optimal storage (cool, humid, turned) is crucial for viability.
5. Failing to Sanitize Properly Between Hatches
Bacteria and mold are enemies of embryonic development. After each hatch, thoroughly clean and sanitize your incubator according to the manufacturer’s instructions. This step is often overlooked but prevents pathogen buildup that can contaminate future batches. Think of it like taking care of any pet care item; hygiene is paramount for health.
6. Misunderstanding Humidity’s Role in the Hatch Window
Many understand humidity is important, but not why it fluctuates. The initial humidity keeps the chick from dehydrating. The sharp increase during lockdown (days 18-21) is specifically to soften the shell membranes. Failing to increase it means tough membranes, leading to “shrink-wrapped” chicks that can’t break out.
Post-Hatch Care & Brooding
Hatching is just the beginning. The next critical step is ensuring your newly hatched chicks have a safe and warm environment to thrive.
Leaving Chicks in the Incubator
After hatching, chicks are wet and exhausted. Leave them in the incubator for 12-24 hours to dry off and fluff up completely. The remaining humidity from other hatching eggs will help any latecomers, and the incubator’s warmth will prevent chilling. Don’t remove eggshells or unhatched eggs during this time, as opening the incubator can affect other eggs still in progress.
Transition to a Brooder
Once dry and active, move the chicks to a prepared brooder. A brooder is essentially a safe, warm enclosure that provides:
- Heat Source: A heat lamp or brooder plate is essential. Start at 90-95°F (32-35°C) for the first week, reducing the temperature by 5°F each subsequent week until they are fully feathered (around 6-8 weeks).
- Draft-Free Enclosure: A large tote, stock tank, or specialized brooder box works well.
- Bedding: Pine shavings (avoid cedar) or straw.
- Feed & Water: Provide chick starter feed (medicated or unmedicated, depending on your preference) and fresh water in a chick-safe fount.
This transition marks the next chapter in their journey from egg to adult chicken.
Maintaining Your Poultry Incubation Equipment
Longevity and reliable performance for your automatic egg hatcher machine depend on proper care and maintenance.
Cleaning and Sanitizing
After every hatch, thoroughly clean your chicken egg incubator.
- Disassemble: Remove egg trays, water trays, and any other removable parts.
- Wash: Use warm, soapy water to clean all surfaces. A mild disinfectant (like a diluted bleach solution or veterinary disinfectant) is crucial to kill bacteria and mold.
- Rinse & Dry: Rinse thoroughly to remove all soap and disinfectant residue, then allow all components to air dry completely before reassembly.
Storage
When not in use, store your incubator in a clean, dry, temperature-stable environment, away from dust and pests. Protect sensitive electronics and sensors. Regular maintenance is a small investment for years of successful hatching. This diligence ensures your equipment is ready for the next batch, much like how taking care of a brown Ragdoll cat or any pet ensures its well-being.
People Also Ask (FAQ)
You’ve got questions; we’ve got answers. Here are some of the most common inquiries about hatching chicken eggs.
What’s the best temperature for hatching chicken eggs?
For forced-air incubators, the ideal temperature is 99.5°F (37.5°C). If you’re using a still-air incubator, aim for 101.5°F (38.6°C), measured at the top of the eggs, as heat stratifies. Consistency is key.
How often should I turn eggs in an incubator?
An automatic egg turner will usually rotate eggs every 1-2 hours. If turning manually, you should turn them at least 3-5 times a day (e.g., morning, midday, evening). Always turn them an odd number of times to ensure they don’t rest on the same side two nights in a row.
Can I hatch different types of eggs together?
Yes, but with caveats. Different species (like chicken, duck, quail) have varying incubation periods, temperatures, and humidity requirements. If you do, ensure the environment is optimized for the most sensitive species or those with the most specific needs. For general chicken, a consistent setting works for most standard breeds. For detailed poultry care, you might explore resources like the USDA APHIS poultry health information.
How long does it take for chicken eggs to hatch?
Chicken eggs typically hatch in 21 days. However, minor temperature fluctuations can cause them to hatch a day early or a day late.
What humidity should an incubator be for chicken eggs?
Maintain 45-55% relative humidity for the first 18 days of incubation. For the final “lockdown” period (days 18-21), increase the humidity to 65-75%. This higher humidity helps soften the shell membranes for easier hatching.
When do you stop turning eggs in an incubator?
You should stop turning eggs on day 18. This allows the chick to get into the correct position for hatching, which involves aligning with the air cell and preparing to pip. Turning after this point can disorient the chick. Just like you’d look up specific treatments if your dog had ear mite medicine for dogs, precise timing and understanding of the chicken incubation process are essential.
Disclaimer: The pet care information on bangladeshcountry.com is based on general internet research and is provided for informational and educational purposes only. We are independent publishers and researchers, not licensed veterinarians or animal health professionals. The content on this site is not a substitute for professional veterinary advice, diagnosis, or treatment. Always consult your veterinarian regarding your pet’s health, diet, or behavior. Reliance on this information is solely at your own risk.