A garden fork, often overlooked in favor of more specialized or mechanized equipment, stands as one of the most fundamental and effective implements a gardener can wield. Far from being a simple pitchfork, this versatile hand tool is engineered to tackle a range of soil cultivation challenges, from breaking up compacted ground and aerating beds to harvesting root crops and moving organic matter. Understanding the mechanics behind its design and mastering its proper use can profoundly transform your gardening efficiency and the health of your soil, making it an indispensable power tool in the truest sense of the word.
Understanding the Garden Fork: More Than Just a Pitchfork
The distinction between a garden fork and other multi-tined tools like a pitchfork or hay fork is crucial. While a pitchfork is primarily designed to lift and move light, loose material like hay or straw, a garden fork—often called a digging fork or spading fork—is built for much heavier work: breaking, lifting, and turning soil. Its strength lies in its robust construction and the specific geometry of its tines.
The Fundamental Mechanics of Soil Work
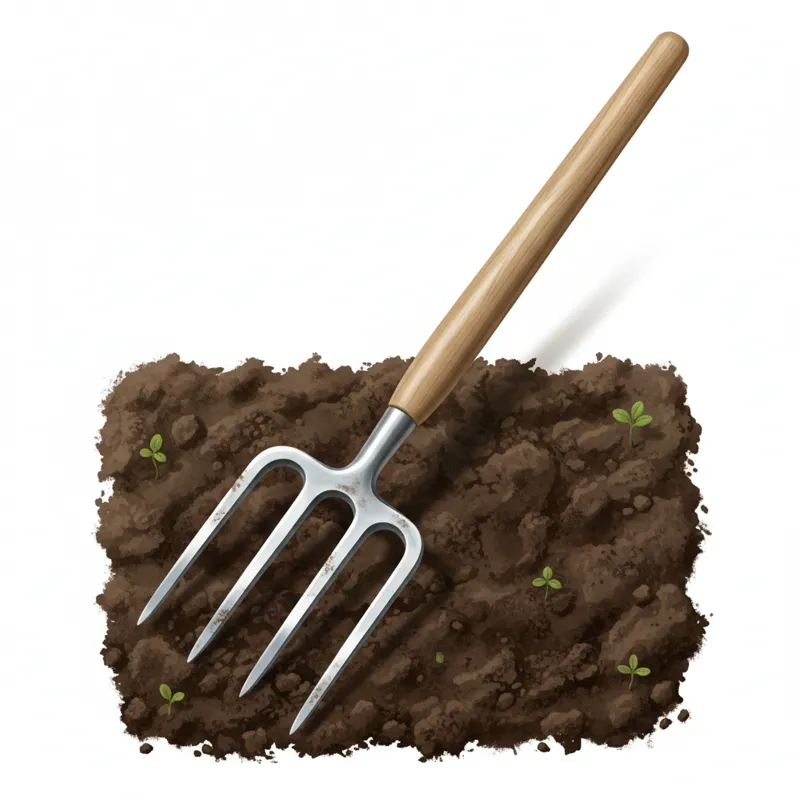
At its core, a garden fork operates on principles of leverage and penetration. Its sharp, strong tines are designed to slice through soil with minimal resistance compared to a spade’s broad blade. When you push the tines into the ground and rock the handle, you apply leverage, effectively fracturing and lifting soil blocks. This action disrupts compaction, introduces air (aeration), and allows for the easy incorporation of organic amendments. It’s a physical process that directly impacts soil structure, promoting better water infiltration, root growth, and microbial activity.
Why a Fork Over a Spade?
For many heavy-duty tasks, a garden fork offers distinct advantages over a spade. A spade cuts and lifts a solid block of soil, which can be ideal for creating sharp edges or digging trenches. However, when you need to loosen, aerate, or incorporate material without completely inverting the soil layers, a fork excels. The tines naturally break up clods, leaving a more friable, open structure. This is especially beneficial in dense clay soils where a spade can create a polished “smear” layer that impedes drainage and root penetration. A good digging fork acts as a primary cultivation hand tool, preparing beds for planting or improving existing ones.
Types of Garden Forks and Their Specific Applications
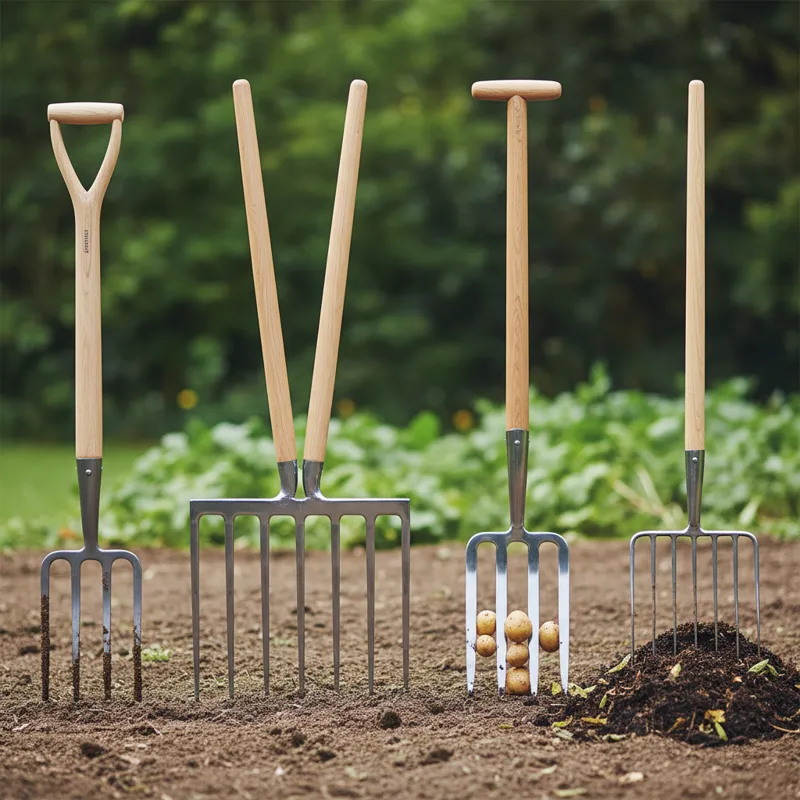
While the term “garden fork” often refers to the general digging variety, several specialized designs exist, each tailored for particular tasks and soil conditions. Choosing the correct type significantly enhances efficiency and reduces strain.
Digging/Border Forks: Standard Multi-Purpose
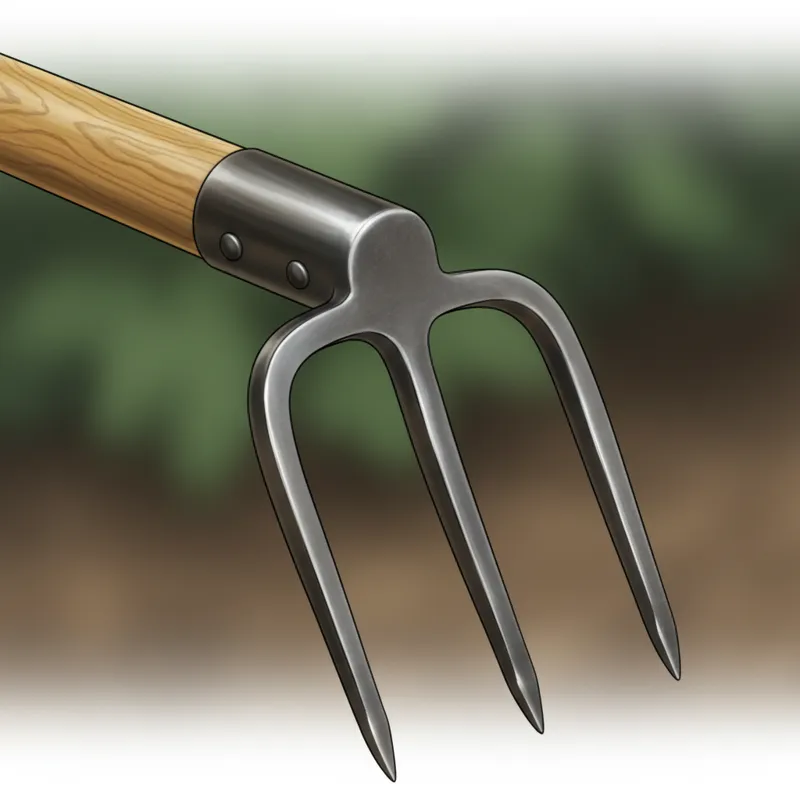
These are the most common garden forks. They typically feature four sturdy, square or slightly flattened steel tines that are sharpened at the ends. Digging forks are robust enough for breaking new ground, turning over vegetable patches, lifting turf, and generally loosening compacted soil. Border forks are essentially smaller, lighter versions of digging forks, designed for working in confined spaces, raised beds, or around delicate plants without disturbing their root systems excessively. They serve as excellent general-purpose cultivation hand tools.
Broadforks: The Ultimate Soil Aerator Tool
A broadfork is a formidable tool, often resembling a large, two-handled fork with widely spaced, long, and exceptionally strong tines. It’s operated by standing on the crossbar, pushing the tines deep into the soil, and then pulling back on the handles to gently lever and loosen the ground. The key benefit of a broadfork is its ability to deeply aerate and decompact soil without inverting the soil layers. This preserves the delicate soil structure and beneficial microbial networks, aligning perfectly with no-dig gardening principles. For gardeners looking to improve soil health and drainage over larger areas, a broadfork is an invaluable heavy duty digging implement.
Potato Forks (or Manure Forks): Specialized for Harvesting or Moving Loose Material
Potato forks are easily identifiable by their flatter, slightly blunter, and often more numerous tines (typically 5 to 7). These tines are designed to scoop and sift through loose soil or compost without piercing fragile root crops like potatoes or damaging bulbs. They are also excellent for moving loose mulch, leaves, or light manure, which is why they are sometimes called manure forks. Their broad, somewhat flattened tines make them less effective for heavy digging in compacted soil but perfect for gentle harvesting and handling.
Composting/Pitch Forks: Lighter Duty, Longer Tines
Though technically a type of pitchfork, composting forks are frequently used in the garden. They have longer, thinner, and often slightly curved tines, ideal for lifting and turning light, bulky materials like compost, hay, straw, or grass clippings. They are not built for digging into dense soil; attempting to do so will likely bend or break the tines. Their primary role is in managing and distributing organic matter.
Spading Forks: Heavy Duty Digging Implement
Often confused with digging forks, spading forks are typically even more robust. They feature very strong, sometimes slightly curved, square-profile tines designed for the toughest digging tasks, similar to a spade but with the fork’s advantage of breaking up soil. They are excellent for breaking hardpan, digging out stubborn weeds with deep taproots (offering serious root severance capabilities), or preparing dense, unworked ground.
Choosing the Right Garden Fork: Key Considerations
Selecting the right garden fork isn’t just about grabbing the first one you see. Thoughtful consideration of your soil type, material quality, and ergonomic fit will ensure you invest in a tool that performs well and lasts for years.
Soil Type Dictates Design
- Heavy Clay Soil: For dense, sticky clay, you’ll need a fork with exceptionally strong, square-profile, forged steel tines. A spading fork or a robust digging fork is best, as the tines need to withstand significant leverage without bending. The tines should be relatively flat to slice through the clay rather than getting stuck.
- Loamy Soil: For well-structured, loamy soils, most standard digging forks will perform admirably. Tines can be slightly flatter or more rounded, as resistance will be less.
- Sandy Soil: In very sandy or loose soil, a lighter digging fork or even a potato fork might suffice for some tasks. However, if you’re incorporating heavy organic matter, a standard digging fork is still preferred.
Material Quality: Tines, Shaft, Handle
The durability and performance of your garden fork heavily depend on the materials and construction.
- Tines: * Forged Steel: This is the gold standard. Forged tines are made from a single piece of heated steel hammered into shape, making them incredibly strong, durable, and less prone to bending or breaking. They retain an edge better, too.
- Stamped Steel: Cheaper forks often have stamped steel tines, which are cut from a sheet of steel and then sharpened. These are less durable and can bend or break under heavy stress.
- Stainless Steel: Offers excellent rust resistance, making cleanup easier. While often strong, ensure it’s a high-grade stainless steel if you’re working with tough soils.
- Shaft (Handle): * Ash Wood: Traditionally favored for its strength, flexibility, and ability to absorb shock. A good quality ash handle should have a straight grain running the full length. It offers a classic feel and can be replaced if broken.
- Fiberglass: Extremely strong, durable, and weather-resistant. It doesn’t rot or splinter but can transmit more shock than wood. It’s often heavier than ash.
- Steel: Very strong and durable, often seen in commercial-grade tools. Can be heavy and conduct cold, but virtually indestructible.
- Socket/Ferrule Construction: The connection where the tines meet the shaft is a critical point. A long, closed, or strapped socket provides superior strength and prevents the handle from twisting or pulling out under strain. Avoid forks where the tines are simply welded to a short tang.
Ergonomics and User Comfort: Handle Shape, Length, Weight
An ergonomic garden fork reduces fatigue and risk of injury.
- Handle Shape: D-handles (closed loop) provide a secure grip and better leverage, especially when twisting or lifting. T-handles are simpler but can be less comfortable for prolonged use. Long, straight handles are common on broadforks.
- Length: Choose a handle length appropriate for your height. A good rule of thumb is that the top of the handle should reach about your hip bone when the tines are on the ground. This ensures proper posture and leverage.
- Weight: While heavier tools can feel more robust, excessive weight leads to fatigue. Aim for the strongest fork you can comfortably lift and maneuver for extended periods.
Mastering Garden Fork Usage: Techniques for Efficiency and Safety
Using a garden fork effectively is about more than just brute strength; it involves technique, leverage, and understanding soil dynamics.
Preparing Beds: Loosening and Aerating
For established beds, push the fork straight down into the soil to its full depth. Rock the handle back and forth, or lift slightly and push down again to gently loosen the soil, creating air pockets. You don’t always need to fully invert the soil. For breaking new ground or turning over cover crops, push the fork in, lever back to lift a section of soil, and then gently flip it over. This allows you to incorporate organic matter or expose weed roots. For very compacted ground, slightly wet the soil a day or two before working it, if possible. This makes penetration significantly easier.
Dividing Perennials and Root Severance
The sturdy tines of a digging fork are excellent for dividing overcrowded perennials. Push the fork into the plant clump, using your foot if necessary, and then lever to pry the clump apart. The tines allow you to separate sections with minimal damage compared to hacking with a spade. Similarly, when encountering stubborn weeds or small shrubs you want to remove, the fork can provide exceptional root severance. Push the tines deep around the plant’s base and lever to lift the root ball intact.
Incorporating Amendments
When adding compost, manure, or other soil amendments, spread them evenly over the bed. Then, use the garden fork to gently work them into the top few inches of soil. This helps distribute nutrients and organic matter without burying it too deeply, keeping it accessible to surface-feeding roots and beneficial microorganisms.
Harvesting Root Crops
For crops like potatoes, carrots, or parsnips, a potato fork is ideal. Gently push the tines into the soil a foot or so away from the plant, then lever upwards to carefully loosen the soil and lift the crops without piercing them. This minimizes damage and makes harvesting much cleaner and more efficient.
Safe Handling and Body Mechanics
Proper body mechanics are paramount to prevent injury.
- Use Your Legs: Bend your knees and keep your back straight. Lift and lever with your legs, not your back.
- Stay Close: Work close to your body to maximize leverage and minimize strain.
- Alternate Hands: If you’re doing extensive work, periodically switch your lead hand to balance the load on your muscles.
- Sharp Tines: Keep tines clean and, if applicable, slightly sharpened for easier penetration.
- Take Breaks: Gardening is physical work. Take frequent short breaks to rest and stretch.
What Most People Get Wrong About Garden Forks
Despite its simplicity, many gardeners misunderstand or misuse their garden forks, leading to frustration, inefficiency, and even damaged tools. One common mistake is misusing types for inappropriate tasks. Trying to dig in hard clay with a lightweight potato fork will only result in bent tines. Conversely, using a heavy digging fork to gently harvest delicate root vegetables can easily damage the produce. Understanding the specific design and purpose of each fork type is crucial. Don’t force a tool to do a job it wasn’t designed for. Another frequent error is ignoring ergonomic fit. A fork that’s too short will force you to bend excessively, straining your back. One that’s too heavy will lead to premature fatigue. Investing time to choose a fork that matches your height and strength, and paying attention to handle shape, makes a significant difference in comfort and long-term use. A well-fitted tool prevents unnecessary strain and injury. Many also neglect proper maintenance. A dirty, rusty fork is harder to push into the soil, requiring more effort. Leaving soil caked on the tines promotes rust and dulls the edges. Regular cleaning and occasional sharpening (for digging and spading forks) keeps the tool performing optimally. Just like you’d maintain a good https://www.bangladeshcountry.com/pruning-saw/ to keep it cutting cleanly, your garden fork benefits from care. Finally, some gardeners underestimate the garden fork’s power as a soil aerator tool, opting for rototillers or other mechanical equipment. While tillers have their place, they can destroy soil structure and beneficial microbes. A broadfork or even a digging fork, when used correctly, offers a gentler, more soil-friendly approach to aeration and decompaction, especially beneficial for long-term soil health. It’s a key cultivation hand tool for sustainable practices. For more on improving soil health, consider how tools like a https://www.bangladeshcountry.com/garden-watering-can/ contribute to healthy hydration and nutrient delivery.
Maintaining Your Garden Fork for a Lifetime of Use
Proper maintenance extends the life of your garden fork, ensures it performs optimally, and makes gardening safer and more enjoyable.
Cleaning After Each Use
This is the simplest yet most overlooked maintenance step. After each use, knock off any large clumps of soil. Then, use a stiff brush or even an old rag to wipe down the tines and shaft. If soil is particularly sticky, a hose can help, but ensure you dry the metal parts immediately to prevent rust.
Sharpening Tines (When Applicable)
While you wouldn’t sharpen a potato fork, digging and spading fork tines benefit from occasional sharpening. Use a mill bastard file or a sharpening stone to put a slight bevel on the underside of each tine. This isn’t about creating a razor edge, but a working edge that helps the fork penetrate soil more easily. A file card can help keep the file clean for better performance.
Inspecting for Wear and Tear
Periodically check your fork for any signs of damage. Look for bent or cracked tines, loose handles, or splinters in wooden shafts. Address these issues promptly. A loose handle can be dangerous; tighten any bolts or re-wedge if necessary. For serious damage, consider professional repair or replacement.
Proper Storage
Store your garden fork in a dry, covered area, away from direct sunlight and extreme temperatures. Hanging tools on a rack is ideal, as it keeps them off the ground and prevents damage. Before storing for the off-season, give it a thorough cleaning, dry it completely, and wipe the metal parts with an oily rag (linseed oil or general-purpose machine oil works well) to prevent rust. For wooden handles, an occasional rub with linseed oil helps nourish the wood and prevents drying and cracking, much like protecting https://www.bangladeshcountry.com/cedar-fence-pickets/ from weathering.
The Garden Fork in the Modern Garden (2026 Context)
In 2026, with an increasing emphasis on sustainable practices, soil health, and organic gardening, the garden fork holds an even more vital role. The “no-dig” and “minimum-tillage” movements have gained significant traction, advocating for approaches that disturb the soil as little as possible to preserve its structure and biological life. The garden fork, particularly the broadfork, perfectly aligns with these philosophies. It allows for deep aeration and decompaction without inverting the soil layers, which helps maintain the delicate fungal and bacterial networks crucial for nutrient cycling. This makes it a preferred alternative to rototillers for many, contributing to healthier, more resilient garden ecosystems. The garden fork isn’t just a heavy duty digging implement; it’s a tool for fostering life beneath the surface. As gardeners become more knowledgeable about soil science, they recognize the mechanistic advantages of a garden fork as a precise soil aerator tool and a cultivation hand tool. It offers a level of control and gentleness that machines often cannot. Whether you’re breaking new ground, rejuvenating an old bed, or simply helping your soil breathe, the garden fork remains a timeless and powerful ally. For further reading on sustainable gardening practices and soil health, resources like the USDA Natural Resources Conservation Service offer extensive information on soil management (e.g., [https://www.nrcs.usda.gov/resources/guides-and-summaries/soil-health-web-page](https://www.nrcs.usda.gov/resources/guides-and-summaries/soil-health-web-page)). Or for general tool history, Wikipedia has detailed articles on various hand tools ([https://en.wikipedia.org/wiki/Garden_tool](https://en.wikipedia.org/wiki/Garden_tool)).
Frequently Asked Questions (FAQ)
Here are some common questions gardeners have about garden forks:
Q: Can I use a garden fork instead of a tiller?
A: Yes, in many cases, especially for smaller gardens or for gardeners committed to no-dig principles. A broadfork, in particular, can deeply loosen soil over larger areas with less disruption to soil structure than a tiller. For annual preparation of vegetable beds, a digging fork or broadfork offers a gentler, more sustainable alternative that promotes better long-term soil health. It will require more physical effort but yields significant benefits for the soil ecosystem.
Q: What’s the difference between a garden fork and a pitchfork?
A: A garden fork (or digging fork) has shorter, stronger, often flatter tines designed for breaking up and turning soil, lifting turf, and digging. A pitchfork has longer, thinner, and often curved tines, primarily for moving loose, lightweight materials like hay, straw, or compost. You wouldn’t use a pitchfork for heavy digging, as its tines would likely bend or break.
Q: How do I know if my soil is too hard for a garden fork?
A: If you’re struggling significantly to push the tines into the ground even with your foot, and the soil feels like concrete, it might be too hard and dry. Trying to force the fork can damage the tool or injure you. In such cases, consider pre-watering the area a day or two before working it, or waiting for rain to soften the soil. For extremely hard, unbroken ground, you might need a pickaxe first, or consider planting cover crops to help break up the soil over time.
Q: Are broadforks worth the investment?
A: For gardeners with larger beds, challenging compacted soil, or those committed to no-dig gardening, a broadfork is absolutely worth the investment. It provides deep aeration without inverting soil layers, preserves soil structure, and significantly reduces the physical effort compared to a digging fork for larger areas. Its durability means it will last for many years, paying for itself in reduced labor and improved soil health.
Q: How do I maintain my garden fork’s wooden handle?
A: Wooden handles benefit from occasional care. After cleaning, let the handle dry completely. Then, rub it down with a light coat of linseed oil or Danish oil. This nourishes the wood, preventing it from drying out, cracking, and splintering. Apply a thin layer, let it soak in, and wipe off any excess. Repeat this process a few times a year, or as needed, especially before seasonal storage. In conclusion, the garden fork is far more than a rudimentary tool; it’s a precisely engineered instrument for vital soil work. By understanding its various forms, selecting the right one for your specific needs, and mastering its use and maintenance, you unlock a powerful capability in your garden. This indispensable cultivation hand tool empowers you to build healthier soil, grow stronger plants, and enjoy a more efficient, rewarding gardening experience. It’s a true testament to the enduring power of simple, well-designed tools.