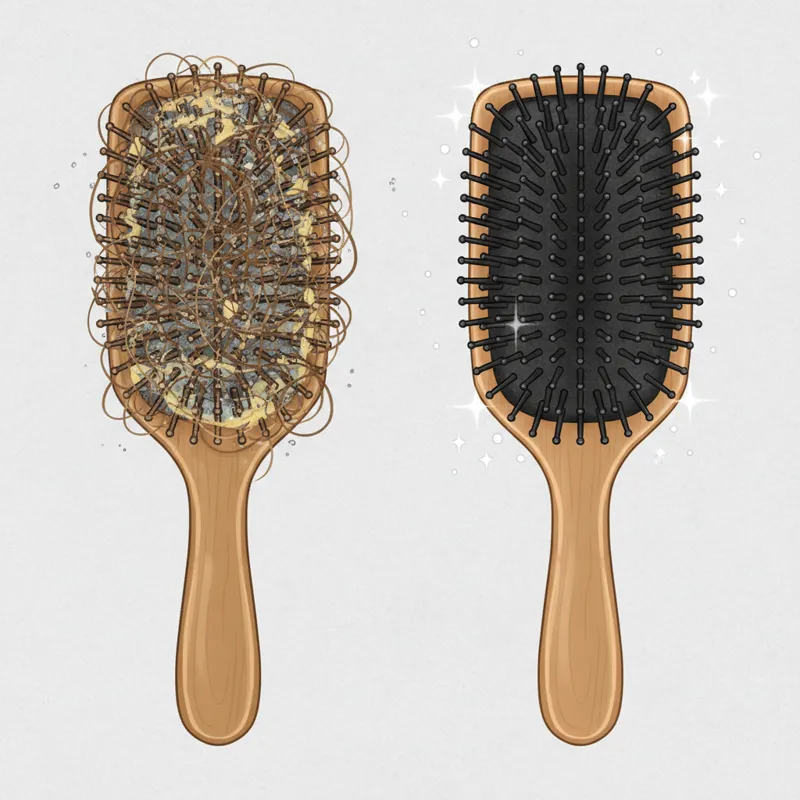
A hair brush is an indispensable tool in most daily routines, shaping styles, detangling knots, and distributing natural oils. Yet, for something we use so intimately with our hair and scalp, it’s often one of the most overlooked items when it comes to regular cleaning. Over time, these brushes accumulate a surprising cocktail of shed hair, dust, lint, natural sebum, and residual styling products. This buildup doesn’t just look unappealing; it actively compromises your brush’s performance, transfers grime back to your clean hair, and can even become a breeding ground for bacteria and fungi. While many people resort to pulling out large clumps of hair by hand, truly clean bristles and brush bases require more targeted effort. The good news is that with the right hair brush cleaner tools, what often feels like a tedious chore can become quick, efficient, and genuinely satisfying.
Why a Clean Hair Brush Matters More Than You Think
Ignoring the state of your hair brush isn’t just about aesthetics; it has direct implications for your hair’s health, your brush’s longevity, and your overall hygiene. Understanding these impacts can shift brush cleaning from an afterthought to a priority.
Impact on Hair Health
A dirty brush is essentially a dirty tool. Each time you run it through your hair, you’re not just styling; you’re redepositing a mixture of old hair, scalp oils, dead skin cells, and product residue back onto your clean strands. This can weigh down hair, make it appear greasy faster, and even lead to scalp irritation. The trapped grime can also make your hair look dull, prevent styling products from working effectively, and generally hinder your hair’s natural vibrancy. Furthermore, abrasive buildup can cause friction, leading to breakage and split ends, particularly if you’re using a brush with clogged or stiff bristles.
Extending Brush Lifespan
Hair brushes, especially those with natural bristles or specialized designs, can be an investment. Constant accumulation of hair and product can stress the bristles, bend them out of shape, or even pull them out from the base. When debris gets matted deep within the brush, it can trap moisture and chemicals, degrading the brush materials over time. Regular cleaning with a dedicated hair brush cleaner preserves the integrity of the bristles and the brush handle, ensuring it remains effective and lasts longer, saving you money on frequent replacements.
General Hygiene and Appearance
From a purely hygienic standpoint, leaving a hair brush teeming with debris on your vanity isn’t ideal. It’s a visible reminder of neglected personal care and can contribute to a less sanitary environment. Just like we clean our makeup brushes, toothbrushes, and other personal items, our hair brushes deserve the same attention. A clean brush simply looks better, feels better in your hand, and provides a fresh start each time you use it. For more general guidelines on personal hygiene and maintaining a healthy environment, the Centers for Disease Control and Prevention (CDC) offers comprehensive advice.
The Core Challenge: What Builds Up in Your Hair Brush?
Before you can effectively clean your brush, it’s helpful to understand the components of the grime you’re fighting. This isn’t just a random collection of dust; it’s a specific biological and chemical concoction that requires a multi-pronged approach to remove.
-
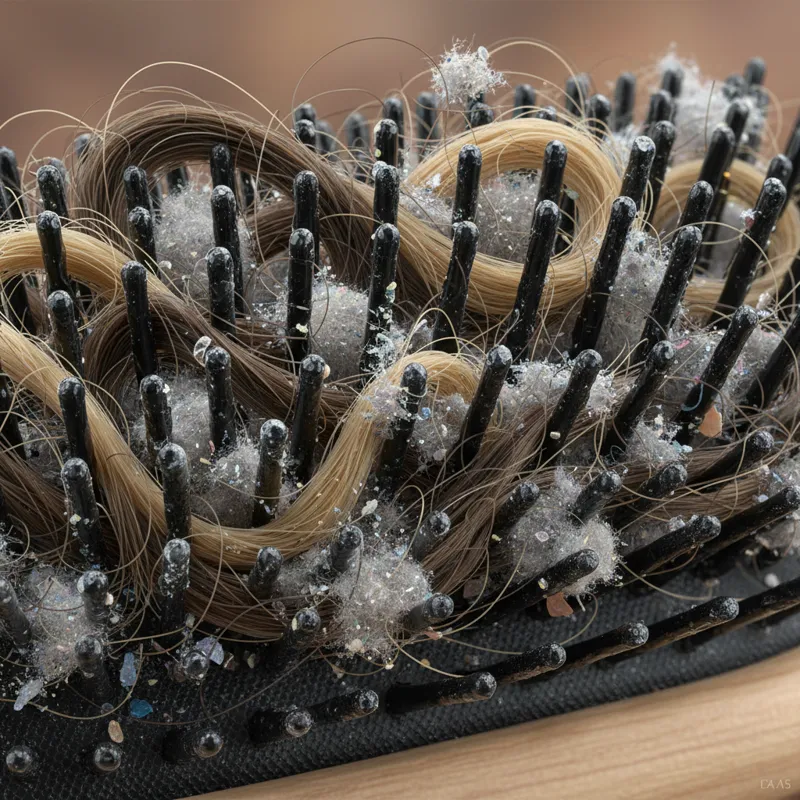
Shed Hair: The most obvious culprit. We lose an average of 50-100 hairs a day, and many of these end up tangled in our brushes. Over time, these hairs mat together, forming a dense, woven layer that can be remarkably difficult to extract without the right tools.
-
Dust and Lint: Airborne particles, textile fibers from towels or clothing, and general household dust are naturally attracted to the static charge often present in hair and brushes. These microscopic particles embed themselves deep within the bristles and at the base.
-
Sebum (Scalp Oil): Your scalp naturally produces sebum to moisturize hair and skin. While beneficial in moderation, excess oil transfers directly to your brush, clinging to bristles and the base. This oil can oxidize, leading to a stale smell and creating a sticky surface for other debris to adhere to.
-
Product Residue: Hair sprays, dry shampoos, mousses, gels, conditioners, and heat protectants all leave behind a residue. This sticky or waxy layer builds up on the bristles, reducing their flexibility and effectiveness, and creating a magnet for dust and hair.
-
Microbes: The combination of warmth, moisture (from styling damp hair), organic matter (dead skin, oil), and trapped debris creates an ideal environment for bacteria, yeasts, and fungi to flourish. While most are harmless, an excessive microbial load can contribute to scalp issues or odor.
Before You Dive In: Essential Pre-Cleaning Steps
Effective cleaning starts with proper preparation. Attempting a deep clean without these preliminary steps can be frustrating and less effective. These actions focus on removing the bulk of the dry debris, making subsequent steps significantly easier.
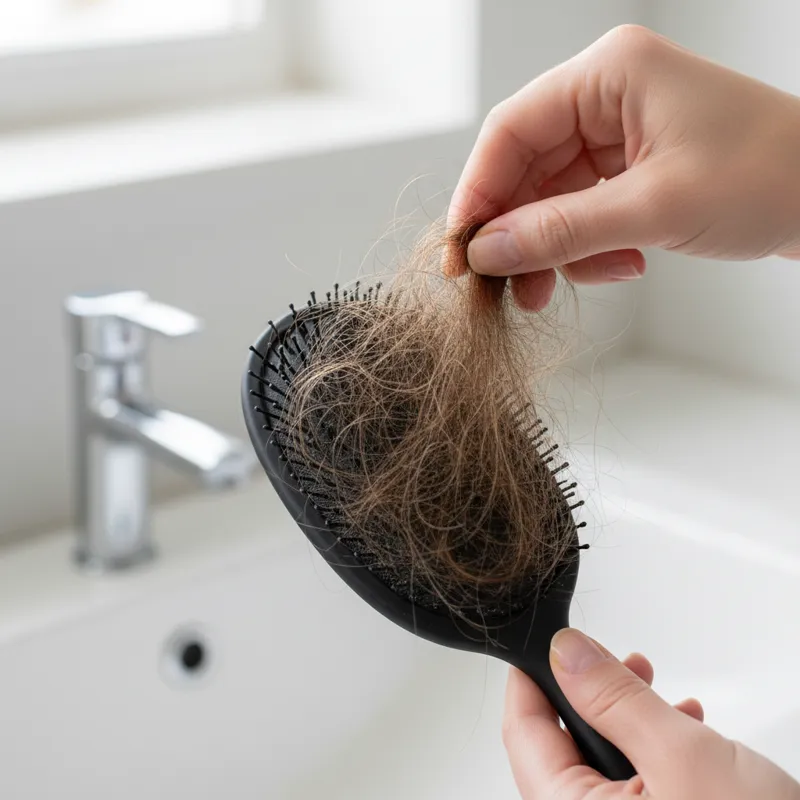
Manual Hair Removal
The first and most crucial step is to manually remove as much loose hair as possible. For brushes with widely spaced bristles (like paddle or vent brushes), you can often use your fingers to pull out the largest clumps. For denser brushes, an old comb can be a helpful preliminary tool. Simply run the comb through the bristles, lifting and gathering the matted hair, then pull it away. This initial pass is about clearing the path for more specialized hair brush cleaner tools.
Tapping Out Debris
Once the bulk of the hair is gone, turn the brush bristle-side down and gently tap the back of the brush against a hard surface, like a countertop or the side of a trash can. This action helps dislodge loose dust, lint, and smaller particles that are sitting on the surface or lightly embedded between bristles. You might be surprised by how much fine debris falls out.
Dry Cleaning for Delicate Brushes
For brushes with very delicate bristles, or those made from materials that shouldn’t get wet (like certain wooden handles or natural boar bristles that can become brittle if improperly dried), dry cleaning might be your primary method. After manual hair removal and tapping, you can use a soft-bristled brush or even a microfiber cloth to gently wipe down the bristles and the base, lifting away surface dust and light residue. This minimizes exposure to moisture while still improving hygiene.
Top 5 Best Hair Brush Cleaner Tools for Effortless Cleaning
While a thorough deep clean involves multiple steps, the right tools make all the difference. These five hair brush cleaner tools are widely recognized for their effectiveness in tackling various types of brush grime, making the process effortless and ensuring a truly clean brush.
1. The Classic Hair Brush Rake/Comb Cleaner
This is often the first tool people think of for brush cleaning, and for good reason. A dedicated hair brush rake or comb cleaner typically features thin, sturdy metal prongs or tightly spaced plastic teeth designed specifically to slide under matted hair and lift it away from the brush bristles.
- Mechanism: The slim profile of the tines allows them to penetrate dense layers of hair that fingers can’t reach. As you rake it through the brush, it catches and pulls the intertwined hair and trapped debris upwards, detaching it from the bristle base.
- Best For: Excellent for all brush types, especially paddle, vent, and larger round brushes with synthetic or widely spaced bristles. It’s ideal for the initial removal of large, matted hair clumps.
- Limitations: While great for bulk hair removal, it might not effectively clean the deep recesses of very dense natural boar bristle brushes or remove sticky product buildup directly from the bristles themselves. Aggressive use on delicate bristles can potentially cause damage.
2. Fine-Tooth Metal Comb
Don’t underestimate the power of a simple, sturdy fine-tooth comb, particularly one made of metal. While seemingly basic, its closely packed, rigid teeth are indispensable for specific cleaning challenges, especially for those who appreciate dedicated tools for tasks like cleaning a comb for curly hair or their favorite hair brush.
- Mechanism: The rigid, narrow teeth can be worked through dense bristle beds, like those found on boar bristle brushes, where a rake might struggle. They effectively “comb” out finer, shorter hairs, lint, and dust particles that are tightly wedged.
- Best For: Absolutely essential for boar bristle brushes and other brushes with very dense, fine bristles. It’s also excellent for tackling persistent lint and tiny hair fragments that remain after using a rake.
- Limitations: Can be a bit tedious for very large brushes or for removing extremely large, matted hair clumps. Care must be taken not to pull too hard, which could damage delicate bristles or the comb itself.
3. Soft Bristle Detail Brush (e.g., Old Toothbrush or Specialized Cleaning Brush)
Once the bulk of the hair and lint is removed, you’re left with product buildup, dust, and sebum clinging to the individual bristles and the base of the brush. This is where a soft bristle detail brush comes in.
- Mechanism: The small, flexible bristles can scrub around the base of the main brush bristles, getting into tight crevices that other tools can’t reach. With a little soap and water, it helps agitate and loosen the sticky film of oil and product.
- Best For: Deep cleaning the brush base and individual bristles. Perfect for tackling dried product residue, oily film, and fine dust. Great for all brush types, particularly effective for scrubbing boar bristles without causing damage. An old toothbrush repurposed for this task works remarkably well.
- Limitations: Not suitable for removing large hair clumps. Its primary role is detailed scrubbing after larger debris has been cleared.
4. Miniature Handheld Vacuum with a Narrow Nozzle Attachment
While not a traditional hair brush cleaner, a handheld vacuum can be surprisingly effective for quick, superficial cleanings, especially between deeper washes. It leverages the power of suction to lift loose debris.
- Mechanism: The vacuum creates suction that pulls loose hair, dust, and lint directly from the bristles and the brush base. A narrow nozzle attachment allows for targeted cleaning without damaging the bristles.
- Best For: Fast, dry removal of surface-level hair, dust, and lint from all brush types, particularly large paddle brushes where speed is a factor. It’s great for maintenance cleaning and preventing excessive buildup.
- Limitations: Not effective for matted hair that is tightly woven, nor can it remove sticky product residue or hardened oil. It’s a supplemental tool for dry debris, not a comprehensive deep cleaner.
5. Dedicated Brush Cleaning Solution/Soaking Trays
While not a physical “tool” in the same vein as a comb or rake, specialized cleaning solutions and soaking trays are indispensable components of a thorough hair brush cleaning system. They represent the chemical and mechanical action needed for a truly sanitized result.
- Mechanism: These solutions are typically formulated to break down oils, dissolve product residue, and often contain sanitizing agents. Soaking trays allow the solution to fully immerse the bristles and base, loosening stubborn grime.
- Best For: Deep cleaning, sanitization, and restoring bristles to their original texture. Ideal for brushes made entirely of plastic, synthetic materials, or those with rubber bases. Always used after manual hair removal.
- Limitations: Requires drying time. Not suitable for brushes with wooden handles or bases, as prolonged exposure to water can cause warping, cracking, or mold. Always check manufacturer instructions.
Step-by-Step Guide to Deep Cleaning Your Hair Brush
Combining these tools with a methodical approach ensures a hair brush that is not just visibly clean, but hygienically refreshed.
1. Initial Dry Clean: Manual Removal and Raking
Start by manually pulling out as much loose hair as you can with your fingers. Then, take your hair brush rake or comb cleaner and systematically run it through the bristles in multiple directions. Gently lift and pull the matted hair away from the brush base. For larger brushes, repeat this process until the majority of the visible hair is gone.
2. Targeted Hair Removal: Fine-Tooth Comb for Density
Once the main clumps are gone, grab your fine-tooth metal comb. For brushes with very dense bristles (especially boar bristles), carefully work the comb through, starting from the outside edges and moving inwards. This will extract any finer, shorter hairs, lint, and stubborn dust that the rake might have missed. Be gentle to avoid damaging the bristles.
3. Scrubbing Away Buildup: Soft Bristle Brush
Now, it’s time to tackle the oil and product residue. Fill a basin with lukewarm water and add a few drops of a mild shampoo or a dedicated brush cleaning solution. Dip your soft bristle detail brush (like an old toothbrush) into the soapy water. Vigorously scrub the base of your hair brush, working between the bristles, and then gently scrub along the length of each bristle. Focus on areas where product buildup or oil seems most concentrated.
4. Soaking (When Appropriate)
If your brush is made of entirely waterproof materials (plastic, rubber, metal) and has significant buildup, you can let it soak. After scrubbing, submerge the bristle-head portion of the brush in the soapy water for 5-10 minutes. This allows the solution to further penetrate and loosen stubborn grime. Crucially, avoid soaking wooden-handled brushes entirely; only immerse the bristle head if absolutely necessary and for minimal time.
5. Rinsing and Drying: The Final Polish
Rinse the brush thoroughly under cool, running water, ensuring all soap residue is removed. Squeeze out excess water from the bristles. Then, gently tap the brush on a towel to remove more moisture. To dry, lay the brush bristle-side down on a clean, dry towel, allowing air to circulate and water to drain away from the brush base. Avoid direct heat (like a blow dryer) unless the manufacturer explicitly states it’s safe, as it can damage bristles or glue. Allow ample time for the brush to air dry completely, ideally overnight, before using it again. This is essential for preventing mildew and bacterial growth.
What Most People Get Wrong When Cleaning Hair Brushes
Even with the right tools, certain habits can undermine your cleaning efforts or even damage your brushes. Being aware of these common pitfalls can save you time and preserve your grooming investments.
-
Ignoring the Brush Base: Many people focus only on removing hair from the bristles. However, the cushion or base of the brush is where oil, dead skin, and product residue truly accumulate and harden. Failing to scrub this area leaves a significant source of grime.
-
Not Drying Brushes Thoroughly: A damp brush is an open invitation for mildew, mold, and bacterial growth, leading to unpleasant odors and potentially unhygienic conditions. Always ensure your brush is completely dry before storage or reuse.
-
Using Harsh Chemicals: Abrasive cleaners, strong detergents, or solvents can degrade brush materials, dissolve glues, and damage bristles. Stick to mild shampoos, gentle soaps, or specialized brush cleaning solutions.
-
Over-Soaking Wooden Brushes: Wood is porous and can swell, crack, or warp if left submerged in water for too long. If you must wet a wooden brush, minimize contact with water and dry it immediately and thoroughly.
-
Not Cleaning Frequently Enough: Letting weeks or months pass between deep cleans means dealing with extreme buildup, making the job much harder. Regular, even quick, cleaning prevents this daunting task.
-
Damaging Bristles with Improper Tools or Technique: Using sharp objects to dig out hair or scrubbing too aggressively can bend, break, or pull out bristles. The right hair brush cleaner is designed to be effective yet gentle.
Maintaining Brush Hygiene Between Deep Cleans
Deep cleaning is essential, but daily and weekly maintenance keeps your brushes in top shape, making deep cleans less frequent and easier.
Daily Hair Removal
After each use, take a moment to pull out any large clumps of hair caught in the brush. This simple act prevents hair from matting down and reduces the amount of debris that accumulates. It takes mere seconds but makes a significant difference.
Weekly Quick Cleans
Once a week, perform a quick dry clean using your hair brush rake and a fine-tooth comb. This will remove most of the loose hair, lint, and dust before it has a chance to embed deeply. A quick vacuum with a handheld nozzle can also be part of this routine.
Proper Storage
Store your brushes bristle-side up or in a drawer, away from direct moisture (like on the edge of a shower). This prevents dust accumulation and allows any residual moisture to evaporate, contributing to a cleaner environment for the brush.
Choosing the Right Hair Brush Cleaner for Your Brush Type
The “best” hair brush cleaner often depends on the type of brush you’re cleaning. Different bristle types and brush constructions require tailored approaches.
-
Paddle and Vent Brushes: These often have widely spaced, flexible bristles, making them excellent candidates for the classic hair brush rake or comb cleaner for initial hair removal. A handheld vacuum with a narrow attachment is also very effective for quick dry cleans. Their typically plastic or rubber construction means they can usually withstand a good scrub with a soft detail brush and a mild soapy soak.
-
Round Brushes: The cylindrical shape and often denser bristles of round brushes mean they collect hair in a spiraling pattern. A hair brush rake is still a good starting point. However, a fine-tooth comb is particularly useful for working around the curvature and between the tighter bristle rows. A soft detail brush is indispensable for scrubbing the core and bristles.
-
Boar Bristle Brushes: These brushes are prized for their ability to distribute natural oils and add shine, but their dense, fine bristles are notorious for trapping lint, dust, and product. A fine-tooth metal comb is your best friend here, carefully worked through the bristles to lift out debris. A soft detail brush with a mild cleaning solution is ideal for scrubbing the bristles without damaging their delicate structure. Avoid prolonged soaking, especially if they have a wooden handle, and ensure thorough, air-dry cleaning.
-
Wooden Brushes: The primary concern with wooden brushes is moisture. For these, prioritize dry hair removal with a rake and fine-tooth comb. If wet cleaning is needed, use minimal water and a soft detail brush with a gentle cleanser, focusing only on the bristles and base. Dry immediately and completely, ideally bristle-side down on a towel, to prevent wood damage. This meticulous approach to maintenance, ensuring the longevity and optimal performance of your tools, is similar to how individuals might carefully select the best men’s ankle socks for comfort and durability or use bra extenders to maximize the life of intimate apparel—it’s all part of a comprehensive approach to personal care and mindful consumption.
The Long-Term Benefits of Regular Brush Cleaning
Consistently maintaining your hair brushes with the right hair brush cleaner tools isn’t just about a quick fix; it yields significant long-term advantages that contribute to your overall hair health and even your wallet.
Healthier Scalp and Hair
By removing old hair, product buildup, and microbial growth, you prevent the transfer of these impurities back to your scalp and hair. This reduces the likelihood of scalp irritation, clogged follicles, and dull-looking hair. A clean brush contributes to a healthier environment for hair growth and ensures your hair looks and feels its best. For further reading on maintaining a healthy scalp, sources like the American Academy of Dermatology provide valuable insights.
Better Styling Results
Clean bristles are flexible and can effectively grip and smooth hair, distributing natural oils evenly. A dirty brush, with stiff, gunk-laden bristles, can’t perform its job properly, leading to less effective detangling, styling, and a less polished finish. Your styling products will also perform better on clean hair that isn’t already weighed down by brush residue.
Saving Money on Replacements
As mentioned, diligent cleaning extends the lifespan of your brushes. High-quality brushes can be an investment, and by preventing premature wear and tear from excessive buildup or improper cleaning, you reduce the need to replace them frequently. This translates to real savings over time and contributes to a more sustainable consumption pattern by maximizing the utility of your existing tools.
Frequently Asked Questions (FAQ)
Here are some common questions people have about keeping their hair brushes clean:
How often should I clean my hair brush?
For most people, a quick hair removal after each use and a dry clean once a week is a good starting point. A deep, wet clean using a hair brush cleaner should be performed at least once a month, or more frequently if you use a lot of styling products, have an oily scalp, or share your brush.
Can I use dish soap to clean my hair brush?
Yes, a mild dish soap can be effective for cleaning hair brushes. Its grease-cutting properties are good for breaking down sebum and product residue. However, ensure it’s a gentle formula and rinse very thoroughly to avoid leaving any residue on the brush, which could transfer to your hair.
Is it okay to get my wooden brush wet?
It’s generally advised to minimize water exposure for wooden brushes. While a quick rinse of the bristles is usually fine, avoid prolonged soaking or fully submerging a wooden brush. If the wood gets wet, dry it immediately and completely, ideally by laying it bristle-side down on a towel.
Why does my brush still smell after cleaning?
A persistent odor often indicates that all the oil and product residue wasn’t fully removed, or that mildew has started to form due to incomplete drying. Ensure you’re deep cleaning the brush base and bristles thoroughly with a good hair brush cleaner, and always allow the brush to air dry completely in a well-ventilated area. A diluted vinegar rinse can sometimes help neutralize odors.
Can dirty brushes cause hair damage or scalp issues?
Absolutely. A dirty brush can redeposit old oils, dead skin, and product residue, which can weigh down hair, make it greasy, and irritate the scalp. The rough buildup can also create friction, leading to hair breakage and split ends. Regularly cleaning your brush helps maintain a healthy scalp and hair. Keeping your hair brush clean might seem like a small detail in your beauty regimen, but its impact is anything but minor. From preserving your hair’s natural shine and health to extending the life of your styling tools, the benefits are clear and tangible. By understanding the common culprits behind brush grime and equipping yourself with the right hair brush cleaner tools—whether it’s a dedicated rake, a versatile fine-tooth comb, a scrubbing detail brush, a quick vacuum, or an effective cleaning solution—you transform a neglected chore into a simple, efficient, and deeply satisfying practice. Invest a little time and the right tools, and your hair (and your wallet) will thank you.


