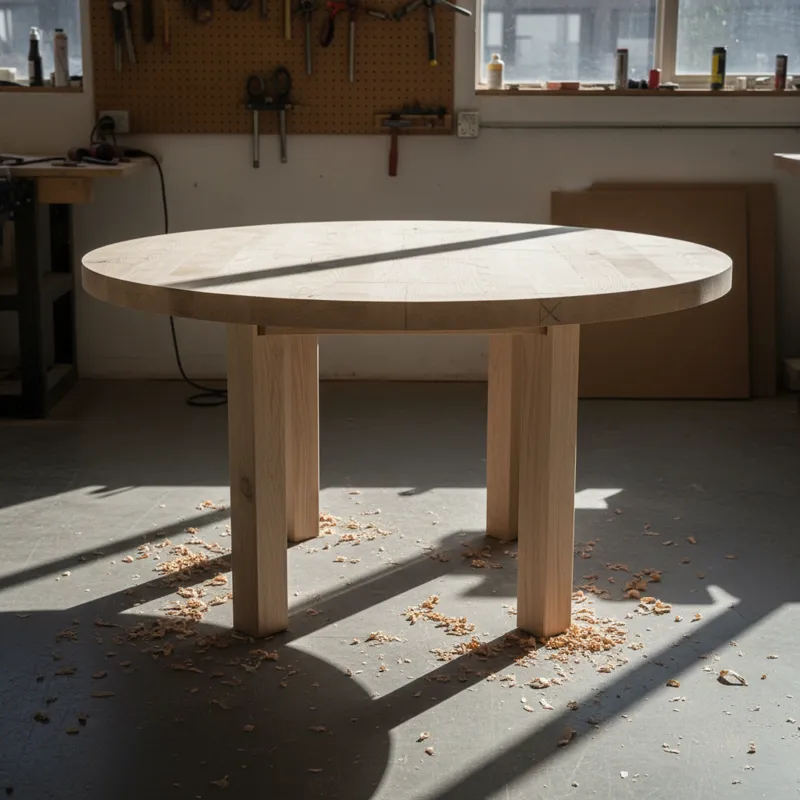
The appeal of an large round dining table set often begins with finding the perfect piece, and if you’re looking for round dining table sets, selecting an unfinished round dining table can be an incredibly rewarding starting point. Unlike pre-finished furniture, an unfinished piece offers a blank canvas, inviting you to impart your personal style and ensure the final product perfectly complements your existing decor. This approach isn’t just about saving money; it’s about crafting a custom centerpiece, a focal point that reflects your taste, whether you envision a rustic farm table, a sleek modern surface, or a vibrant painted statement piece. In 2026, the DIY finishing trend remains strong, driven by a desire for unique, high-quality furniture that stands apart from mass-produced options. This guide delves into everything you need to know about transforming a raw, unfinished round dining table into a durable, beautiful, and deeply personal item for your home.
Why Choose an Unfinished Round Dining Table?
Opting for an unfinished round dining table provides several distinct advantages over purchasing a pre-finished piece. It’s an investment in customization, quality, and often, significant value.
Unlocking Customization
The primary draw of an unfinished round dining table is the freedom it gives you. You aren’t limited to a manufacturer’s stock colors or finishes. You control the aesthetic entirely. Imagine matching a specific shade from a piece of art or integrating a unique texture that store-bought items simply don’t offer. This level of personalization allows you to create a truly one-of-a-kind dining experience.
Cost-Effectiveness
Generally, unfinished furniture carries a lower price tag than its finished counterparts. The manufacturer saves on labor and material costs associated with finishing, and those savings often pass on to the consumer. This makes an unfinished round dining table an excellent option for those on a budget who still desire high-quality solid wood furniture. Your “sweat equity” translates directly into savings.
Quality and Longevity
Many unfinished pieces, particularly dining tables, are constructed from solid hardwoods designed to last. When you finish it yourself, you have direct control over the quality of the protective layers. You can choose premium stains, paints, and sealants known for their durability and environmental friendliness, ensuring your table withstands daily use for years to come. This direct involvement often leads to a deeper understanding and appreciation of the table’s construction and future maintenance needs.
Selecting Your Unfinished Round Dining Table
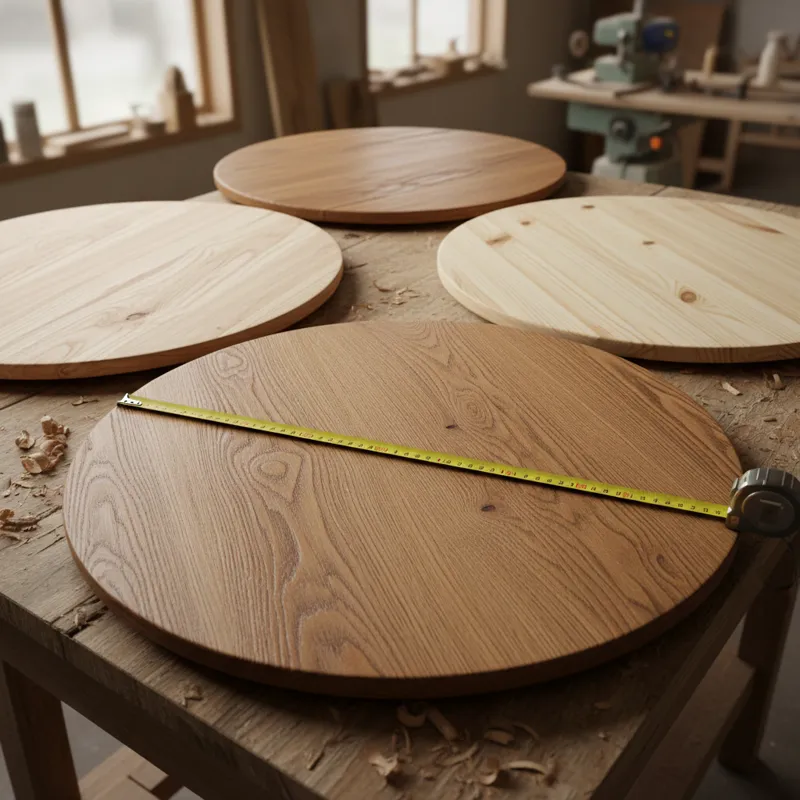
Choosing the right unfinished round dining table involves more than just liking the shape. You need to consider the wood species, the table’s dimensions relative to your space, and the overall construction quality.
Wood Species: Understanding Your Canvas
The type of wood dictates the table’s inherent characteristics, how it accepts finishes, and its overall durability. Most unfinished tables come in common hardwoods or softwoods.
- Solid Wood: This is the gold standard for dining tables. It’s durable, can be refinished multiple times, and often holds its value well. Common solid wood options include:
- Oak: Known for its prominent grain patterns and exceptional durability. It accepts stains beautifully, revealing rich textures. Red oak tends to have a reddish hue, while white oak is lighter and more muted.
- Maple: A dense, fine-grained wood that’s very strong and resistant to dents. It stains evenly but can sometimes appear blotchy if not pre-conditioned. Maple is an excellent choice for a smooth, contemporary finish.
- Pine: A softwood that’s more affordable and lighter in color. Pine has distinctive knots and a rustic appeal. It can dent more easily than hardwoods and may require a wood conditioner to achieve an even stain.
- Rubberwood: An eco-friendly option often sourced from sustainably managed plantations. It’s a medium-density hardwood, generally light in color with a fine grain, making it versatile for various finishes.
- Engineered Wood with Solid Wood Veneer: Some unfinished tables might feature an engineered core (like MDF or plywood) with a thick, unfinished solid wood veneer. While more stable against humidity changes, these often have limited refinishing potential due to the thinness of the veneer. Ensure you’re clear on the construction before purchase.
Sizing for Your Space
A round dining table requires adequate clearance around it for comfortable seating and movement. Measure your dining area carefully.
- Diameter Considerations:
- 30-36 inches: Ideal for small kitchens or apartments, comfortably seating 2 people.
- 40-48 inches: Seats 4 people comfortably, suitable for most average dining rooms.
- 50-60 inches: Accommodates 4-6 people, often used in larger dining spaces.
- 60-72 inches or more: Can seat 6-8+ people, perfect for grand dining rooms or open-plan living. When thinking about round glass dining sets for 4, consider the table’s overall footprint with chairs pulled out.
- Clearance: Aim for at least 36-42 inches of space between the table edge and any walls or other furniture to allow chairs to be pulled out and people to walk around comfortably.
Construction Quality: What to Look For
Even though it’s unfinished, the underlying craftsmanship is crucial for durability.
- Joinery: Inspect how the tabletop attaches to the base and how the base itself is constructed. Look for sturdy joints like mortise and tenon, dowel, or robust metal fasteners. Avoid tables primarily held together with only small screws or staples.
- Stability: Give the table a gentle wobble test. It should feel solid and stable, with no excessive movement or creaking.
- Wood Thickness: Thicker tabletops (1 inch or more) generally indicate better quality and durability, offering more material for future sanding and refinishing if needed.
- Leg Design: Consider the leg design not just for aesthetics but for stability and comfort. Pedestal bases can offer more legroom but must be well-weighted and balanced to prevent tipping. Four-leg designs are typically very stable.
Essential Tools and Supplies for Finishing
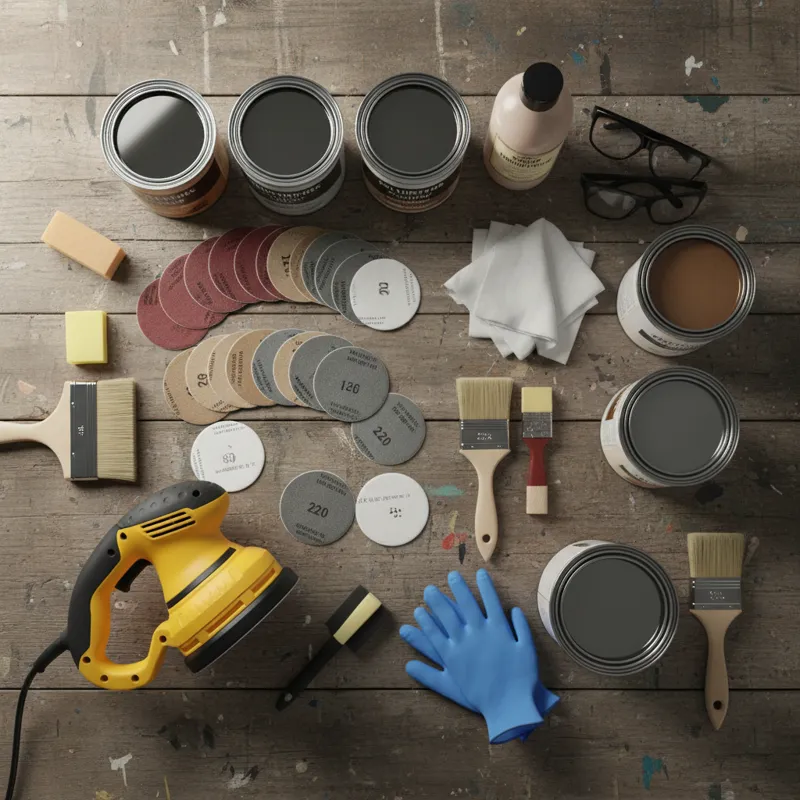
Before you begin, gather everything you’ll need. Proper preparation prevents frustrating interruptions and ensures a smoother process.
Surface Preparation Tools
- Orbital Sander: Essential for efficient and even sanding of large surfaces.
- Sanding Blocks/Sponge: For edges, curves, and areas an orbital sander can’t reach.
- Sandpaper: Various grits from coarse (80-100) to fine (180-220 or even 320 for painted finishes).
- Tack Cloths: Sticky cloths for picking up fine dust after sanding.
- Vacuum Cleaner with Brush Attachment: For initial dust removal.
- Mineral Spirits or Denatured Alcohol: For cleaning off sanding dust and residue before applying finish.
Finishing Application Tools
- Brushes: High-quality synthetic brushes for water-based finishes, natural bristles for oil-based.
- Foam Applicators/Pads: Excellent for applying stains and some topcoats smoothly.
- Clean Rags: Lint-free cotton rags for wiping off excess stain or applying waxes.
- Paint Trays/Buckets: For pouring and holding your finishes.
- Stir Sticks: To thoroughly mix stains and paints.
- Wood Conditioner: Crucial for softer woods (like pine) to ensure even stain absorption.
- Stain, Paint, or Sealant: Your chosen finishing products.
Safety Gear
- Safety Glasses: Protect your eyes from dust and splatters.
- Gloves: Nitrile or chemical-resistant gloves to protect your hands from stains, paints, and solvents.
- Respirator Mask: Essential for protecting your lungs from fine dust particles during sanding and fumes from oil-based finishes. Ensure it’s rated for organic vapors if using oil-based products.
- Drop Cloths/Plastic Sheeting: To protect your workspace floor and surrounding areas.
Surface Preparation: The Foundation of a Flawless Finish
You can’t achieve a professional-looking finish without meticulous surface preparation. This stage is non-negotiable and dictates the quality of your final result.
Inspection and Initial Cleaning
Start by thoroughly inspecting your unfinished round dining table. Look for any manufacturer’s marks, pencil lines, glue residue, or minor dents and scratches. Address these now. Use a stiff brush or a damp cloth to remove any loose debris or factory dust. If there’s glue, gently scrape it off with a putty knife, being careful not to gouge the wood. Glue spots will resist stain and paint, creating noticeable blemishes.
Sanding Techniques and Grit Progression
Sanding is critical for achieving a smooth, even surface that readily accepts your chosen finish. It removes imperfections and opens the wood grain.
- Start Coarse (80-100 Grit): If your table has significant imperfections, deeper scratches, or needs a lot of material removed, begin with 80-100 grit sandpaper. Use an orbital sander, moving with the wood grain. Avoid pressing too hard, and keep the sander moving to prevent swirl marks or gouges.
- Intermediate Sanding (120-150 Grit): Switch to 120 or 150 grit sandpaper. This step removes the scratches left by the coarser grit. Continue sanding with the grain, ensuring even coverage over the entire surface.
- Fine Sanding (180-220 Grit): This is your final sanding pass for most stains and paints. 180 or 220 grit provides a smooth surface without closing off the wood grain too much (which can prevent stain absorption). If you plan a very smooth painted finish, you might go up to 320 grit for the ultimate smoothness. Always sand with the grain. For rounded edges and intricate parts, switch to sanding blocks or sponges.
- Edge Finishing: Don’t forget the edges and underside of the table. A consistent finish requires consistent prep. Sand these areas just as thoroughly as the top surface.
What most people get wrong here: Many people stop sanding too early or skip grits. Every successive grit should remove the scratches from the previous one. If you skip from 80 to 220, you’ll likely still see coarse scratches under your finish.
Dust Removal: A Critical Step
After each sanding grit, and especially before applying any finish, you must remove all sanding dust. Dust particles trapped under your finish will create a bumpy, uneven surface.
- Vacuuming: Use a shop vacuum with a brush attachment to thoroughly vacuum the entire table surface, legs, and underside.
- Wiping: Follow with a damp (not wet) cloth or a cloth dampened with mineral spirits. Allow any solvent to evaporate completely.
- Tack Cloths: For the final pass, use a tack cloth. These sticky cloths are designed to pick up even the finest dust particles. Wipe gently and thoroughly, folding the cloth to expose fresh surfaces as you work.
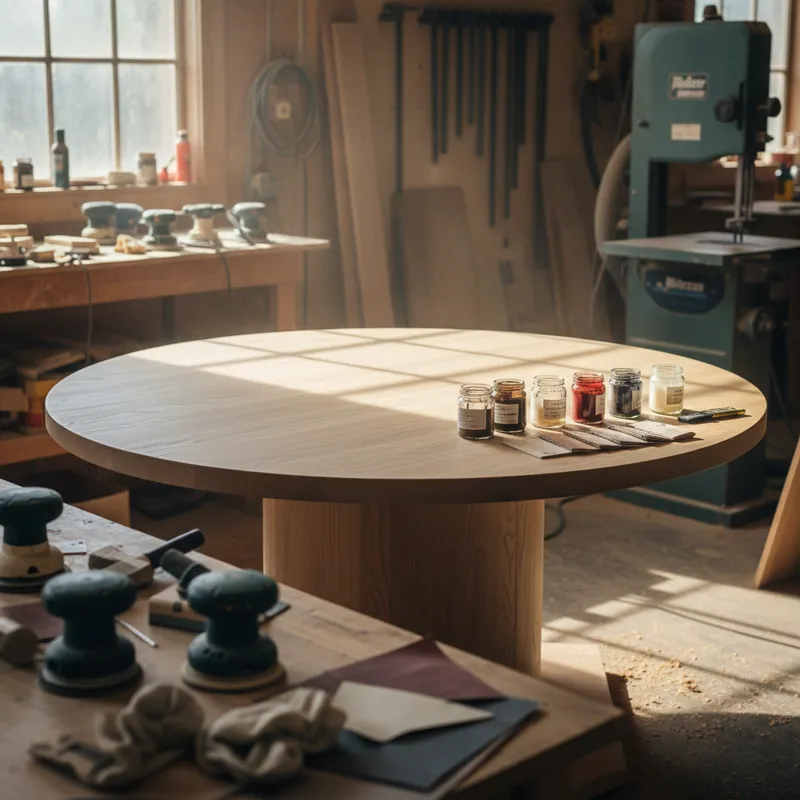
Choosing Your Finish: Stains, Paints, and Sealants
The choice of finish dramatically alters the appearance, durability, and maintenance of your unfinished round dining table. Consider your desired look, expected wear and tear, and ease of application.
Stains: Enhancing Natural Beauty
Stains penetrate the wood fibers, adding color while allowing the natural grain to show through. This is ideal for highlighting the inherent beauty of your wood.
- Oil-Based Stains: Offer deep, rich colors and longer open times, allowing for easier blending. They require mineral spirits for cleanup and typically take longer to dry. They are very durable.
- Water-Based Stains: Dry much faster and clean up with water. They produce less odor and are more environmentally friendly. Colors can be vibrant, but they might raise the wood grain, requiring light sanding between coats.
- Gel Stains: Thicker consistency, less penetration, and more like a thin paint. Excellent for woods that tend to blotch (like pine or maple) as they sit more on the surface, offering more even color. They are easier to apply without streaks.
- Wood Conditioner: For woods like pine, maple, or birch, applying a wood conditioner before staining is crucial. It helps the wood absorb the stain more evenly, preventing blotchiness.
Paints: Bold Transformations
Paint covers the wood grain entirely, offering an opaque, solid color finish. This is perfect for a modern, eclectic, or brightly colored aesthetic.
- Latex Paint: Water-based, easy cleanup, fast-drying, and generally low odor. Available in various sheens from matte to gloss. You’ll want a high-quality interior/exterior grade for durability.
- Oil-Based Paint: Extremely durable and creates a very hard, smooth finish. However, it has a strong odor, requires mineral spirits for cleanup, and takes a long time to dry.
- Chalk Paint: Known for its matte, velvety finish and minimal prep requirements (often no sanding or priming). It creates a distressed or vintage look easily, but generally requires a wax or clear coat for durability on a high-use item like an unfinished round kitchen table.
- Priming: For painted finishes, a good primer is essential. It blocks stains from the wood, ensures better paint adhesion, and results in a more uniform color. Use a high-quality stain-blocking primer, especially for knotty woods like pine.
Sealants and Topcoats: Protection and Durability
A topcoat is paramount for a dining table, protecting the finished surface from spills, scratches, and daily wear.
- Polyurethane: The most common choice for dining tables due to its excellent durability, water resistance, and heat resistance.
- Oil-Based Polyurethane: Very durable, amber tint that darkens over time. Strong odor, longer drying times.
- Water-Based Polyurethane: Dries clear, low odor, faster drying. Slightly less durable than oil-based but still very robust.
- Varnish: Similar to polyurethane but often made with natural resins. Offers good durability and weather resistance.
- Lacquer: Dries extremely fast to a very hard, durable finish. Often spray-applied, which can be challenging for DIYers without proper equipment and ventilation.
- Wax: Offers a soft, natural look and feel. Provides some protection but is generally less durable for high-traffic surfaces like a dining table. Best for low-use pieces or as an aesthetic top-up over another finish.
- Food-Safe Options: If you anticipate food directly contacting the table, consider options like tung oil, raw linseed oil (not boiled linseed oil, which contains metallic dryers), or beeswax, which are generally food-safe once fully cured. However, these often offer less protection than polyurethane or varnish and require more frequent reapplication. For maximum durability with food contact, consider a durable topcoat like polyurethane and use placemats or trivets. For a stainless dining table, a sealant isn’t applicable, but understanding finishes is key for wood.
Considering Durability and Maintenance
Think about how your table will be used. A bustling family kitchen will need a more robust finish than a rarely used formal dining table. Polyurethane is generally the go-to for durability. Consider the ease of repair too: minor scratches on a stained and polyurethaned table are often easier to touch up than on a painted surface.
Step-by-Step Finishing Process
This is where your vision comes to life. Follow these steps carefully for the best results, remembering that patience is your most valuable tool.
1. Applying Wood Conditioner (if staining woods prone to blotching)
If you’re working with pine, birch, or soft maple, apply a pre-stain wood conditioner. This equalizes the porosity of the wood, allowing the stain to penetrate more evenly. Apply it liberally with a brush or cloth, let it soak in according to manufacturer instructions (usually 5-15 minutes), then wipe off any excess before it dries. Don’t wait too long after applying conditioner to stain, usually within 2 hours.
2. Applying Stain (if chosen)
Once your wood is properly prepared and conditioned (if needed):
- Mix Thoroughly: Stir the stain well before and during application to ensure pigments are evenly distributed.
- Apply Evenly: Use a brush, foam applicator, or lint-free cloth to apply the stain generously and evenly, always working with the wood grain. Work in manageable sections (e.g., half the tabletop at a time).
- Allow to Penetrate: Let the stain sit for the recommended time (check the can – usually 5-15 minutes). Longer dwell times result in deeper color.
- Wipe Off Excess: Use a clean, lint-free cloth to wipe off all excess stain, again working with the grain. If you don’t wipe thoroughly, the stain won’t dry properly and your topcoat won’t adhere well. Use a second clean cloth to buff gently for an even sheen.
- Dry Time: Allow the stain to dry completely according to the manufacturer’s instructions, typically 12-24 hours. Rushing this step will compromise your topcoat.
- Second Coat (Optional): If you desire a darker color, you can apply a second coat of stain after the first has thoroughly dried. Remember that each subsequent coat will darken the color, so test on an inconspicuous area first.
3. Applying Paint (if chosen)
If you opt for paint, the process differs slightly:
- Prime: Apply a high-quality primer. This is especially important for blocking knots and ensuring excellent paint adhesion. Use a brush or roller, working in thin, even coats. Allow to dry completely.
- Light Sanding (Optional): After the primer dries, you can lightly sand with 220-320 grit sandpaper to remove any raised grain or imperfections. Wipe clean with a tack cloth.
- Apply First Coat of Paint: Use a high-quality brush or roller. Apply thin, even coats, working with the grain where applicable. Avoid thick coats, as they tend to drip, sag, and take longer to dry.
- Dry Time and Second Coat: Allow the first coat to dry completely. Lightly sand with 220-320 grit if needed to smooth out any brush marks or imperfections, then wipe clean. Apply a second coat. Most projects benefit from two to three thin coats for optimal coverage and durability.
4. Applying the Topcoat/Sealant
This is the final protective layer and crucial for the longevity of your unfinished round dining table.
- Ensure Cleanliness: Make sure the stained or painted surface is completely dry and free of any dust. A tack cloth is your friend here.
- Mix (Do Not Shake): Gently stir your topcoat. Shaking creates bubbles that will appear in your finish.
- First Coat: Apply a thin, even coat of your chosen sealant (polyurethane, varnish, etc.) with a good quality brush, foam applicator, or roller. Work quickly and avoid overworking the finish, which can cause streaks or bubbles. Follow the wood grain.
- Dry Time: Allow the first coat to dry thoroughly according to the manufacturer’s instructions (often 2-4 hours for water-based, longer for oil-based).
- Light Sanding Between Coats: After the first coat is dry, lightly sand the entire surface with 220-320 grit sandpaper. This creates a “tooth” for the next coat to adhere to and removes any dust nibs or raised grain. DO NOT sand through the previous coat. Wipe away all sanding dust with a tack cloth.
- Subsequent Coats: Apply 2-4 more thin coats, repeating the dry time and light sanding/dust removal steps between each. More coats generally mean better durability. For a rectangle glass dining room table, this process is different, but for wood, these layers are vital.
- Final Coat: For your final coat, do not sand. Apply a smooth, even layer and allow it to dry completely.
Curing Time and Final Inspection
Your table might feel dry to the touch in a few hours, but it takes significantly longer for the finish to fully cure and achieve maximum hardness. This can range from 72 hours to 30 days, depending on the product and environmental conditions. During this curing period, treat the table gently: avoid placing heavy objects, hot items, or sharp items directly on the surface. Protect it with soft cloths. Once fully cured, inspect your beautiful, custom-finished dining table!
What Most People Get Wrong When Finishing an Unfinished Round Dining Table
While the process sounds straightforward, several common errors can undermine your efforts. Being aware of these pitfalls can save you time, frustration, and the need to re-do work.
Skipping Proper Surface Prep
This is the number one mistake. People often assume an unfinished round dining table is ready to go straight out of the box. It’s not. Any glue residue, factory marks, or rough patches not removed during sanding will be magnified by the finish. Skipping grits or not sanding thoroughly enough will leave scratches that become glaring once stain or clear coat goes on. The finish won’t hide imperfections; it will highlight them.
Rushing Drying Times
Every product – wood conditioner, stain, paint, and topcoat – has a recommended drying time between coats and a full cure time. Ignoring these instructions is a recipe for disaster. Applying a new coat before the previous one is fully dry can lead to tackiness, bubbling, poor adhesion, and a soft, easily damaged finish. Be patient. Good things come to those who wait.
Over-applying Finish Coats
It might seem logical to apply thick coats for better protection or faster coverage, but this rarely works well. Thick coats are prone to drips, sags, uneven drying, and an “orange peel” texture. They can also take excessively long to dry and cure, remaining soft and vulnerable. Always apply multiple thin, even coats rather than a few thick ones.
Neglecting Edge and Underside Finishing
The top surface often gets all the attention, but the edges and underside of an unfinished round kitchen table are just as important. Unfinished edges can soak up moisture, leading to warping or swelling. An unfinished underside can also absorb or release moisture inconsistently compared to the top, potentially causing the tabletop to cup or warp over time. Finish these areas to provide complete protection and a polished look.
Maintaining Your Custom Finished Dining Table
Once you’ve invested the time and effort into finishing your unfinished round dining table, proper maintenance ensures its beauty and durability last for years.
Regular Cleaning
For most finishes, a soft, damp cloth is sufficient for daily cleaning. Avoid harsh abrasive cleaners, ammonia-based products, or silicone polishes, as these can degrade the finish over time. For tougher spills, a mild soap solution followed by a wipe with a clean, damp cloth and then a dry cloth will work. Always wipe up spills immediately.
Protecting from Heat and Moisture
Dining tables are prone to heat and moisture damage. Use placemats, coasters, and trivets under hot dishes or wet glasses. Prolonged exposure to heat can leave white rings, and excessive moisture can cause the finish to lift or warp the wood. Even a robust finish like polyurethane isn’t indestructible against extreme conditions.
Addressing Scratches and Wear
Despite your best efforts, life happens. For minor scratches, wood repair markers or touch-up pens designed for furniture can often blend them away. For deeper scratches or areas of significant wear, you might need to lightly sand the affected area and reapply stain and topcoat. If the damage is extensive, a full refinishing might be necessary, which is a key advantage of solid wood furniture—it can be restored multiple times.
Frequently Asked Questions (FAQ) About Unfinished Round Dining Tables
Can I really finish an unfinished round dining table myself?
Absolutely! While it requires patience and attention to detail, finishing an unfinished round dining table is a highly rewarding DIY project. With the right tools, quality products, and careful adherence to instructions, most people can achieve professional-looking results. Start with thorough research and take your time.
How long does the entire finishing process take?
The actual hands-on application time might only be a few hours spread over several days. However, the overall process, including drying and curing times for each coat of conditioner, stain, paint, and topcoat, typically spans several days to a week or even longer (up to 30 days for full cure). Rushing will compromise the finish, so factor in plenty of waiting time.
What’s the best finish for high-traffic dining tables?
For high-traffic dining tables, polyurethane (either oil-based for maximum durability and ambering, or water-based for a clear, fast-drying finish) is generally the top recommendation. It provides excellent resistance to scratches, spills, and general wear. Hardwax oils can also offer good protection and a more natural feel, though they might require more frequent reapplication than polyurethane.
Is it cheaper to buy unfinished or finished?
In most cases, buying an unfinished round dining table is significantly cheaper upfront than buying a comparable finished table. While you’ll incur costs for stains, paints, sealants, and tools, the total cost often remains lower, especially if you already own some of the basic supplies. The biggest “cost” is your time and effort, which many see as an investment in a custom piece.
Can I paint over a stained unfinished round kitchen table?
Yes, you can paint over a stained unfinished round kitchen table, but proper preparation is crucial. You’ll need to clean the surface thoroughly, lightly sand it to de-gloss the old stain and provide “tooth” for the new paint, and then apply a high-quality, stain-blocking primer. The primer will prevent the underlying stain color from bleeding through your new paint job, ensuring a vibrant, consistent finish.


