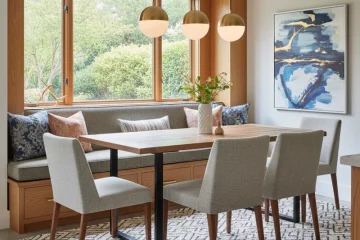
Crafting a woodworking dining table is more than just an assembly of lumber; it’s an investment in a centerpiece that defines a home, gathers families, and hosts countless memories. In 2026, the demand for authentic, durable, and uniquely personal furniture continues to grow, moving away from disposable trends. A well-built dining table, born from careful selection and skilled craftsmanship, stands as a testament to enduring quality and thoughtful design. This guide will walk you through the essential considerations, from timber selection to final finishing, ensuring your venture into creating or commissioning a real wood dining room table is grounded in practical understanding and geared towards heirloom quality.
Understanding the Enduring Appeal of a Woodworking Dining Table

The allure of a woodworking dining table stems from its unique combination of natural beauty, robust durability, and the potential for unparalleled customization. Unlike mass-produced alternatives that often compromise on materials and construction, a handcrafted wooden table embodies integrity. It’s a piece built to withstand daily life, developing character and patina over generations, becoming more beautiful with age. This isn’t just furniture; it’s a legacy.
Why Choose a Custom-Built Wooden Dining Table?
- Durability and Longevity: Solid wood, properly constructed, can last for centuries. It resists wear and tear far better than engineered wood products or veneer, offering true resilience against daily use.
- Aesthetics and Character: Each species of wood offers unique grain patterns, colors, and textures. This natural variation ensures every table is one-of-a-kind, bringing warmth and organic beauty into a space.
- Customization: From dimensions and wood species to joinery and finish, a custom woodworking dining table can be tailored precisely to your functional needs and aesthetic preferences. This means perfect fit, proportion, and style for your home.
- Sustainability: When sourced responsibly, wood is a renewable resource. Opting for locally harvested or certified sustainable timber contributes positively to environmental stewardship.
- Investment Value: A well-made woodworking dining table holds its value, often appreciating over time, especially when crafted from desirable species with exceptional workmanship.
Selecting Your Timber: The Heart of Your Woodworking Dining Table

The choice of wood is arguably the most critical decision when planning a woodworking dining table. It dictates the table’s aesthetic, its structural integrity, and how it will perform over time. Understanding the characteristics of different species is key to making an informed choice.
Hardwoods vs. Softwoods for Dining Tables
While both categories have their place in woodworking, hardwoods are overwhelmingly preferred for dining tables due to their density, durability, and resistance to denting.
- Hardwoods: These come from deciduous trees (those that lose their leaves seasonally) like oak, maple, walnut, cherry, and ash. They are generally denser, harder, and more durable, making them ideal for high-traffic furniture like dining tables. They also tend to have more interesting grain patterns and color variations.
- Softwoods: These come from coniferous trees (evergreens) like pine, cedar, and fir. While easier to work with and often less expensive, softwoods are typically less resistant to dents and scratches, making them less suitable for a primary dining surface unless a more rustic, distressed look is explicitly desired and accepted.
Popular Hardwood Species for Dining Tables
1. Oak (Red & White):
- White Oak: Exceptionally strong, durable, and resistant to moisture. Its prominent ray fleck (especially in quarter-sawn boards) creates a distinctive, elegant grain. It’s a classic choice for a reason.
- Red Oak: Slightly softer than white oak but still very strong. It has a more open grain and a reddish hue. It takes stain well and is a common, reliable option.
- Characteristics: Excellent stability, good workability, classic aesthetic, takes stains beautifully.
2. Maple (Hard & Soft):
- Hard Maple (Sugar Maple): One of the hardest domestic woods available, highly resistant to dents and scratches. It has a fine, even grain and a light, creamy color, making it a favorite for modern aesthetics and kitchens.
- Soft Maple: While still a hardwood, it’s softer than hard maple. It’s more affordable and has similar grain characteristics, though it might be more prone to denting.
- Characteristics: Exceptional durability (hard maple), fine and even grain, light color, excellent for smooth finishes.
3. Walnut:
- Known for its rich, dark brown color and striking grain patterns. Walnut is a premium wood, moderately hard, stable, and highly sought after for its luxurious appearance. It works well and finishes beautifully.
- Characteristics: Rich, dark color, excellent stability, luxurious appearance, works beautifully.
4. Cherry:
- Starts with a light pinkish-brown hue and darkens significantly to a rich reddish-brown over time with exposure to light. It has a fine, smooth grain and a classic, elegant appeal. Cherry is moderately hard and stable.
- Characteristics: Smooth, fine grain, develops a rich patina, elegant and timeless.
5. Ash:
- Similar in strength and appearance to white oak but generally lighter in color and more affordable. It has a pronounced grain pattern and is known for its flexibility and resistance to shock.
- Characteristics: Strong, clear grain, good shock resistance, takes stain well.
6. Reclaimed Wood:
- Salvaged from old barns, factories, or other structures, reclaimed wood offers unique character, often with nail holes, saw marks, and a naturally weathered patina. It’s an environmentally friendly choice and each piece tells a story. When considering a reclaimed wood table top, remember its inherent imperfections contribute to its charm.
- Characteristics: Unique character, sustainable, often very stable due to age.
Sourcing Sustainable Wood and Understanding Moisture Content
In 2026, sustainable sourcing is more than a trend; it’s a responsibility. Look for wood certified by organizations like the Forest Stewardship Council (FSC), which ensures responsible forest management. Alternatively, support local sawmills that harvest timber ethically.
Crucially, ensure your wood is properly dried. Lumber must have a suitable moisture content (MC) for its intended environment. For interior furniture in the United States, kiln-dried hardwoods typically have an MC between 6-8%. Using wood with too high an MC will lead to significant warping, cracking, and joint failure as it dries out in your home. Always use a reliable moisture meter to verify MC before starting your project.
Design Principles for a Lasting Woodworking Dining Table

A dining table needs to be both beautiful and functional. Thoughtful design considers ergonomics, aesthetics, and structural integrity.
Ergonomics and Dimensions
The size and height of your dining table are paramount for comfort and usability.
- Standard Height: Most dining tables are between 29 and 30 inches tall (74-76 cm). This allows comfortable legroom beneath the apron (the frame beneath the tabletop) for standard dining chairs, which typically have a seat height of 17-19 inches.
- Legroom: Ensure there’s at least 6-7 inches (15-18 cm) of clearance from the top of the chair seat to the underside of the table apron.
- Seating Capacity:
- 4 people: A round table 36-48 inches (90-120 cm) in diameter or a rectangular table 48-60 inches (120-150 cm) long by 30-36 inches (75-90 cm) wide.
- 6 people: A round table 48-60 inches (120-150 cm) in diameter or a rectangular table 60-72 inches (150-180 cm) long by 36-42 inches (90-105 cm) wide.
- 8 people: A round table 60-72 inches (150-180 cm) in diameter or a rectangular table 80-96 inches (200-240 cm) long by 40-48 inches (100-120 cm) wide.
- Allow at least 24 inches (60 cm) of width per person at the table for comfortable dining.
Tabletop Styles
The tabletop is the dominant visual element of your woodworking dining table.
- Solid Slab: A single, wide board (or a few exceptionally wide boards glued invisibly) that showcases the natural beauty of the wood, often with live edges. This is a premium option, requiring very large, stable timber.
- Glued-Up Panels: The most common approach, where several narrower boards are joined edge-to-edge to create the desired width. Careful grain matching is crucial for a cohesive look.
- Breadboard Ends: A traditional technique where a solid piece of wood is attached to the ends of a panel, running perpendicular to the main tabletop grain. This method helps prevent cupping and keeps the tabletop flat, while also adding a refined aesthetic. It requires specific joinery (like a sliding dovetail or mortise and tenon) to allow for the seasonal expansion and contraction of the main panel.
Base Designs
The table base dictates stability, legroom, and overall style.
- Four-Leg Post: The most common and stable design. Legs can be straight, tapered, turned, or sculpted. Ensure the apron system properly connects the legs and supports the top.
- Trestle Base: Features two or more vertical supports (trestles) connected by a horizontal stretcher. Offers excellent stability and can allow for more flexible seating, as there are no corner legs.
- Pedestal Base: A central column or cluster of columns supporting the top. Great for maximizing seating as there are no interfering legs. Requires careful engineering for stability, especially for larger tops.
- Statement Bases: These can be intricate sculptural forms, often involving a mix of materials like wood and metal. A metal top dining room table might feature a metal base, but even wooden tables can incorporate metal accents in their bases for a modern industrial look.
Aesthetic Harmony
Consider how your woodworking dining table will integrate with your existing home decor. Is your style modern, rustic, minimalist, or traditional? A traditional dining table might feature turned legs and classical joinery, while a modern piece might emphasize clean lines and a slab top. The choice of wood species and finish also plays a significant role in defining the table’s overall aesthetic.
Construction Techniques: Building for Longevity
The true strength and durability of a woodworking dining table lie in its joinery and construction methods. This is where skilled craftsmanship truly shines.
Joinery Essentials for Dining Tables
Strong joints are non-negotiable for a piece of furniture that will endure daily use.
- Mortise and Tenon: A classic, incredibly strong joint where a projecting tenon (from one piece) fits snugly into a rectangular hole (mortise) in another. This is the gold standard for connecting table legs to aprons, offering maximum resistance to racking and shear forces.
- Dovetails: While often associated with drawers, dovetails can be used for apron-to-leg connections or other structural elements where extreme mechanical strength and aesthetic appeal are desired. Their interlocking shape makes them highly resistant to being pulled apart.
- Dowels: Cylindrical wooden pins inserted into mating holes. They provide good alignment and decent strength when properly glued, often used in conjunction with other joints or for aligning panels.
- Biscuits/Dominos: These aren’t structural joints on their own but excel at aligning boards for edge-to-edge glue-ups. They prevent boards from slipping during clamping and add a modest amount of shear strength.
- Pocket Screws: While convenient and fast, pocket screws should be used judiciously in a fine woodworking dining table. They are useful for certain non-structural assemblies or as temporary clamping aids, but relying solely on them for critical structural connections (like leg-to-apron) can lead to weakness over time compared to traditional joinery.
Dealing with Wood Movement: A Critical Consideration
Wood is a hygroscopic material, meaning it absorbs and releases moisture from the air, causing it to expand and contract across its grain. This movement is inevitable and significant. Failing to account for it will lead to cracked tabletops, split aprons, or failing joints.
- Tabletop Fastening: Never glue or screw a solid wood tabletop directly and rigidly to its base. It needs to be able to move independently. Common methods include:
- Z-Clips (Tabletop Fasteners): Metal clips that fit into a groove in the apron and screw into the underside of the tabletop, allowing the top to expand and contract while holding it securely.
- Slotted Screw Holes: Elongating screw holes in the apron or cleats allows screws to slide as the tabletop moves.
- Wooden Buttons/Battens: Blocks of wood attached to the underside of the top that fit into slots in the apron, similar to Z-clips.
- Breadboard Ends: As mentioned, these require special joinery (like floating tenons or dowels) where the tenons are glued only in the center and allowed to slide in elongated mortises at the ends, accommodating movement.
For a deeper dive into the physics of wood movement, consider resources from reputable woodworking schools or forestry departments, such as Forest Products Laboratory Technical Notes.
Assembly and Glue-Ups
Precision in assembly is as important as precise cutting.
- Dry Fit: Always dry-assemble all components before applying glue to ensure everything fits perfectly. Address any gaps or misalignments at this stage.
- Glue Selection: For most interior furniture, PVA wood glue (like Titebond II or III) is excellent. It offers strong bonds, sufficient open time, and easy cleanup. For specific needs, consider epoxy or hide glue.
- Clamping: Use plenty of clamps to apply even pressure across glue joints. Gaps often indicate insufficient clamping pressure or poorly fitting joints, not a lack of glue. Ensure cauls (protective strips of wood) are used to prevent clamp marks.
- Panel Glue-Ups: When joining boards for a tabletop, alternate the growth rings (cathedral grain patterns) up and down to help balance internal stresses and reduce the likelihood of cupping.
Finishing Your Woodworking Dining Table: Protection and Beauty
The finish is the final touch that protects your woodworking dining table, enhances its beauty, and defines its tactile experience. A good finish protects against moisture, spills, and wear while showcasing the natural wood.
Surface Preparation
The quality of your finish is 80% surface preparation.
- Sanding Sequence: Start with a coarse grit (e.g., 80 or 100) to remove milling marks and significant imperfections. Progress systematically through finer grits (120, 150, 180, 220). Do not skip grits, as the coarser scratches won’t be removed by subsequent finer grits, showing up under the finish.
- Dust Removal: After each sanding step, thoroughly clean the surface. Use a vacuum, then a tack cloth or compressed air to remove all sanding dust. Dust trapped under the finish will create an uneven, cloudy appearance.
Types of Finishes
1. Oil Finishes (e.g., Tung Oil, Linseed Oil, Danish Oil):
- Characteristics: Penetrates the wood fibers, offering a very natural, “in-the-wood” look and feel. They are easy to apply and repairable if scratched. Provide moderate protection against moisture but less against impact.
- Application: Wiped on, allowed to penetrate, then excess wiped off. Multiple coats are typically required.
2. Varnish/Polyurethane (Oil-Based & Water-Based):
- Characteristics: Forms a durable protective film on the wood surface. Highly resistant to scratches, chemicals, and moisture. Oil-based polyurethanes amber slightly, adding warmth; water-based versions stay clearer. They offer superior protection for a high-traffic item like a dining table.
- Application: Brushed, wiped, or sprayed. Multiple thin coats are better than a few thick ones. Light sanding between coats improves adhesion and smoothness.
3. Lacquer:
- Characteristics: Dries very quickly, forms a hard, durable film. Often used in professional spray setups. Provides excellent clarity and can be polished to a high sheen.
- Application: Best applied by spraying due to fast drying time.
4. Wax:
- Characteristics: Provides a low-sheen, natural look but offers minimal protection against moisture and wear. Often used as a top coat over other finishes or for aesthetic purposes on less-used items.
- Application: Wiped on, allowed to haze, then buffed off.
5. Hybrid Finishes:
- Many modern finishes combine oils with resins or polyurethanes to offer both penetration and film-building properties, providing a good balance of natural feel and protection.
Application Techniques and Curing
Always apply finishes in a well-ventilated, dust-free environment. Follow the manufacturer’s instructions for dry times between coats. Allow the finish to fully cure (which can take several weeks) before placing heavy objects or covering the table for extended periods. Even if “dry to the touch,” the finish is still hardening.
Things People Usually Miss When Building a Woodworking Dining Table
Even experienced woodworkers can overlook subtle details that make a significant difference in the final quality and longevity of a woodworking dining table.
- Underestimating Wood Movement: This is the biggest culprit for structural failures. Many beginners fail to properly account for wood’s expansion and contraction, leading to cracked tabletops, separated breadboard ends, or split aprons. Always assume wood will move, and design joinery and fastening methods to accommodate it.
- Inadequate Surface Preparation Before Finishing: A beautiful piece of wood can be ruined by a poor finish, and a poor finish is often a result of inadequate sanding or failure to remove all dust. Scratches from coarser grits, swirl marks, or embedded dust will be magnified by the finish.
- Insufficient Clamping Pressure or Poorly Fitted Joints During Glue-Ups: Glue is strong, but it’s a gap filler only to a limited extent. If joints aren’t tight or clamping pressure is uneven, the joint will be weak. Don’t rely on excessive glue to fill gaps; fix the joint fit first.
- Not Accounting for Disassembly/Moving: A large dining table may need to be moved through doorways or transported. Designing the base to be detachable from the top, or even having the base itself break down, can save immense frustration later. Use knockdown hardware if necessary for robust, repeatable assembly.
- Prioritizing Aesthetics Over Structural Integrity: While a table should look good, its primary function is to be sturdy. A beautiful design with weak joinery or an unstable base is a failure. Always ensure the structure can handle the weight and forces it will endure. For instance, using too small an apron or flimsy leg attachments can lead to wobble.
- Ignoring Wood Selection Imperfections: Not every board is perfect. Paying attention to grain direction, knots, and defects during lumber selection and cutting can prevent issues down the line. For instance, using a board with significant runout (grain that goes sharply out of the thickness of the board) in a critical structural piece like a leg or apron can lead to weakness.
- Neglecting to Add Levelers: Floors are rarely perfectly level. Adding adjustable leg levelers to your dining table allows for easy stabilization, preventing frustrating wobbles.
Maintaining Your Heirloom: Care for Your Woodworking Dining Table
Once your woodworking dining table is complete and cured, proper care will ensure its beauty and longevity for generations.
- Regular Cleaning: Wipe down your table with a soft, damp cloth. Avoid abrasive cleaners or harsh chemicals, which can damage the finish.
- Protect from Heat and Moisture: Always use coasters for drinks and placemats for hot dishes. Trivets are essential for anything coming directly from the oven or stovetop. Prolonged exposure to moisture can cause water rings or lift the finish.
- Avoid Direct Sunlight: Over time, direct sunlight can fade wood and finishes unevenly. If your table is regularly exposed, consider rotating it periodically or using window treatments.
- Address Spills Promptly: Wipe up spills immediately to prevent staining or damage to the finish.
- Periodic Re-Finishing or Conditioning:
- Oil Finishes: May need re-oiling every 6-12 months, depending on use, to replenish the oil and maintain protection.
- Film Finishes (Polyurethane, Varnish): These are very durable. If the finish gets minor scratches or dulls, it might be possible to lightly scuff sand and apply a fresh topcoat. For major damage, a full re-sanding and re-finishing might be necessary.
- Wax: Can be re-applied periodically to refresh the luster, but remember it offers minimal protection.
Conclusion
Building or investing in a woodworking dining table is a deeply rewarding endeavor. It’s a journey that combines artistic vision with precise engineering, yielding a piece that is not only functional but also deeply personal and rich in character. By understanding the fundamentals of wood selection, design principles, construction techniques, and proper finishing, you’re not just acquiring a piece of furniture; you’re creating an heirloom. A well-crafted wooden dining table stands as a symbol of quality, craftsmanship, and enduring value, ready to anchor your home for decades to come.
People Also Ask About Woodworking Dining Tables
How long does it typically take to build a custom woodworking dining table?
The time frame varies widely based on complexity, wood species, and the maker’s skill level. A simple design might take 40-80 hours of active work, spread over 3-6 weeks to account for glue drying, finish curing, and ensuring proper wood movement acclimation. More complex designs or those with intricate joinery could easily extend to 100-200+ hours.
What’s the best wood for a dining table if I have kids and pets?
For high-traffic environments with kids and pets, highly durable hardwoods like hard maple or white oak are excellent choices. Their density makes them very resistant to dents and scratches. Pair them with a robust, film-building finish like polyurethane for maximum protection against spills and wear.
Is it more cost-effective to build a woodworking dining table myself or buy one?
Building your own can be cost-effective if you already own the necessary tools and have the skills. The primary costs will be lumber, hardware, and finish, which can still add up to a significant amount, especially for premium wood. However, if you need to buy tools or factor in the value of your time, purchasing a well-made custom or semi-custom table from a reputable woodworker can often be more economical and guarantee professional results.
How do I account for wood movement in a large tabletop?
For large tabletops, it’s critical to use fastening methods that allow the top to expand and contract across its width. Never glue or rigidly screw the entire tabletop to the base. Use tabletop fasteners (Z-clips), slotted screw holes, or wooden buttons/battens that slide within dados or elongated holes in the apron. This ensures the top remains flat and doesn’t crack as humidity levels change.
Can I use a live edge slab for my dining table?
Absolutely. Live edge slabs are a popular choice for woodworking dining tables, offering a unique, organic aesthetic. However, sourcing a properly dried and flattened slab is crucial. They often require more specialized tools for flattening and finishing. Also, live edge slabs can be prone to more movement and cracking if not properly stabilized and accounted for in their design. Ensure the slab is fully acclimated to your home’s humidity before construction.