Letter embroidery offers a powerful way to infuse personalization and distinct character into almost any textile. Far from being a niche craft, it’s a versatile art form that spans centuries, evolving from functional labeling to intricate decorative statements. Whether you’re looking to add a personal touch to clothing, create memorable gifts, or brand a set of accessories, understanding the nuances of letter embroidery—from selecting the right font and fabric to mastering various hand stitches or machine techniques—unlocks a world of creative possibilities. For anyone delving into textile arts, understanding the craft of embroidery artists and their techniques is crucial, and letterwork is often a foundational skill that showcases both precision and flair.
Understanding Letter Embroidery
At its core, letter embroidery involves using needle and thread to create lettering or monograms on fabric. This can range from simple initials on a handkerchief to elaborate script on a denim jacket or intricate logos for apparel. The appeal lies in its ability to transform an ordinary item into something truly unique and meaningful. It’s a craft that allows for immense personal expression, whether you’re aiming for understated elegance or bold, statement-making text.
The techniques employed in letter embroidery are as varied as the styles themselves. You can achieve stunning results through meticulous hand stitching, or leverage the speed and precision of modern embroidery machines. Each method offers distinct advantages and challenges, catering to different skill levels, project scopes, and desired aesthetic outcomes.
Why Personalize with Letter Embroidery?
Personalization is a driving force behind the enduring popularity of letter embroidery. In an age of mass production, items adorned with custom letters stand out. Here’s why it remains a top choice:
- Unique Expression: Add initials, names, significant dates, or meaningful words that resonate personally.
- Thoughtful Gifting: A custom embroidered item makes for an incredibly heartfelt and memorable gift for birthdays, weddings, baby showers, or anniversaries.
- Brand Identity: Businesses often use letter embroidery for uniforms, merchandise, or promotional items to enhance brand recognition with a premium feel.
- Elevated Aesthetics: Embroidery adds texture, depth, and a bespoke quality that print or other embellishments often can’t match. It conveys craftsmanship and attention to detail.
- Durability: Unlike many surface prints, embroidery is incredibly durable, with designs often outlasting the fabric they’re stitched onto when cared for properly.
Hand Embroidery for Letters: Artistry and Craft
Hand letter embroidery is a timeless craft, valued for its artistic freedom, tactile quality, and the satisfaction of creating something stitch by stitch. It allows for nuanced textures and a human touch that machines often replicate with difficulty. It’s often the preferred method for intricate details, subtle shading, or when a perfectly imperfect, artisanal look is desired.
Essential Hand Stitches for Lettering
While many stitches can be adapted, some are particularly well-suited for forming letters:
- Backstitch: The most fundamental stitch for outlining letters. It creates a solid, continuous line, perfect for crisp edges.
- Stem Stitch: Ideal for elegant, flowing script or creating slightly thicker lines with a rope-like texture.
- Chain Stitch: Forms a series of interconnected loops, giving letters a braided, textured appearance. Great for slightly bolder outlines or fill.
- Satin Stitch: Used to completely fill in areas, like block letters or sections of script. It creates a smooth, raised surface when stitches are laid close together and parallel. This stitch requires precision to maintain an even, glossy finish.
- Couching: Excellent for very thick or metallic threads where directly stitching through the fabric is difficult. A thick thread is laid on the surface and then secured with smaller, perpendicular stitches.
- French Knots or Colonial Knots: Can be used for decorative accents, dots, or to create a textured fill for small letters or parts of letters.
Materials and Tools for Hand Letter Embroidery
- Fabric: Any stable, woven fabric works well—cotton, linen, canvas, denim. Ensure it’s not too stretchy or loosely woven, which can distort stitches.
- Embroidery Floss: Six-strand divisible cotton floss is standard. You can adjust thickness by using fewer strands. Pearl cotton offers a different sheen and texture.
- Needles: Crewel or embroidery needles with sharp points and larger eyes are ideal.
- Embroidery Hoop: Essential for keeping fabric taut, preventing puckering, and ensuring even stitches. Wooden or plastic hoops are common.
- Design Transfer Tools: Water-soluble pens, heat-transfer pencils, tracing paper, light boxes, or iron-on transfers. Choosing the right method depends on your fabric and design complexity.
Machine Embroidery for Letters: Speed and Precision
Machine letter embroidery revolutionized the craft, offering unparalleled speed, consistency, and the ability to replicate complex designs with ease. It’s the go-to method for commercial applications, large batches, or when a perfectly uniform and professional finish is paramount. Modern machines, even for home use, are incredibly sophisticated.
Types of Embroidery Machines
- Sewing Machines with Embroidery Modules: Many advanced sewing machines come with an attachment that allows them to perform embroidery. These are versatile for those who also sew garments.
- Dedicated Embroidery Machines: These machines are designed solely for embroidery, often featuring larger hooping areas, faster speeds, and more robust software capabilities.
- Multi-Needle Embroidery Machines: Typically for commercial or serious hobbyists, these machines can hold multiple thread colors at once, reducing the need for constant thread changes during a complex design.
Key Components and Considerations
- Embroidery Software: Essential for digitizing designs, choosing fonts, resizing, and arranging letters. Many machines come with basic software, but advanced programs offer greater creative control.
- Stabilizers: Critical for machine embroidery. Stabilizers provide a foundation for stitches, preventing fabric distortion and ensuring crisp lettering. Types include tear-away, cut-away, and wash-away, chosen based on fabric type and project needs.
- Threads: Rayon and polyester embroidery threads are popular for their sheen, strength, and wide color range. Metallic and specialty threads also offer unique effects.
- Hoops: Machine hoops securely hold both fabric and stabilizer. They come in various sizes to accommodate different design dimensions.
Designing Your Letter Embroidery
Effective letter embroidery starts with thoughtful design. The choices you make here will significantly impact the final look and feel of your project.
Font Selection
The font you choose sets the tone:
- Script Fonts: Convey elegance, formality, or a personal touch. Ideal for monograms, names, or fancy text.
- Block Fonts: Bold, clear, and easy to read. Excellent for sporty apparel, logos, or children’s items.
- Serif Fonts: Classic and traditional, often used for a sophisticated or vintage feel.
- Sans-Serif Fonts: Modern, clean, and minimalist, perfect for contemporary designs.
- Novelty Fonts: Whimsical or themed fonts add character but can sometimes be harder to read if too intricate.
Consider the target audience and the item being embroidered. A delicate script might look out of place on a rugged work jacket, just as a bold block font might overwhelm a delicate baby blanket. Remember that some embroidery patterns, especially complex script, can be challenging for beginners.
Sizing and Placement
The size and placement of your letters are crucial for visual balance and impact:
- Clothing: For t-shirts, consider the left chest, center chest, sleeve, or back. For hats, typically the front or side.
- Accessories: Tote bags might have large central letters, while a small pouch could feature a single initial.
- Home Decor: Pillows, towels, or wall hangings allow for more flexibility in scale.
Always mock up your design, even roughly, to visualize how it will look on the actual item. Print it out and place it on the garment, or use software to simulate.
Color Theory in Letter Embroidery
Thread color dramatically affects visibility and aesthetic:
- Contrast: High contrast colors (e.g., white on black, red on blue) make letters stand out boldly.
- Harmony: Analogous colors (e.g., different shades of blue and green) create a softer, blended look.
- Monochromatic: Using different shades of the same color offers subtle texture and depth.
- Multi-color: For complex designs or playful effects, but ensure colors don’t clash or overwhelm the legibility of the letters.
Digitizing Designs (for Machine Embroidery)
For machine embroidery, your chosen letters need to be “digitized.” This process converts an image or font into a series of stitches that the embroidery machine can understand. Specialized software allows you to:
- Select fonts from built-in libraries.
- Adjust size, spacing, and rotation.
- Choose stitch types (satin, fill, running stitch).
- Optimize stitch density and pull compensation.
Good digitizing is key to a smooth, pucker-free result. If you’re not using built-in fonts, learning basic digitizing or purchasing pre-digitized designs is essential.
Essential Tools and Materials Deep Dive
Having the right supplies makes a significant difference in the quality and enjoyment of your letter embroidery projects.
Fabric Selection
The best fabrics for letter embroidery are those with a stable weave that won’t distort easily:
- Woven Cottons (e.g., broadcloth, quilt cotton): Excellent for beginners, stable, easy to hoop, and widely available.
- Linen: Offers a natural, rustic texture. Can be a bit more challenging due to its looser weave, but beautiful results.
- Denim: Durable and popular for jackets, jeans, and bags. Requires a sturdy needle and often a heavier stabilizer for machine work.
- Felt: Non-fraying and often used for appliqué letters or badges.
- Knits (e.g., t-shirt jersey, fleece): Require careful handling and often a robust stabilizer (especially cut-away) to prevent stretching and puckering.
Thread Types
- DMC Six-Strand Cotton Floss: The most common for hand embroidery, offering a matte finish and a vast color palette.
- Pearl Cotton: A mercerized, non-divisible thread with a slightly lustrous sheen, often used for a bolder, more defined look in hand embroidery.
- Rayon Embroidery Thread: Popular for machine embroidery due to its high sheen and silky texture. Less durable than polyester but vibrant.
- Polyester Embroidery Thread: A strong, colorfast, and durable option for machine embroidery, resistant to bleach and fading. Widely used for items that will see heavy wear or frequent washing.
- Metallic Threads: Add sparkle but can be challenging to work with. Requires specialized needles and slower speeds, especially on machines.
Needles
- Hand Embroidery: Crewel needles (sharp, medium eye) for fine work; tapestry needles (blunt, large eye) for larger count fabrics or working with thicker yarns. Sharps are good all-purpose needles.
- Machine Embroidery: Specific embroidery needles have a slightly rounded ballpoint to prevent fabric damage and a larger eye for less thread friction. Different sizes (e.g., 75/11, 90/14) are chosen based on thread and fabric weight.
Hoops and Frames
- Hand Hoops: Typically made of wood or plastic, they come in various diameters. They keep the fabric taut for even stitching.
- Machine Hoops: These are specialized frames that attach to the embroidery machine. They have inner and outer rings that securely hold the fabric and stabilizer, ensuring the fabric remains flat during stitching. They come in specific sizes compatible with your machine’s embroidery field.
Stabilizers (for Machine Embroidery)
Stabilizers are arguably the most crucial material for successful machine letter embroidery. They prevent fabric from stretching, puckering, or sinking into stitches:
- Tear-Away: Best for stable woven fabrics. Provides temporary support and can be easily torn away after stitching.
- Cut-Away: Essential for stretchy fabrics like knits, or any fabric where permanent support is needed. It prevents distortion over time.
- Wash-Away (Water Soluble): Used when no stabilizer residue can be left, often for delicate fabrics or freestanding lace. It dissolves completely in water.
- Heat-Away: Designed to be removed with heat, leaving no residue.
- No-Show Mesh: A light, sheer cut-away stabilizer, good for preventing show-through on light-colored fabrics.
Correct stabilizer choice depends on fabric weight, stretch, stitch density, and intended use of the finished item.
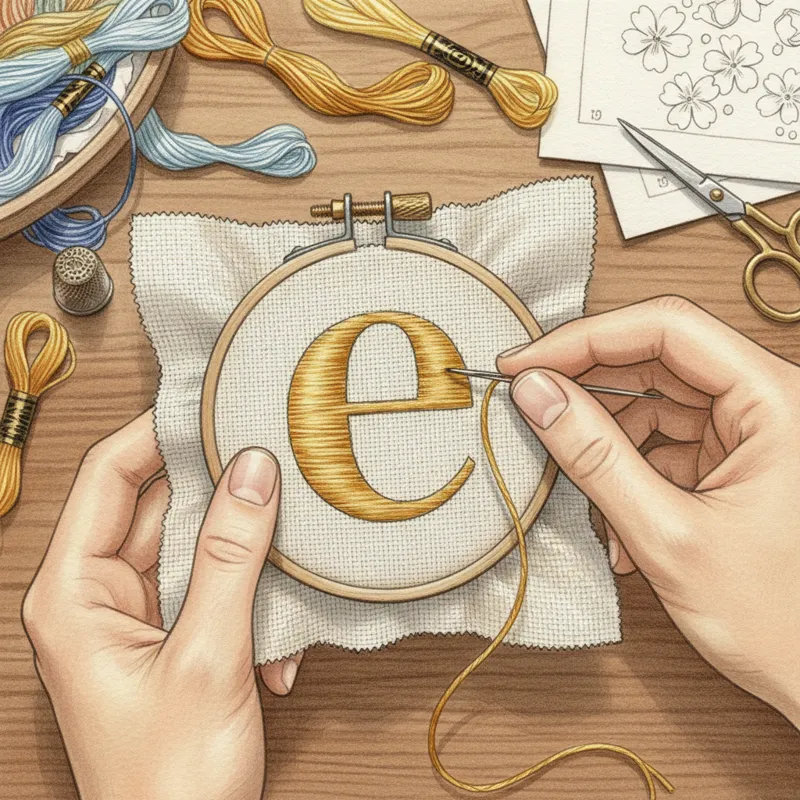
Step-by-Step Guide: Hand Embroidering Letters
Hand embroidering letters is a meditative process that yields beautiful, unique results. Here’s a general workflow:
- Prepare Your Fabric: Pre-wash and iron your fabric to prevent shrinkage and remove wrinkles. This ensures a smooth surface for stitching.
- Transfer Your Design: Using your chosen method (water-soluble pen, iron-on transfer, light box, tracing paper), accurately transfer your letter design onto the fabric. Precision here is key.
- Hoop Your Fabric: Place your fabric securely in an embroidery hoop, ensuring it’s taut like a drum without distorting the fabric weave.
- Choose Your Stitches: Decide whether you’ll outline with backstitch or stem stitch, and fill solid areas with satin stitch or another texture. For simple embroidery designs, a basic backstitch outline might be all you need.
- Begin Stitching:
- Start from the back of the fabric, securing your thread with a small knot or a few hidden stitches.
- Work your outline first, making sure your stitches are even in length and tension.
- If filling, work your fill stitches carefully, keeping them consistent in direction and tension for a smooth finish. For satin stitch, stitches should lay parallel and very close together.
- Finish Your Work: Once all letters are stitched, secure your thread on the back with a few small, hidden knots. Remove the fabric from the hoop, gently press it, and trim any stray threads.
Step-by-Step Guide: Machine Embroidering Letters
Machine embroidery offers precision and speed. While specific steps vary by machine model, the general process is consistent:
- Create or Load Your Design: Use your machine’s built-in fonts or embroidery software to create or import your letter design. Adjust size, rotation, and placement as needed.
- Select and Prepare Fabric and Stabilizer: Choose the appropriate stabilizer for your fabric. Cut both fabric and stabilizer slightly larger than your hoop.
- Hoop Your Fabric: Layer the stabilizer underneath your fabric, ensuring both are taut and wrinkle-free within the hoop. It’s critical that the fabric and stabilizer are perfectly aligned and taut to prevent shifting and puckering.
- Load the Hoop onto the Machine: Attach the hooped fabric securely to your embroidery machine.
- Select Threads and Needles: Load the correct thread color for your first letter section. Use an appropriate machine embroidery needle.
- Start Embroidering: Follow your machine’s instructions to begin the embroidery process. Monitor the machine, especially at the start, to ensure no issues.
- Trim and Finish: Once stitching is complete, remove the hoop from the machine. Carefully unhoop the fabric. Trim excess stabilizer (tear-away or cut-away) or dissolve wash-away stabilizer. Trim all jump stitches (threads connecting letter parts) carefully from the front and back for a clean finish.
Machine embroidered letters make for excellent machine embroidery gift ideas due to their professional finish and durability.
Advanced Techniques & Considerations for Letter Embroidery
Beyond basic stitching, several techniques can elevate your letter embroidery:
- Appliqué Letters: Involves cutting fabric letters and attaching them to the base fabric with embroidery stitches (like satin stitch or running stitch). This adds dimension, color blocking, and can reduce stitch count, especially for large letters.
- Puffy Foam Embroidery: A specialized technique where a layer of foam is placed under the embroidery, creating a raised, 3D effect. Common for hats and bold, block lettering.
- Monograms and Initial Designs: Often involve interlocking letters, specific layouts (e.g., larger last initial in the center), or decorative borders.
- Mixing Stitches and Textures: Combine different hand stitches (e.g., satin fill with a backstitch outline) or use varying thread types to create rich, tactile letters.
- Shadowing and Outlining: Adding a second, slightly offset outline or a shadow color can make letters pop and add depth.
- Working with Challenging Materials: Leather, delicate silks, or very thick fabrics require specific needles, stabilizers, and adjustments to machine tension or hand stitching technique.
Project Ideas for Letter Embroidery
The applications for letter embroidery are vast and inspiring:
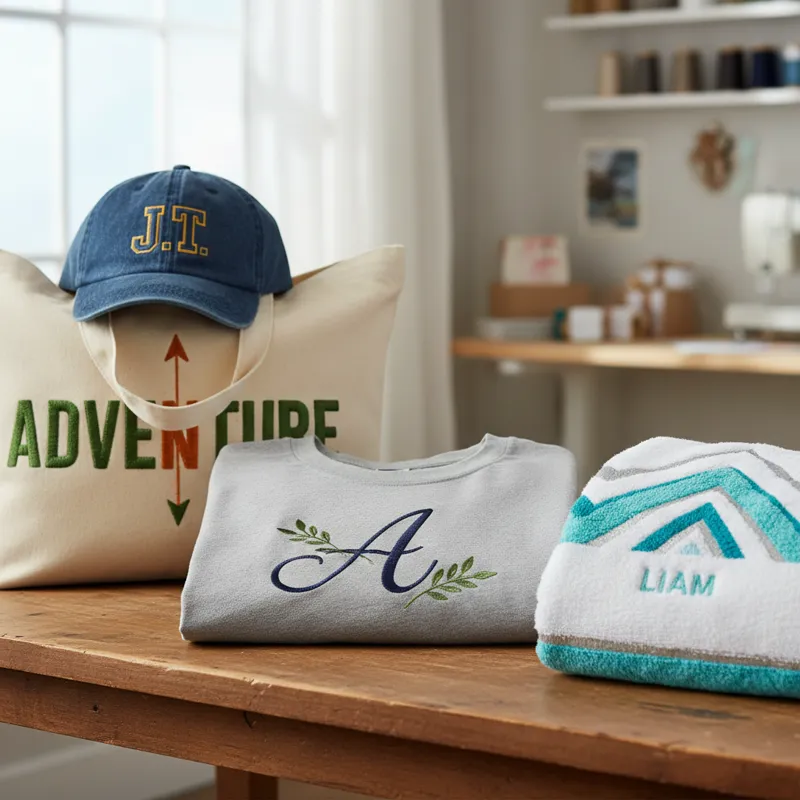
- Apparel:
- T-shirts and Hoodies: Personalize with names, slogans, or monograms.
- Denim Jackets: Add initials, a favorite word, or a custom design for a trendy statement.
- Caps and Beanies: Perfect for logos, team names, or individual initials.
- Blouse embroidery designs: Embellish collars, cuffs, or fronts of blouses with initials or delicate script.
- Home Decor:
- Pillows: Embroider quotes, family names, or decorative letters.
- Towels: Monograms are a classic choice for bath or kitchen towels.
- Wall Hangings: Create framed textual art. You can find inspiration from wall art for living room nearby stores, often featuring typographic elements.
- Vintage framed embroidery: Recreate classic monograms or phrases to suit a retro aesthetic.
- Accessories:
- Tote Bags and Pouches: Ideal for adding a name, initials, or a short message.
- Keychains: Small, fabric-based keychains can be personalized.
- Book Sleeves: Embroider titles or names onto fabric book covers.
- Gifts for Special Occasions:
- Baby Items: Onesies, blankets, and bibs with the baby’s name or initial.
- Wedding Gifts: Monograms on napkins, guest towels, or ring bearer pillows.
- Graduation Stoles: Customize with year and school initials.
What Most People Get Wrong About Letter Embroidery
Even experienced crafters can overlook common pitfalls. Here’s what people frequently get wrong:
- Underestimating Preparation: Rushing the preparation phase, especially for machine embroidery, often leads to disaster. Skipping pre-washing fabric, choosing the wrong stabilizer, or inadequate hooping causes puckering, uneven stitches, and distorted designs.
- Ignoring Fabric Type: Not all fabrics behave the same. Trying to machine embroider on a very stretchy knit without a suitable cut-away stabilizer will almost always result in a wavy, unreadable mess. Similarly, trying to hand embroider tiny letters on a coarsely woven linen can be frustrating.
- Poor Font Choice for Scale: Selecting a very thin, delicate font and then attempting to stitch it very large, or a chunky block font for tiny applications. The stitch density and detail of a font need to match the size it’s being embroidered at to ensure legibility and a clean finish.
- Incorrect Thread and Needle Pairing: Using a thick needle with fine thread, or vice-versa, can lead to skipped stitches, broken threads, or holes in the fabric. The same goes for hand embroidery—a blunt needle makes fine work difficult.
- Not Trimming Jump Stitches: For machine embroidery, failing to trim the connecting threads (jump stitches) between letters or elements results in a messy, unprofessional look. These should be trimmed flush with the fabric.
- Over-Complicating for Beginners: Many beginners jump into complex script fonts or dense fill stitches, only to get frustrated. Starting with simple backstitch outlines and block letters builds foundational skills and confidence.
The Future of Letter Embroidery in 2026
As we move through 2026, letter embroidery continues to evolve with technological advancements and shifting consumer demands:
- AI-Powered Design Tools: Expect more intuitive software leveraging AI to suggest font pairings, optimal stitch types, and even generate unique typographic designs based on user input or images. This will make complex design more accessible.
- Enhanced Machine Capabilities: Home embroidery machines will likely feature even faster speeds, larger embroidery fields, and more integrated smart features, potentially including direct-to-app control and cloud-based design libraries.
- Sustainable Materials: A growing emphasis on eco-friendly practices will push for more sustainable thread options (recycled polyester, organic cotton) and ethically sourced fabrics.
- Hyper-Personalization at Scale: The demand for truly unique items will increase, with letter embroidery playing a central role. Businesses will leverage faster machines and streamlined design processes to offer on-demand, custom-embroidered products with quicker turnaround times.
- Integration with Other Crafts: We’ll see more hybrid projects, combining letter embroidery with digital printing, laser cutting, and other textile art forms for truly mixed-media creations.
The enduring appeal of a custom initial or a meaningful word, stitched with care, will ensure letter embroidery remains a cherished craft and a valuable personalization technique.
Frequently Asked Questions About Letter Embroidery
What are the easiest letters to embroider by hand?
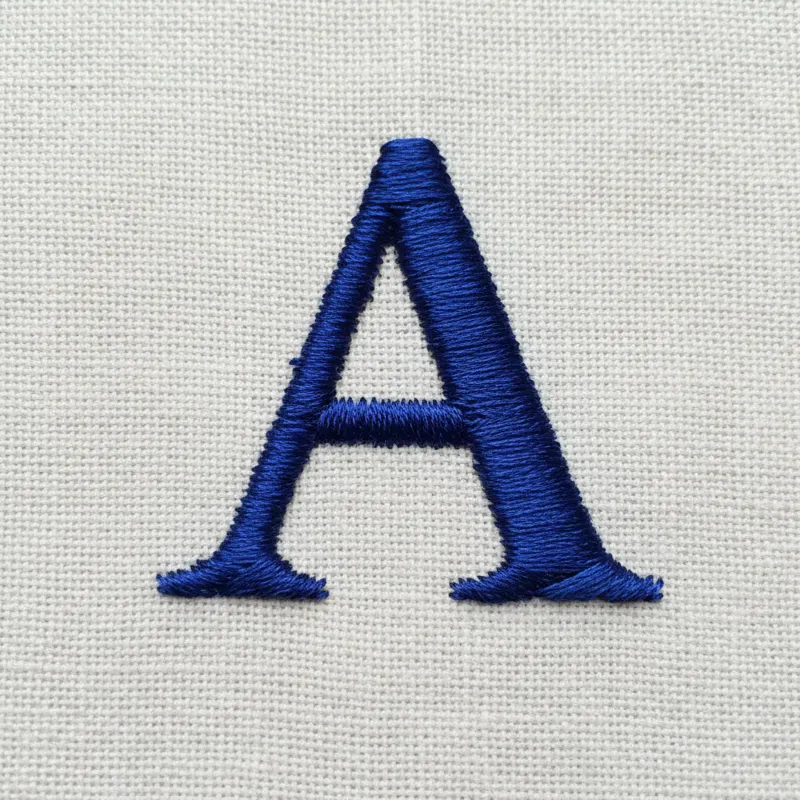
Block letters with straight lines, such as ‘I’, ‘L’, ‘T’, ‘H’, and ‘F’, are generally the easiest for hand embroiderers. They require simple straight stitches or backstitches and are forgiving for beginners. Letters with curves like ‘S’, ‘C’, ‘O’, or intricate script fonts require more practice and precision.
What kind of thread is best for letter embroidery?
For hand embroidery, six-strand divisible cotton floss is the most versatile. For machine embroidery, rayon or polyester threads are best due to their strength, sheen, and durability. Polyester is often preferred for items needing frequent washing.
Can you embroider letters on any fabric?
While you can technically embroider on most fabrics, stable woven fabrics like cotton, linen, and denim are ideal, especially for beginners. Stretchy knits (like jersey t-shirts) or delicate fabrics (like silk) require specific stabilizers and careful handling to prevent distortion and damage.
How do you make embroidered letters look neat?
Neatness comes from consistent stitch length, even thread tension, and careful design transfer. For hand embroidery, using an embroidery hoop keeps fabric taut. For machine embroidery, the correct stabilizer and proper hooping are critical to prevent puckering and ensure clean lines. Trimming all jump stitches also contributes significantly to a neat finish.
Is letter embroidery difficult for beginners?
Starting with simple block letters and basic stitches (like backstitch) makes hand letter embroidery very accessible for beginners. Machine letter embroidery has a steeper initial learning curve due to software and machine operation, but once mastered, it offers highly consistent results. Both methods become easier and more rewarding with practice.
How do I choose the right font for my letter embroidery project?
Consider the item you’re embroidering, the overall aesthetic you want to achieve, and the legibility of the font. Script fonts suit elegant items, while block fonts are great for clarity on casual wear. Always consider how intricate details will translate into stitches; some fonts might be too thin or delicate for certain fabrics or sizes. Websites like Fonts.com or Dafont.com can offer vast libraries of inspiration, though ensure licensing for commercial use if applicable, and always test stitch samples before committing to a full project.
What’s the best way to care for embroidered items?
Care instructions depend on the fabric and thread used. Generally, wash embroidered items inside out on a gentle cycle with cold water, and air dry or tumble dry on low. Avoid harsh detergents or bleach, and iron from the reverse side on a low setting. For delicate items, hand washing is often recommended. USA.gov provides useful guides on general garment care that can be adapted.