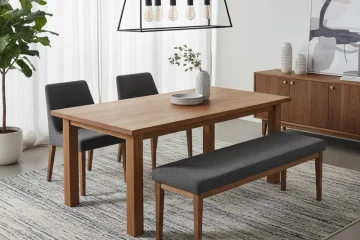
Navigating the world of creative textile work, especially when you’re looking for the right material & technique for decorative projects, often brings up the question of specialized equipment. Many hobbyists and small business owners wonder about the capabilities of a single machine for both traditional garment construction and intricate decorative stitching. The concept of machine embroidery sewing sits right at this intersection, offering a compelling blend of functionality that appeals to a broad spectrum of crafters.
Understanding Machine Embroidery Sewing: The Dual Functionality

When we talk about machine embroidery sewing, we’re typically referring to machines designed to perform both standard sewing tasks and computer-controlled embroidery. Traditionally, these were two distinct categories: a sewing machine stitches fabric together to create garments or other textile items, while an embroidery machine uses programmed designs to embellish fabric with intricate patterns. The convergence into a single unit aims to offer versatility without needing multiple large pieces of equipment.
The primary distinction lies in their core operational mechanics. A regular sewing machine requires the user to guide the fabric, controlling stitch direction and pattern manually (or via built-in utility stitches). An embroidery machine, conversely, holds the fabric taut in an embroidery hoop and moves the hoop under a stationary needle bar according to a digital design file. The machine handles precise placement, color changes, and stitch types automatically. A combined machine integrates the necessary components for both modes, allowing users to switch between them, often by detaching the embroidery unit and attaching a standard sewing foot.
The Evolution of the Combo Machine
It wasn’t that long ago, perhaps in the early 2000s, that dedicated embroidery machines were clunky, expensive, and largely separate from their sewing counterparts. As technology advanced, particularly in microprocessors and motor control, manufacturers found ways to integrate these functionalities more seamlessly. By 2026, the market offers a wide array of sophisticated machines that can switch roles with relative ease, making them an attractive option for home crafters and small business startups who want both capabilities without the significant investment in two high-end machines. This evolution means these machines are now more reliable, user-friendly, and capable of producing high-quality results in both areas.
Why Consider a Machine for Both Tasks?
The appeal of a single machine that handles both sewing and embroidery is clear: space-saving, cost-effective (compared to buying two high-end dedicated units), and convenience. For many home users, having one machine that can mend a seam, sew a quilt, and then embroider a monogram or a complex decorative motif on a garment or needle artwork project is incredibly practical.
Space and Cost Efficiency
For anyone with limited workspace, a combo unit is a significant advantage. You avoid dedicating a large footprint to two separate machines and all their associated accessories. Financially, while a high-quality combo machine isn’t cheap, it often represents a better overall value than purchasing a top-tier sewing machine and a top-tier embroidery machine individually. This can free up budget for essential supplies like stabilizers, quality threads, and design software.
Streamlined Workflow
Imagine needing to sew a garment and then add an embroidered detail. With a combo machine, you don’t have to unpack one machine and pack away another. You simply switch modes, attach the relevant accessories (embroidery unit or sewing foot), and continue working. This streamlined workflow can save a lot of time and hassle, especially for those working on complex projects like “in the hoop” embroidery designs that combine sewing steps directly within the embroidery process.
Distinguishing the Functions: Sewing vs. Embroidery
While a combined machine offers both, it’s crucial to understand that the underlying mechanisms and typical use cases for sewing and embroidery are quite different.
Traditional Sewing Operations
A sewing machine excels at constructing items. It creates strong, functional stitches that join pieces of fabric, hem edges, gather fabric, and insert zippers. Key elements of a sewing machine include:
- Feed Dogs: These teeth-like mechanisms move the fabric smoothly under the needle.
- Presser Foot: Holds the fabric down, allowing the feed dogs to move it. Different feet are designed for specific tasks (e.g., zipper foot, buttonhole foot).
- Stitch Variety: Utility stitches (straight, zigzag, buttonhole) are paramount for construction. Decorative stitches are also common, but these are typically simpler than embroidery.
- Manual Control: The user guides the fabric’s path, dictating curves, corners, and overall shape.
Machine Embroidery Operations
An embroidery machine, by contrast, focuses on aesthetic embellishment. It doesn’t primarily join fabric but rather decorates its surface. Its unique components facilitate this:
- Embroidery Unit: An arm that attaches to the machine, containing motors and mechanisms to move the embroidery hoop.
- Embroidery Hoop: Frames and holds the fabric taut, preventing puckering and ensuring precise stitch placement.
- Design Software: Essential for digitizing designs, editing, resizing, and combining patterns.
- Computer Control: The machine reads a digital embroidery file (. DST, . PES, . JEF, etc.) and executes the design automatically.
- Specialized Stitches: Embroidery uses various fill stitches, satin stitches, and running stitches to create detailed imagery and text.
Limitations of Combo Machines: What Most People Get Wrong
Here’s where practicality meets expectation. While machine embroidery sewing machines are incredibly versatile, they often come with trade-offs. What many people get wrong is expecting a combo machine to perform both tasks at the absolute highest level of dedicated, top-tier machines in each category.
Compromise in Performance
A combo machine is a master of many trades, but rarely a master of one.
- Embroidery Speed and Hoop Size: Dedicated embroidery machines, especially multi-needle industrial models, operate at much higher speeds and accommodate larger hoop sizes. Home combo units have limitations, both in speed and the maximum embroidery area they can handle, typically ranging from 4×4 inches to 8×12 inches, though some advanced models can go larger.
- Sewing Capabilities: While the sewing function is often robust, a dedicated high-end sewing machine might offer smoother fabric feeding for very heavy or delicate materials, a wider range of specialty feet, or a more expansive harp space (the area to the right of the needle) for quilting large projects.
- Complexity of Switching: While easier than switching machines, detaching and reattaching the embroidery unit, then re-threading for a different task, can still be a minor inconvenience for extensive projects in both areas.
It’s essential to manage expectations. A combo machine is excellent for hobbyists and small-scale production, but it may not match the brute force or specialized finesse of a machine designed solely for, say, heavy-duty quilting or high-volume commercial embroidery.
Maintenance and Wear
Another point often overlooked is maintenance. A machine with more moving parts and dual functionality might require more frequent servicing or careful handling. The additional mechanisms for embroidery, such as the moving hoop arm, introduce more potential points of wear over time compared to a simpler, dedicated sewing machine. Regularly cleaning and lubricating per the manufacturer’s guidelines becomes even more critical for a machine doing double duty.
Ideal Machine Features for Machine Embroidery Sewing (2026 Perspective)
Given that it’s 2026, technology has pushed the envelope. When selecting a machine for both sewing and embroidery, look for specific features that enhance both functionality and user experience.
For Sewing Excellence:
- Ample Harp Space: Look for at least 8 inches to the right of the needle for comfortable sewing of larger projects like quilts or curtains.
- Good Lighting: Multiple LED lights around the needle area and workspace are crucial for visibility.
- Automatic Thread Cutter: A simple button press to cut both top and bobbin threads saves time and effort.
- Robust Feed System: A high-quality box feed or integrated dual-feed system (like AcuFeed Flex or IDT) ensures even feeding of various fabrics, from slippery silks to thick denim.
- Knee Lift: This allows you to raise the presser foot with your knee, keeping your hands free to manipulate fabric.
- Wide Array of Presser Feet: Ensure the machine comes with or has available a good selection for various sewing tasks.
- Stitch Precision and Speed Control: Consistent stitch quality at various speeds, and precise control over that speed.
For Embroidery Prowess:
- Large Embroidery Area (Hoop Size): This is perhaps the most critical feature. Aim for at least 5×7 inches, but ideally 8×12 inches or larger if your budget allows. Larger hoops reduce the need for re-hooping on bigger designs.
- Fast Embroidery Speeds: Measured in stitches per minute (SPM). While home machines won’t match industrial speeds, look for higher SPM ratings that don’t compromise stitch quality.
- On-Screen Editing Capabilities: The ability to resize, rotate, combine, and add text directly on the machine’s touchscreen is invaluable.
- Connectivity (USB/Wi-Fi): USB ports are standard for transferring designs. Wi-Fi connectivity, increasingly common by 2026, allows for wireless transfer from a computer or even direct download from cloud services.
- Automatic Needle Threader: A huge time-saver, especially during multi-color embroidery designs.
- Thread Break Sensor: Alerts you if the top thread breaks, preventing wasted stitches.
- Jump Stitch Trimming: Machines that automatically trim jump stitches between design elements save significant post-embroidery cleanup time.
- Integrated Software/Compatibility: Ensure the machine is compatible with popular embroidery software for design creation and editing.
Shared Features for Both Modes:
- Clear Touchscreen Display: Intuitive navigation, design selection, and settings adjustment.
- Built-in Tutorials/Guides: Helpful for both beginners and experienced users needing a quick reference.
- Durable Construction: A heavy-duty metal frame reduces vibration and increases stability, especially at high speeds.
- Quiet Operation: Important for long sewing or embroidery sessions.
Essential Accessories and Supplies for Machine Embroidery Sewing
Success in both sewing and machine embroidery relies heavily on having the right tools and consumables. Don’t skimp on these.
For Machine Embroidery:
- Stabilizers: The unsung hero of embroidery.
- Cut-away: Permanent, for stretchy fabrics like knits, providing long-term support.
- Tear-away: Temporary, for stable wovens, easily removed after stitching.
- Wash-away (Water-soluble): Ideal for delicate fabrics, lace, or topping for textured fabrics to prevent stitches from sinking.
- Heat-away: Another temporary option that vanishes with heat.
The choice depends on the fabric, design density, and desired finish. Learning about stabilizers is crucial for any successful embroidery project.
- Embroidery Threads:
- Rayon: Produces a high-sheen, silky finish, vibrant colors.
- Polyester: Durable, colorfast (resistant to fading from bleach/sun), slightly less sheen than rayon, excellent for items that will be washed frequently.
- Metallic: Adds sparkle and effect, but can be finicky to work with. Requires special needles and slower speeds.
- Specialty threads: Variegated, glow-in-the-dark, matte finish.
Ensure you have a good selection of colors and types. For the bobbin, use a specialized bobbin thread (often thinner polyester) unless the design calls for matching top thread in the bobbin.
- Embroidery Needles: Ballpoint for knits, sharp for wovens, titanium-coated for durability, and specialty needles for metallic or heavy threads. The right needle prevents skipped stitches and fabric damage.
- Embroidery Software: While machines have built-in editing, dedicated software (e.g., Embrilliance, Hatch) on your computer allows for more advanced design creation, digitizing (converting images to stitch files), font manipulation, and design combination. This is where you can truly unlock creative potential and even produce your own blouse embroidery designs.
- Hoops: Beyond the standard hoops included, consider specialty hoops for specific applications, like hat hoops, sleeve hoops, or magnetic hoops for easier hooping.
- Adhesives and Sprays: Temporary fabric adhesive sprays can help secure fabric to stabilizer, especially for items difficult to hoop.
For Sewing:
- Quality Threads: All-purpose polyester thread is a workhorse, but consider cotton, silk, or specialty threads depending on your project and fabric.
- Sewing Needles: A variety of sizes and types (universal, sharp, ballpoint, denim, quilting) to match different fabrics and projects. Change them regularly!
- Bobbins: Have plenty of pre-wound bobbins, especially if you work with multiple thread colors.
- Presser Feet: Build a collection beyond the basics: zipper foot, buttonhole foot, walking foot (for quilting), invisible zipper foot, overcasting foot.
- Rotary Cutter, Mat, and Rulers: Essential for precise fabric cutting, especially for quilting and apparel.
- Fabric Scissors: Dedicated, sharp scissors for fabric only.
- Pins and Clips: For holding fabric layers together.
- Seam Ripper: Because mistakes happen, and a good seam ripper makes corrections less painful.
Maximizing Your Machine Embroidery Sewing Experience
To get the most out of your versatile machine, a structured approach helps.
Learn Your Machine Inside Out
Read the manual. Seriously. Modern machines are complex instruments, and the manual often holds keys to unlocking advanced features, troubleshooting, and proper maintenance. Many manufacturers also provide online video tutorials, which can be incredibly helpful for visual learners.
Practice and Experiment
Don’t jump straight into a complex project. Start with simple designs on scrap fabric. Experiment with different stabilizers, threads, and needle combinations to see how they interact with various fabrics. This iterative process builds confidence and understanding. For beginners, understanding how hard is embroidery often comes down to this initial learning curve.
Understanding Fabric and Design Interaction
Embroidery success is highly dependent on matching the design’s density and stitch type to the fabric and stabilizer. A dense design on a lightweight knit without proper stabilization will likely pucker badly. Similarly, fine details on a highly textured fabric may get lost. Consider the stretch, weave, and weight of your fabric when selecting designs and supplies.
Maintenance is Key
Regular cleaning of lint and thread debris from the bobbin area, tension disks, and feed dogs is vital. Lubricate moving parts according to the manufacturer’s instructions. A well-maintained machine runs smoother, produces better stitches, and lasts longer. Think of it as tuning a precision instrument.
In the Hoop (ITH) Projects: Where Sewing Meets Embroidery
One of the most exciting applications for a combined machine is “in the hoop” (ITH) projects. These designs are entirely or mostly completed while the fabric is still hooped in the embroidery machine. They often involve multiple steps where the machine stitches out a design, then prompts you to place another piece of fabric, trim, or add batting, and then continues stitching to form a complete item.
Common ITH projects include:
- Coasters and mug rugs
- Small bags and pouches
- Appliqué designs with stitched edges
- Key fobs and tags
- Felt ornaments
- Small stuffed animals or dolls
These projects truly showcase the seamless integration of machine embroidery sewing. You’re not just embellishing; you’re constructing. The precision of the embroidery machine ensures perfect alignment for sewing steps that would be challenging to do manually.
Future Trends in Machine Embroidery Sewing (Beyond 2026)
Looking ahead, we can anticipate further advancements in this segment. Imagine even more intuitive AI-driven design suggestions, predictive maintenance alerts, or seamless integration with smart home ecosystems. Virtual reality or augmented reality could play a role in design placement, allowing you to preview how an embroidery design will look on a garment before a single stitch is made. The software will continue to evolve, making complex digitizing more accessible to the average user, and perhaps even offering subscription models for design libraries or software updates directly from the machine. The goal remains consistent: to make the creative process more efficient, precise, and enjoyable for everyone engaged in fabric arts.
Things People Usually Miss
Many users focus heavily on the machine itself and overlook the critical role of external factors in achieving professional-looking results. Here’s what’s often missed:
- Needle Quality and Freshness: A dull or bent needle (which can happen faster than you think, especially when hitting pins or sewing through thick layers) can cause skipped stitches, thread breaks, and fabric damage. Replace needles frequently, ideally after every 8-10 hours of sewing or after a major embroidery project.
- Thread Quality: Cheap thread can wreak havoc on a machine. It produces excessive lint, breaks easily, and can leave inconsistent stitches. Investing in high-quality, reputable brands for both sewing and embroidery threads is a non-negotiable for smooth operation and beautiful results.
- Bobbin Winding: An unevenly wound bobbin can lead to tension issues, nesting (tangled threads on the underside), and skipped stitches. Most machines have specific instructions for bobbin winding; follow them precisely. Some advanced machines even have separate bobbin winding motors that allow you to wind a bobbin while the machine is embroidering.
- Environmental Factors: Humidity and temperature can affect thread and fabric. Storing threads properly (away from direct sunlight and extreme temperatures) helps maintain their integrity. Dust is also a machine’s enemy, so covering your machine when not in use is a simple but effective preventive measure.
- The Importance of Test Swatches: Before embroidering on your final project, always do a test stitch-out on a scrap of the exact fabric you’ll be using, with the same stabilizer and thread. This allows you to check tension, design density, and how the fabric behaves. It’s an invaluable step that saves countless headaches.
Frequently Asked Questions About Machine Embroidery Sewing
Can a regular sewing machine be converted into an embroidery machine?
No, not effectively. While some very basic sewing machines might have decorative stitches, they lack the specialized embroidery unit, computer control, and hoop movement system required for true machine embroidery. You need a machine specifically designed for embroidery, either a dedicated unit or a combo machine.
Are combo sewing and embroidery machines hard to learn?
Like any sophisticated tool, there’s a learning curve. However, modern machines are designed with user-friendly interfaces and often include onboard tutorials. The basic sewing functions are usually straightforward. Embroidery requires understanding hooping, stabilizers, thread types, and design software, which takes practice. Most users find they can get comfortable with basic functions relatively quickly, but mastering advanced techniques takes time and experimentation.
What’s the typical cost of a good machine embroidery sewing machine in 2026?
The price range for combo machines can vary significantly. Entry-level models for home use might start around $800-$1,500. Mid-range machines with larger hoop sizes and more features generally fall between $2,000-$5,000. High-end, professional-grade models with advanced software integration and expansive embroidery areas can go upwards of $10,000 or more. Your budget will heavily influence the features and capabilities you get.
Do I need special software for machine embroidery?
Most machines come with basic editing capabilities on their touchscreens. However, to truly create custom designs, digitize images, or make complex alterations, dedicated embroidery software on a computer is highly recommended. Many popular software brands offer different tiers of functionality, from basic editing to advanced digitizing. You can learn more about how design software interacts with these machines from reputable sources like Wikipedia’s entry on embroidery machines.
How often should I service my machine?
It’s generally recommended to have your machine serviced by a professional technician every 1-2 years, especially if you use it frequently. Between professional services, regular cleaning and lubrication (as per your machine’s manual) are essential for maintaining optimal performance and extending its lifespan. A well-cared-for machine ensures consistent stitch quality, whether you’re working on cool needlepoint kits or complex garment construction.