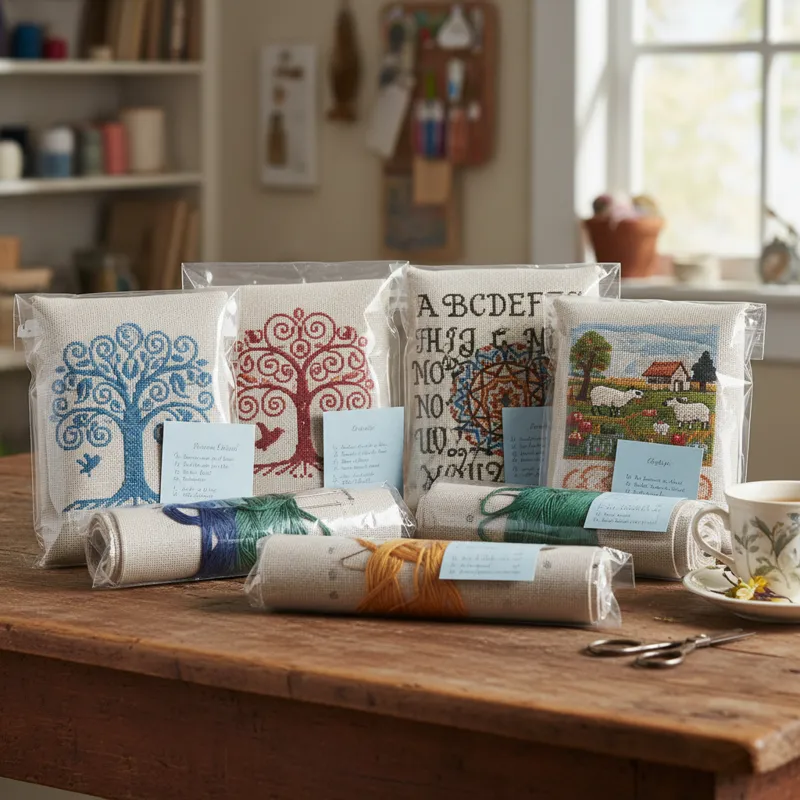
Needlepoint sampler kits offer a structured, engaging entry point into the world of textile art. For many, they represent the ideal blend of creative exploration and skill development, providing everything needed to complete a project from start to finish. In 2026, as interest in handmade crafts continues to surge, these kits remain a foundational choice for both newcomers eager to learn foundational stitches and experienced stitchers looking to practice new techniques or complete a quick project. Unlike free-form needlepoint, a sampler kit specifically guides you through a variety of stitches, often arranged in distinct bands or sections, making the learning process clear and manageable.
They distill the often-complex art of needlepoint into an accessible package, removing the guesswork involved in sourcing individual components. Whether you’re aiming to create a piece of fabric art for wall display or simply looking for a relaxing, tactile hobby, understanding the nuances of these kits will significantly enhance your experience and the quality of your finished work.
Why Needlepoint Sampler Kits Are Your Starting Point

Opting for a needlepoint sampler kit, especially as a beginner, streamlines the entire process. It eliminates the initial overwhelm of selecting the right materials—canvas, threads, needles, and patterns—each with its own specifications. Instead, you receive a curated collection designed to work harmoniously, allowing you to focus purely on the stitching itself.
The primary benefit of a sampler kit is its inherent educational value. Samplers, by definition, feature a range of different stitches. This design choice is deliberate, intended to teach and reinforce various needlepoint techniques within a single project. You’ll likely encounter the fundamental tent stitch variations (continental, half-cross, basketweave), and perhaps several more decorative stitches, all demonstrated with clear instructions. This progressive learning environment builds confidence step by step.
Furthermore, kits ensure material compatibility. The thread count, fiber type, and color palette are chosen specifically to suit the canvas mesh size, preventing common issues like inadequate coverage or threads that are too bulky for the chosen fabric. This thoughtful curation results in a more satisfying stitching experience and a professional-looking finished piece.
Deconstructing the Kit: Essential Components You’ll Find
A typical needlepoint sampler kit includes several core components, each vital to the success of your project. Understanding what each part contributes helps you appreciate the kit’s design and manage your expectations.
- The Canvas: This is the foundation of your needlepoint. It’s a stiff, open-weave fabric, usually made from cotton or linen, pre-printed with the sampler design. The mesh size (number of threads per inch) determines the fineness of your stitches and the overall scale of the finished piece.
- Needlepoint Threads: Kits provide a selection of threads in the colors required for the design. These can be various types, most commonly Persian wool, tapestry wool, cotton floss, or sometimes silk or specialty fibers. The quantity is usually generous enough to complete the project without running out.
- Tapestry Needle(s): You’ll receive one or more blunt-tipped needles. Tapestry needles have large eyes for easy threading of thicker yarns and blunt tips to glide through the canvas mesh without piercing the fibers, which is crucial for uniform stitches.
- The Pattern or Chart: While many modern sampler kits feature pre-printed canvases, a separate chart might also be included, especially for more complex designs. This chart serves as a detailed map, often with symbols corresponding to thread colors, guiding you in placing each stitch.
- Instructions: This is arguably the most critical component for beginners. Comprehensive instructions should detail how to start and end threads, explain each stitch included in the sampler, and often provide tips on tension, blocking, and finishing.
Understanding Canvas: Mesh Counts and Materials
The canvas in your needlepoint sampler kit dictates much about the project’s feel and finished look. It’s not just a blank slate; it’s an active participant in your stitching journey.
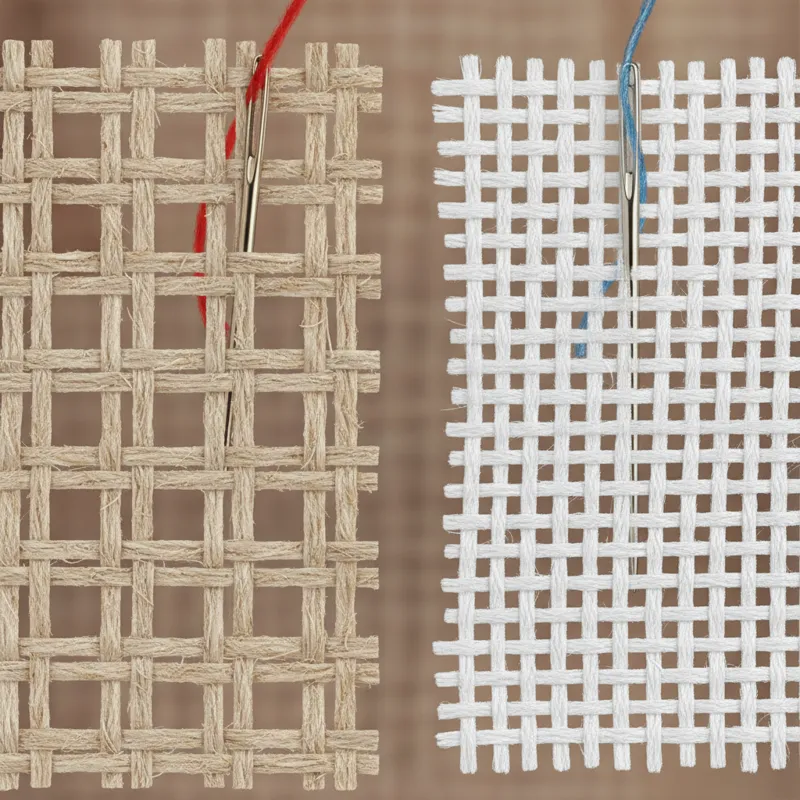
Canvas Types:
- Mono Canvas: This is the most common type for printed designs. It has single threads woven in a consistent, even grid. It’s durable and provides a clear base for most needlepoint projects.
- Interlock Canvas: Similar to mono, but the horizontal threads “interlock” with the vertical ones, making it very stable and less prone to distortion. It’s excellent for beginners as it holds its shape well.
- Penelope Canvas (or Duo Canvas): Features pairs of threads woven together, creating both larger (double-thread) and smaller (single-thread) holes. This allows you to stitch both petit point (fine detail) and gros point (larger, quicker coverage) on the same canvas. It’s less common in beginner sampler kits but offers versatility.
Mesh Counts:
The “mesh count” refers to the number of threads (or holes) per inch. A lower number means a coarser canvas with larger holes, while a higher number indicates a finer canvas with smaller, more numerous holes. This directly impacts the size of your stitches and the level of detail achievable:
- 10-Count and 12-Count: These are ideal for beginners. The larger holes are easier to see and work with, and the project finishes more quickly. Threads like tapestry wool or multiple strands of Persian wool are often used.
- 13-Count and 14-Count: A popular intermediate choice, offering a good balance between speed and detail. They’re versatile for various thread types.
- 18-Count: This is considered a finer mesh, suitable for more detailed designs and experienced stitchers. It results in a smaller, more intricate finished piece, often requiring finer threads like single-ply Persian wool or cotton floss.
When selecting a sampler kit, consider the canvas mesh. If you’re new to needlepoint, sticking to a 10- or 12-count canvas will make your initial experience far more enjoyable and less prone to frustration.
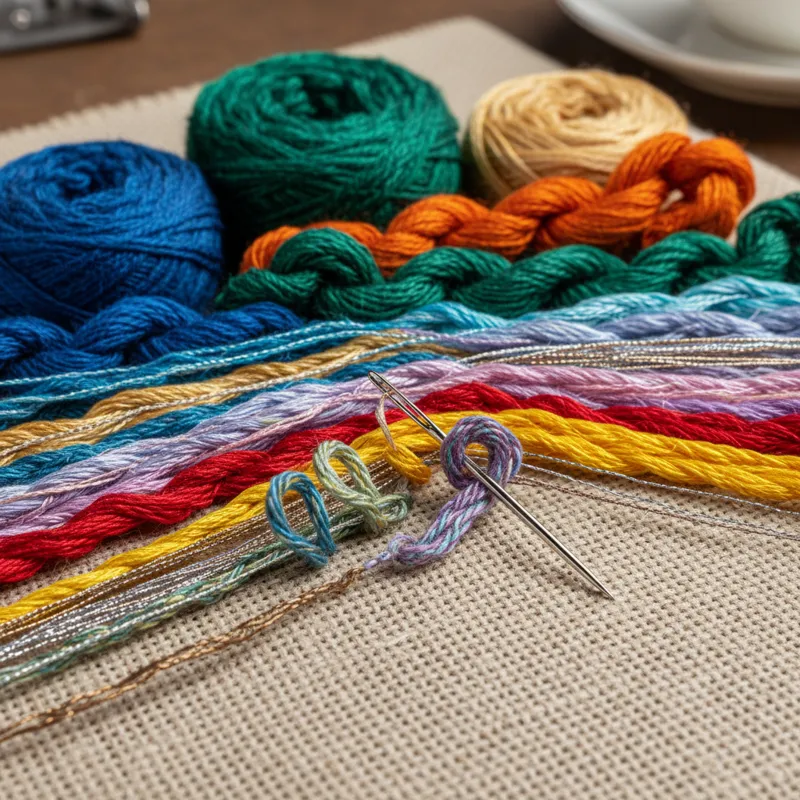
Thread Types and Their Impact on Your Sampler
The threads provided in your needlepoint sampler kits are not just about color; their fiber content, ply, and texture significantly influence the look, feel, and durability of your finished sampler. Knowing the characteristics of each type helps you appreciate why a particular thread was chosen for a specific kit.
- Tapestry Wool: This is a non-divisible, plied wool yarn, typically four-ply. It’s durable, gives excellent coverage on 10- to 12-count canvas, and has a matte finish. It’s a workhorse thread, often seen in larger projects or those needing robust texture.
- Persian Wool: A three-ply wool yarn that you can separate (divide) into individual plies. This versatility makes it suitable for a wider range of mesh counts. Using one or two plies on an 18-count canvas creates fine detail, while using all three plies provides good coverage on 10- or 12-count. Persian wool offers a slightly softer, less uniform texture than tapestry wool.
- Cotton Floss (stranded cotton): Composed of six divisible strands, cotton floss provides a smooth, lustrous finish. It’s excellent for finer mesh canvases (14-count and up) where you want a crisp, defined stitch. The ability to vary the number of strands used allows for precise coverage. You might find similar hanky embroidery design kits utilize this versatile thread type.
- Silk Threads: Known for their luxurious sheen and vibrant colors, silk threads (often stranded) create an elegant, reflective surface. They are typically used for accenting or for finer, more delicate samplers on higher mesh counts.
- Metallic Threads: These add sparkle and highlight areas of a design. They can be a bit more challenging to work with due to their tendency to fray or kink, but they offer a unique visual impact. Many kits incorporating metallic threads suggest shorter thread lengths to minimize wear.
The choice of thread in your kit directly impacts how stitches lay, how light reflects off the finished piece, and the overall longevity of your needlework. High-quality threads resist fading and provide consistent color, ensuring your sampler remains beautiful for years to come.
The Heart of the Sampler: The Stitches You’ll Learn
The true value of needlepoint sampler kits lies in their educational design, specifically curated to introduce you to a repertoire of stitches. Beyond mere execution, understanding the mechanics and applications of each stitch is key to mastering needlepoint. Learning about the foundational stitches is also critical for appreciating other needle artwork forms.
Foundational Tent Stitches:
These are the most common and often the first stitches you’ll master. They are diagonal stitches, each covering a single intersection of canvas mesh.
- Half-Cross Stitch: This is the simplest of the tent stitches. You work it quickly, creating a single diagonal thread from the bottom left to the top right. While fast, it uses less thread and can sometimes leave more canvas visible. It’s best suited for areas that won’t experience much wear or when speed is a priority.
- Continental Stitch: A more robust diagonal stitch that covers the canvas more completely and is less prone to distortion than half-cross. It creates a solid foundation on the front and a diagonal line of thread on the back, offering good coverage and durability. It’s worked in horizontal or vertical rows.
- Basketweave Stitch: The gold standard for large areas of color. Basketweave works diagonally across the canvas, producing a sturdy, woven-like texture on the back of the work. This unique back structure helps to prevent the canvas from distorting and creates a very even tension on the front, leading to a professional finish. It’s an essential stitch for any serious needlepointer.
Decorative and Specialty Stitches:
Beyond the tent stitches, many sampler kits will introduce you to more complex and visually interesting options. These stitches add texture, depth, and character to your work.
- Bargello Stitch: A flame-like stitch using straight stitches of varying lengths that skip over a number of canvas threads, creating distinct patterns.
- Diagonal Mosaic Stitch: A small square formed by two short diagonal stitches and two longer ones, creating a textured pattern.
- Rhodes Stitch: A circular or square stitch that covers multiple canvas intersections, creating a raised, dimensional effect.
- French Knot: While more common in embroidery, some needlepoint samplers include French knots for small, raised dots or textured details.
Your kit’s instructions will meticulously guide you through each new stitch. Pay close attention to the diagrams and practice on a scrap piece if needed. Understanding the underlying structure of these stitches will not only help you complete your sampler but also empower you to tackle more ambitious needlepoint designs in the future.
Choosing Your First Sampler Kit: A Practical Guide for Beginners
Selecting your inaugural needlepoint sampler kit can feel a bit overwhelming given the variety available. However, a structured approach helps ensure your first experience is positive and encouraging. The goal is to choose a kit that challenges you enough to learn but not so much that it leads to frustration.
1. Assess Your Skill Level (Honestly):
- Absolute Beginner: Look for kits explicitly labeled “beginner” or “first project.” These typically feature a 10- or 12-count canvas, primarily utilize the tent stitch (especially continental or basketweave), have clear, large-print instructions, and often use fewer colors. The design will likely be geometric or have large blocks of color.
- Advanced Beginner/Intermediate: If you’ve done some cross-stitch or other forms of embroidery, you might be comfortable with a 13- or 14-count canvas. These kits may introduce a few more decorative stitches and a slightly more complex color palette or design.
2. Consider Design Preference and Aesthetics:
Since you’ll spend many hours with this project, choose a design that genuinely appeals to you. Samplers come in every style imaginable:
- Traditional/Historic: Often featuring alphabets, numbers, mottoes, or classic motifs, reminiscent of vintage tapestries.
- Modern/Geometric: Bold colors, clean lines, and abstract patterns.
- Nature/Floral: Botanical themes, animals, or landscapes.
- Whimsical/Novelty: Fun, quirky designs that might incorporate contemporary elements.
The joy of needlepoint comes from creating something you love. Don’t settle for a design you don’t connect with, even if the skill level seems perfect.
3. Evaluate Project Size and Time Commitment:
Smaller kits are excellent for beginners. A project that measures 6×6 inches or 8×10 inches is typically manageable and can be completed relatively quickly. Larger projects, while rewarding, require significant time and commitment, which can be daunting for a first-timer. Check the estimated completion time if provided, or gauge by the canvas size.
4. Set a Realistic Budget:
Needlepoint sampler kits vary in price based on materials quality, design complexity, and brand. Beginner kits are generally more affordable, while those with specialty threads (silk, metallics) or intricate designs will cost more. You don’t need the most expensive kit to have a great first experience. Focus on value: good quality materials and clear instructions are paramount.
5. Read Reviews and Research Brands:
Before purchasing, a quick search for reviews of specific kits or brands can be highly informative. Look for comments on the clarity of instructions, thread quality, and overall user satisfaction. Reputable brands often provide excellent customer support if you encounter issues.
By carefully considering these factors, you can confidently select a needlepoint sampler kit that sets you up for success and cultivates a lasting love for this craft.
Evaluating Kit Quality: What to Look For
The adage “you get what you pay for” often holds true in the world of needlepoint sampler kits. While budget is a factor, investing in a quality kit can significantly impact your enjoyment and the final outcome of your project. Here’s what a knowledgeable enthusiast looks for:
1. Quality of Materials:
- Canvas: A good canvas will be stiff enough to hold its shape but not so rigid that it’s difficult to stitch. The mesh should be consistently woven, with no noticeably larger or smaller holes, ensuring uniform stitch tension. The printing on pre-printed canvases should be clear, without smudges or misalignments. For historical context on textile production, you might find information on textile manufacturing processes on Wikipedia insightful.
- Threads: High-quality threads are smooth, consistently dyed, and resist fraying or breaking easily. Wool threads should feel soft and have good loft, while cotton or silk should have a natural sheen. Ensure there’s enough thread provided; a good kit often includes a slight overage to account for variations in stitching tension.
- Needles: While seemingly minor, a good tapestry needle is smooth, free of burrs, and has a comfortably sized eye.
2. Clarity and Comprehensiveness of Instructions:
This is where many kits differentiate themselves. Excellent instructions are:
- Step-by-step: Guiding you from beginning to end, including how to start/end threads.
- Clearly illustrated: Diagrams for each stitch are crucial, especially for visual learners.
- Detailed: Explaining not just how to do a stitch, but also offering tips on tension, common pitfalls, and finishing techniques like blocking.
- Easy to Read: Large font, logical layout, and unambiguous language.
3. Design Integrity and Aesthetic:
A high-quality kit features a well-conceived design. Colors should be harmonious, and the overall composition should be pleasing. If the canvas is pre-printed, the colors on the canvas should closely match the thread colors. The design should also be appropriate for the canvas mesh count – intricate details on a coarse canvas will look pixelated, while simple designs on a fine canvas might seem underutilized.
4. Brand Reputation and Customer Support:
Established needlepoint brands often have a reputation for consistent quality. They invest in better materials and professional designers. Look for brands known for their instructional clarity and responsive customer service. A quick search for “best needlepoint kit brands 2026” can yield current insights.
Ultimately, a quality kit feels thoughtful. Every component seems purposefully chosen to contribute to a successful and enjoyable stitching experience. Paying attention to these details will ensure your investment in a needlepoint sampler kit is a wise one.
Beyond the Kit: Customization and Embellishment
While needlepoint sampler kits provide a complete experience, their true potential often blossoms when you move beyond the prescribed pattern. Customization and embellishment allow you to inject your personality into the project, transforming a standard kit into a unique piece of needle artwork.
Personalizing Your Sampler:
- Adding Initials or Dates: Many traditional samplers include the stitcher’s initials and the completion date. If your kit doesn’t include a space, you can often find a blank band or corner to add these details using a simple alphabet chart. This makes the piece distinctly yours.
- Modifying Colors: Feeling adventurous? If your kit includes a chart, you can swap out thread colors for hues you prefer. Be mindful of contrast and how different colors will interact. For pre-printed canvases, this is trickier but not impossible if you have a good eye for color.
- Integrating Different Stitches: Once you’ve mastered the stitches taught in the kit, you might experiment by replacing a simple area of tent stitch with a more elaborate decorative stitch you’ve learned elsewhere. Just ensure the new stitch is appropriate for the canvas mesh.
Embellishing for Extra Flair:
Even a basic sampler can be elevated with thoughtful additions:
- Beads: Small seed beads or bugle beads can be sewn onto the finished needlepoint to add sparkle and texture. Attach them securely with a fine needle and matching thread. Kits for bead embroidery templates can offer great inspiration.
- Metallic Threads: If your kit didn’t include them, you could outline certain motifs or add highlights with a metallic thread to catch the light.
- Ribbon Embellishment: Tiny satin ribbons can be woven through finished stitches or used to create small bows or floral elements.
- Small Charms: For whimsical samplers, consider attaching small, lightweight charms (e.g., a tiny key, a star) to the surface with a small stitch.
Before adding any permanent embellishments, always consider the long-term care of your piece. Will the embellishments interfere with framing or cleaning? A little forethought ensures your personalized sampler remains a cherished item.
Common Misconceptions and What People Often Overlook
Even with comprehensive needlepoint sampler kits, beginners (and sometimes experienced stitchers) can fall prey to common misconceptions or overlook critical details. Addressing these can prevent frustration and improve your results.
1. Misconception: All stitches are the same on the back.
Reality: The back of your needlepoint should reflect the stitch you’re using. Basketweave creates a distinct woven pattern on the back, while continental creates diagonal lines, and half-cross leaves largely bare canvas. Understanding this helps you verify your technique and achieve even tension.
2. Overlooking: Consistent Thread Tension.
What people miss: Pulling the thread too tight or leaving it too loose.Impact: Uneven tension leads to puckering or pulling of the canvas (too tight) or stitches that don’t fully cover the canvas (too loose). This is perhaps the single most common issue for beginners.Solution: Aim for a consistent, gentle tension. Each stitch should lay flat and cover its corresponding canvas intersection without distorting the fabric.
3. Misconception: You need to use very long lengths of thread.
Reality: Long lengths (more than 18-24 inches) increase friction, causing threads to fray, twist, and thin as you pull them through the canvas multiple times.Solution: Use shorter lengths. While it means re-threading more often, your threads will remain in better condition, resulting in smoother, neater stitches.
4. Overlooking: The Importance of Blocking.
What people miss: Many think needlepoint should naturally lay perfectly flat.Impact: Even experienced stitchers can cause some canvas distortion. Blocking (wetting and gently stretching/pinning the finished piece to its original shape) is crucial for a professional, flat finish, especially before framing.Solution: Almost every needlepoint piece benefits from blocking. Don’t skip this step if you want your sampler to look its best.
5. Misconception: All needles are interchangeable.
Reality: While your kit provides the correct needle, if you replace it, ensure you use a tapestry needle with a blunt tip.Impact: A sharp embroidery needle will pierce canvas threads, leading to inconsistent stitches and potential damage to the canvas.Solution: Always use a blunt tapestry needle for needlepoint. A useful guide to different needle types can be found on resources like Craftsy’s blog.
6. Overlooking: Reading the instructions completely before starting.
What people miss: Jumping straight into stitching without fully understanding the overall plan.Impact: This can lead to incorrect stitch placement, running out of thread in a specific color, or needing to undo significant work.Solution: Take 10-15 minutes to read through all instructions, familiarize yourself with diagrams, and understand the flow of the project. Pay special attention to how to manage your threads on the back of the canvas to avoid large knots or messy tangles, which can show through the front.
By being aware of these common pitfalls, you can approach your needlepoint sampler kit with greater insight and achieve a more satisfying result.
Caring for Your Finished Sampler
Completing a needlepoint sampler kit is a significant accomplishment. Protecting your finished piece ensures it remains a cherished item, whether it’s destined for display or as a thoughtful gift. Proper care involves both initial finishing and ongoing maintenance.
1. Blocking for a Professional Finish:
As mentioned, blocking is essential. Even with perfect tension, canvas can distort slightly during stitching. Blocking reshapes your needlepoint to its original dimensions, squareness, and flatness. This usually involves dampening the finished piece and carefully stretching and pinning it to a flat, padded surface (like foam core or a blocking board) until it dries completely. Your kit instructions may provide specific blocking advice.
2. Framing and Display:
Framing is the most common way to display needlepoint. For best results, use a professional framer experienced with textiles. They can ensure the piece is stretched properly, mounted without damage, and protected behind UV-filtering glass to prevent fading. If framing yourself, use acid-free materials for mounting boards and backing to prevent long-term discoloration of your needlework.
Other display options include:
- Pillows: A common and beautiful way to use needlepoint, often requiring backing fabric and an insert.
- Ornaments or Small Accessories: Smaller samplers can be finished into decorative items or parts of macrame wall hanging art pieces if the size is appropriate.
- Box Tops or Inserts: Adding a finished piece to a decorative box.
3. Cleaning and Storage:
Needlepoint is delicate and generally not suitable for machine washing. For simple dust removal, use a soft brush or a low-suction vacuum cleaner with an appropriate attachment. For deeper cleaning, especially for older or heavily soiled pieces, consult a professional textile conservator. Avoid harsh chemicals or direct spot cleaning, which can damage fibers or cause colors to bleed. When storing, wrap your sampler in acid-free tissue paper or a clean cotton sheet and lay it flat in a cool, dry place away from direct sunlight and pests. The National Gallery of Art provides excellent resources on textile conservation, which can be adapted for personal needlework.
By giving your finished sampler the care it deserves, you ensure its beauty and integrity for years to come, allowing it to become a lasting testament to your skill and creativity.
The Evolution of Sampler Kits in 2026
The world of needlepoint sampler kits, while rooted in tradition, has continued to evolve and adapt in 2026, reflecting broader trends in crafting, technology, and sustainability. Manufacturers are increasingly catering to a diverse audience, blending classic appeal with contemporary demands.
Digital Integration:
Many modern kits now include or offer access to digital resources. Instead of just a printed booklet, you might find QR codes linking to:
- Video Tutorials: Step-by-step videos demonstrating each stitch, which is invaluable for visual learners.
- Interactive Charts: Digital patterns that allow you to zoom in, track your progress, and even change color palettes virtually.
- Online Communities: Forums or social media groups where stitchers can share progress, ask questions, and connect with fellow enthusiasts. This fosters a sense of community that enhances the solo crafting experience.
Focus on Sustainability and Ethical Sourcing:
Consumers in 2026 are more conscious of environmental impact. Needlepoint kit producers are responding by:
- Eco-friendly Materials: Offering kits with organic cotton canvas, sustainably sourced wools, or recycled fiber blends.
- Minimalist Packaging: Reducing plastic and excessive packaging, opting for recyclable or biodegradable alternatives.
- Ethical Production: Emphasizing fair labor practices in the sourcing and manufacturing of threads and canvases.
Contemporary Designs and Inclusivity:
While traditional designs remain popular, there’s a noticeable shift towards more modern, often minimalist, and inclusive designs. Artists are creating samplers that:
- Reflect Current Trends: Incorporating pop culture references, abstract art, or modern typography.
- Embrace Diverse Themes: Moving beyond historical motifs to include a wider range of cultural, social, and personal expressions.
- Collaborations: Kits are increasingly emerging from collaborations between renowned textile artists and manufacturers, bringing fresh perspectives to the craft.
“Build Your Own Kit” Options:
Some retailers now offer more flexible options where you can select your canvas, thread colors, and pattern separately, allowing for a highly personalized “sampler kit” experience tailored to your exact preferences and skill level.
These developments ensure that needlepoint sampler kits remain relevant, accessible, and appealing to a new generation of crafters, making it easier than ever to explore this timeless art form.
Frequently Asked Questions About Needlepoint Sampler Kits
Q: What’s the difference between needlepoint and cross-stitch?
A: While both are forms of counted thread embroidery, the fundamental difference lies in the stitch and the canvas. Cross-stitch uses a single ‘X’ shaped stitch on an evenweave fabric (like Aida or linen), often with square holes. Needlepoint uses a variety of stitches, primarily the diagonal tent stitch variations, on a stiffer, open-mesh canvas. Needlepoint stitches typically cover the entire canvas, while cross-stitch often leaves background fabric visible.
Q: Can I wash a finished needlepoint sampler?
A: Generally, no. Most needlepoint, especially with wool or silk threads, should not be machine washed or submerged in water beyond a light blocking process. For cleaning, gentle dusting is recommended. For deeper cleaning, consult a professional textile conservator to avoid damage, color bleeding, or shrinking.
Q: What if I run out of thread for a color in my kit?
A: High-quality kits usually provide a generous amount of thread. If you do run out, check if the kit manufacturer offers replacement threads. If not, you’ll need to purchase a matching skein from a local craft store. Bring a piece of the original thread or your finished work to ensure the closest possible color match.
Q: Do I need a hoop or frame for needlepoint?
A: While not strictly mandatory for very small pieces, using a hoop, stretcher bars, or a frame is highly recommended for needlepoint. It keeps your canvas taut and prevents distortion as you stitch, leading to more even tension and a better-finished piece. For larger projects, stretcher bars are often preferred as they support the entire canvas.
Q: How long does it take to complete a needlepoint sampler kit?
A: This varies greatly depending on the kit’s size, the mesh count of the canvas, the complexity of the design (i.e., how many different stitches), and your personal stitching speed. A small, beginner-friendly kit on a 10-count canvas might take 10-20 hours, while a larger, more intricate sampler could take 50+ hours. The joy is in the process, so don’t rush it!
Q: Can I use different types of threads than what came in the kit?
A: While possible, it’s generally not recommended for your first kit. The threads provided are chosen specifically to provide proper coverage and texture for the canvas mesh. Substituting threads can lead to uneven coverage, different textures, or an altered final appearance. As you gain experience, you can experiment with different threads on future projects, understanding how they interact with different mesh counts.
Concluding Thoughts on Needlepoint Sampler Kits
Needlepoint sampler kits continue to serve as an indispensable resource for anyone looking to delve into the rewarding craft of needlepoint. They democratize access to this art form by bundling everything you need, fostering a structured learning environment, and ensuring material compatibility. In 2026, with the added benefit of digital resources and an increased focus on sustainable practices, these kits are more appealing and accessible than ever.
Whether you’re drawn to the meditative rhythm of stitching, the satisfaction of creating something tangible with your hands, or the desire to learn a new skill, a well-chosen needlepoint sampler kit provides the perfect foundation. By understanding the components, appreciating the stitches you’ll master, and knowing how to evaluate quality, you’re not just buying a craft project—you’re investing in a fulfilling creative journey that culminates in a beautiful, handmade piece of textile art.