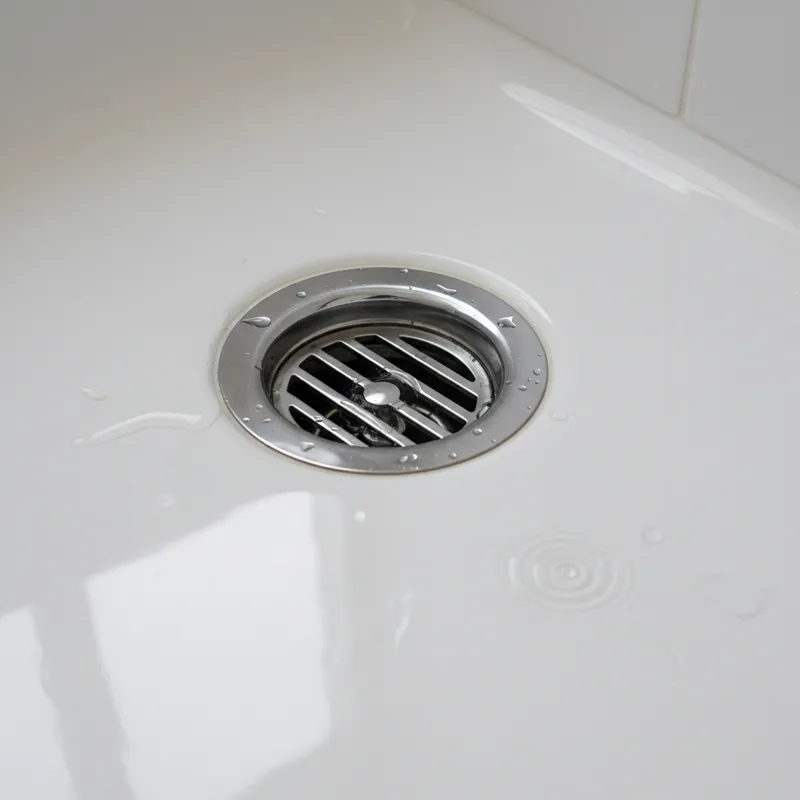
A well-functioning tub drain is one of those household necessities we rarely think about until it stops working right. From a slow drain that turns your relaxing bath into a murky swamp to a leaky stopper that wastes water, drain issues can be a major headache. But in 2026, understanding your options and knowing how to handle common problems means you’re well-equipped to keep things flowing smoothly. This isn’t just about preventing clogs; it’s about optimizing your entire bathing experience, ensuring hygiene, and maintaining the integrity of your plumbing system. Choosing the right tub drain, or even just understanding the one you have, can significantly impact daily life and future maintenance.
Understanding Your Tub Drain: The Basics

Before we dive into specific impressive picks, let’s establish a foundational understanding of what a tub drain system actually entails. It’s more than just the metal piece at the bottom of your tub. A complete system consists of several critical components working in concert:
- The Drain Shoe (or Tub Shoe): This is the assembly directly beneath the tub’s main drain opening. It connects the tub to the P-trap.
- The Overflow Assembly: A separate opening located higher up on the tub wall. It prevents the tub from overflowing if the main drain is closed and water continues to fill. This connects to the drain shoe via an overflow pipe.
- The Stopper Mechanism: This is the part you interact with directly to open and close the drain. There are various types, each with its own operation and aesthetic.
- The P-Trap: Located below the drain shoe, this U-shaped pipe always holds a small amount of water. Its purpose is crucial: it creates a barrier, preventing sewer gases from entering your home.
- The Drainpipe: This pipe carries the water from the P-trap to the main household drain line.
Understanding these components helps immensely when troubleshooting an issue or considering an upgrade. Each part has a role, and a failure in one can affect the entire system.
Common Tub Drain Stopper Types
The stopper is your most direct interaction point with the tub drain. Here are the most common types you’ll encounter:
- Pop-Up Stopper: Operated by a lever on the overflow plate. Moving the lever up and down raises or lowers a linkage rod inside the overflow pipe, which in turn lifts or drops the stopper in the drain opening. These are common and generally reliable, but the linkage can get gummed up with hair and soap scum.
- Lift-and-Turn Stopper: This stopper is manually pushed down to close and then turned slightly to lock it in place. To open, you turn it back and lift. It’s a simple, reliable design with minimal internal mechanisms, making it less prone to linkage issues.
- Push-Pull Stopper: Similar to a lift-and-turn, but you just push down to close and pull up to open. No turning is required. It’s straightforward and durable.
- Toe-Touch (or Foot-Actuated) Stopper: You push it down with your toe to close, and push it again to pop it open. These are popular for their convenience and sleek appearance, as they don’t require an external lever.
- Trip Lever Stopper: Often found in older homes, this system uses a lever on the overflow plate that operates a plunger or disc inside the drainpipe. The plunger drops to block the flow and lifts to allow draining. It’s an older design, sometimes less efficient than direct stoppers.
- Rubber Stopper with Chain: The simplest, most basic type. A rubber stopper is manually placed into the drain opening and removed by a chain. While highly effective at stopping water, it lacks the integrated aesthetic of other options.
Each type has its own maintenance considerations. Knowing yours helps in both basic cleaning and identifying potential problems.
Why a Good Tub Drain Matters
Investing in a quality tub drain goes beyond mere functionality; it’s about enhancing the overall experience and prolonging the life of your plumbing. A good tub drain contributes to:
- Efficient Draining: Nobody wants to stand in ankle-deep water while showering. A well-designed drain allows water to flow quickly and completely, preventing buildup and reducing the time it takes for the tub to empty.
- Clog Prevention: Many modern tub drains integrate features like hair catchers or larger flow paths that actively minimize the accumulation of hair and soap scum, the primary culprits behind most clogs.
- Hygiene and Cleanliness: A drain that empties properly and is easy to clean prevents mildew, mold, and unpleasant odors from developing around the drain area.
- Water Conservation: A reliable stopper seals completely, preventing minor leaks that can waste significant amounts of water over time. Even a slow drip adds up. For more ways to think about water conservation, consider resources like the EPA WaterSense program.
- Aesthetics: The drain is a small but visible part of your tub. Matching its finish (chrome, brushed nickel, matte black, oil-rubbed bronze) to your faucet and other bathroom fixtures contributes to a cohesive and polished look, just like choosing the right wood floating shelves or white oak flooring contributes to your overall home decor.
- Plumbing Longevity: Fewer clogs mean less reliance on harsh chemical drain cleaners, which can corrode pipes over time. A robust, well-maintained drain system reduces strain on your entire plumbing network.
Ultimately, a good tub drain offers peace of mind and reduces the likelihood of costly repairs down the line.
Before We Dive In: Key Considerations for Choosing a Tub Drain
Selecting the right tub drain requires more than just picking one that looks good. You need to consider practical factors that ensure compatibility, longevity, and ease of use.
Tub Type and Material
The type of tub you have dictates certain drain requirements:
- Standard Alcove/Drop-in Tubs: Most common, typically use a standard waste and overflow kit.
- Clawfoot Tubs: Often require exposed waste and overflow kits that are designed to be seen and are usually decorative.
- Walk-in Tubs: These usually need specialized, high-flow drains to empty quickly and ensure user safety.
- Freestanding Tubs: Similar to clawfoot, often use exposed drains, but some modern designs may have concealed floor drains.
The material of your tub (acrylic, cast iron, fiberglass, composite) doesn’t typically change the drain type but might influence the sealant or installation method, especially with vintage cast iron tubs where the drain opening might be less uniform.
Drain Size
Most bathtubs in the U. S. use a drain opening that accommodates a 1.5-inch diameter drain shoe. However, always measure your existing drain opening or consult your tub’s specifications to confirm. Some older or specialty tubs might differ.
Finish Matching
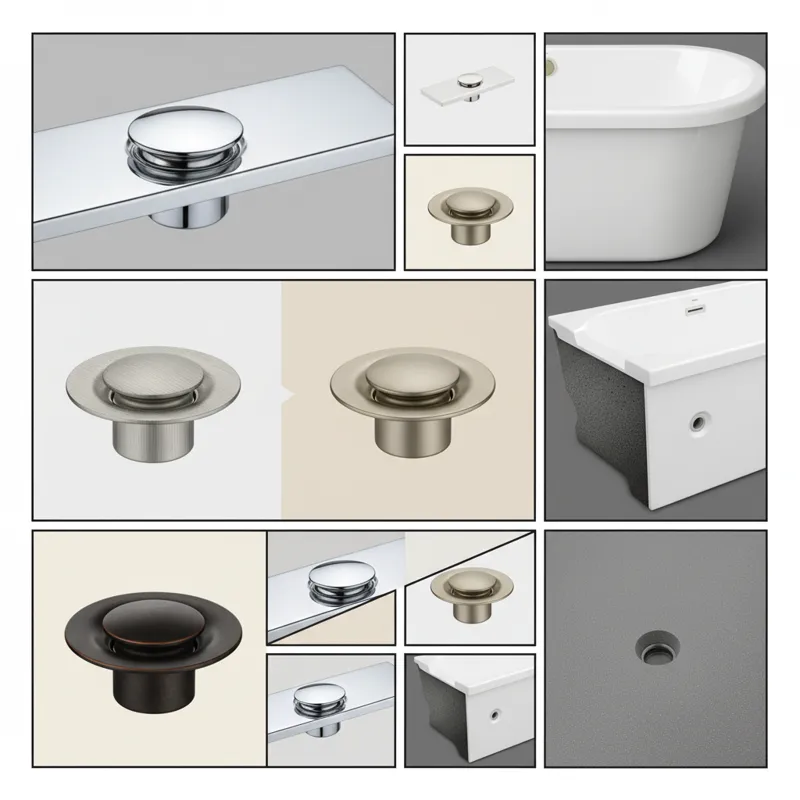
This is purely aesthetic but critical for a cohesive bathroom design. Tub drains are available in a wide array of finishes:
- Chrome: Classic, shiny, and durable.
- Brushed Nickel: Muted, fingerprint-resistant, modern.
- Oil-Rubbed Bronze: Dark, antique look, popular for traditional styles.
- Matte Black: Contemporary, bold, and increasingly popular.
- Polished Brass/Gold: For a luxurious or vintage feel.
Try to match your tub drain finish with your faucet, showerhead, and any other visible hardware for a harmonious look.
Installation Type: Waste & Overflow Kit vs. Drain Shoe Only
Most tubs require a complete “waste and overflow kit” which includes the drain shoe, the overflow pipe, and the overflow plate. If you’re replacing an existing kit, ensure the new one is compatible. If you’re only replacing the stopper or the visible drain flange, you might just need a “drain shoe” component. Always verify what parts you truly need for your project.
Maintenance and Ease of Cleaning
Consider how easily the drain stopper can be removed for cleaning hair and debris. Some stoppers are designed for quick removal, while others require tools or more intricate disassembly. This greatly impacts how often you’ll actually clean it.
Our 14 Best Tub Drain Picks That Truly Impress
When we talk about “best picks,” it’s not just about specific brands, but about the design philosophies and features that genuinely make a tub drain perform better, last longer, or offer a superior user experience. Here are 14 categories or attributes of tub drains that truly impress knowledgeable professionals and everyday users alike:
1. The Effortless Toe-Touch Stopper Drain
This type offers unparalleled convenience. A simple tap with your foot opens or closes the drain. It’s ideal for those seeking a hands-free operation and a clean, minimalist look since there’s no visible lever. The internal mechanism is robust and generally easy to maintain. Many contemporary bathroom designs favor these for their sleek integration.
2. The Integrated Hair Catcher Drain
For anyone plagued by slow drains, an integrated hair catcher is a game-changer. These drains often come with a removable basket or screen built right into the stopper or drain body, making it incredibly simple to pull out and clean accumulated hair and debris before it can form a clog deeper in the system. This proactive approach significantly reduces the need for harsh chemicals or snaking.
3. The Deep Soaker’s Delight: High-Flow Overflow
Modern tubs, especially freestanding and deep soaking models, demand a drain system that can handle higher volumes of water and prevent overflow efficiently. Impressive high-flow overflow designs ensure that even when the tub is filled to the brim, excess water is quickly and quietly diverted, providing peace of mind during a luxurious soak. These often feature larger internal channels for faster water movement.
4. The Aesthetic Minimalist: Invisible Overflow Drain
For those pursuing a truly seamless and sleek bathroom design, invisible overflow drains are incredibly impressive. Instead of a traditional plate, these designs integrate the overflow function subtly into the tub wall itself, often as a thin slot or a barely perceptible opening. The result is a clean, uninterrupted tub surface that speaks to high-end design.
5. The Durable Brass Construction Drain
While many drains use PVC, a truly impressive and long-lasting choice for the critical components is solid brass. Brass offers superior corrosion resistance and durability, ensuring the drain won’t degrade or leak over decades of use. This is particularly important for the drain shoe and overflow connection points, where robust materials prevent future headaches.
6. The Universal Retrofit Drain Kit
Not every tub drain replacement is a full tear-out. Impressive universal retrofit kits are designed with adjustability in mind, allowing them to adapt to a wider range of tub thicknesses and existing plumbing configurations. This saves significant time and effort for DIYers and professionals alike, making replacements smoother without custom fabrication.
7. The Quick-Release Pop-Up Stopper
While traditional pop-up stoppers can be a pain to clean, impressive quick-release versions allow you to simply pull the stopper straight up and out for easy access to accumulated hair and gunk. This design retains the convenience of a lever-actuated stopper while eliminating one of its biggest maintenance drawbacks, promoting better drain hygiene.
8. The Modern Matte Black Finish Drain
In 2026, matte black remains a dominant trend in bathroom design. An impressive matte black tub drain isn’t just painted; it’s often finished with a durable powder coat or PVD (Physical Vapor Deposition) process that resists chipping, scratching, and fading. This ensures the drain maintains its striking contemporary look for years, perfectly complementing modern fixtures.
9. The Classic Lift-and-Turn Drain with Heavy-Duty Gasket
Sometimes, simplicity and reliability are the most impressive features. A well-engineered lift-and-turn drain, especially one with a high-quality, long-lasting rubber or silicone gasket, offers excellent sealing performance and straightforward operation. The lack of complex internal mechanisms means fewer points of failure and easier maintenance compared to linkage-based systems.
10. The Walk-In Tub Specialist Drain
Walk-in tubs require very specific drain performance for safety and convenience. Truly impressive drains for these applications feature exceptionally high flow rates (often referred to as ‘fast drains’) to empty the tub rapidly. This minimizes the time a bather must wait for the tub to drain before they can exit, enhancing the walk-in tub’s primary benefit.
11. The Overflow Plate with Integrated Plug-and-Chain
For those who prefer a more traditional or rustic aesthetic, or simply want a foolproof stopper, overflow plates that cleverly integrate a plug-and-chain system impress with their functionality and charm. This design keeps the stopper readily accessible and eliminates the need for complex internal mechanisms, offering durable simplicity.
12. The Eco-Conscious Water Saver Drain
While not always obvious, some tub drains are designed with water efficiency in mind. This might involve optimized overflow heights that allow for a fuller bath without exceeding a safe level, or stopper designs that provide an airtight seal to prevent slow leaks. It’s about maximizing your bathing experience while minimizing waste. You can find more information on water conservation from various government initiatives, such as those discussed on USGS water use basics.
13. The Durable PVD Finish Drain (Physical Vapor Deposition)
Beyond just matte black, drains with PVD finishes (available in various colors like brushed gold, polished nickel, or even bronze) are incredibly impressive for their longevity and resistance to tarnishing, scratching, and corrosion. PVD is a cutting-edge process that bonds the finish to the base metal at a molecular level, creating a surface far more durable than traditional plating.
14. The Easy-Access Cleanout Drain Shoe
A truly user-friendly tub drain system includes a drain shoe with an accessible cleanout. This feature allows you to directly access the P-trap area below the tub without having to disassemble the entire drain. It’s invaluable for quickly clearing stubborn clogs or retrieving dropped items, making maintenance significantly less arduous.
Common Tub Drain Issues and How to Troubleshoot Them (DIY Guide)
Even the best tub drains can encounter issues. Knowing how to diagnose and often fix these common problems yourself can save you time and money. Always exercise caution and, when in doubt, call a licensed plumber.
1. Slow Draining Bathtub
This is perhaps the most frequent complaint.
- The Culprit: Hair and Soap Scum. The vast majority of slow tub drains are caused by a buildup of hair, soap scum, and body oils. These create a sticky, fibrous mass that restricts water flow.
- DIY Fix: Mechanical Removal.
- Remove the Stopper: Depending on the type, you might need a screwdriver (for overflow plate levers or some pop-ups) or simply twist and pull (for lift-and-turn or toe-touch).
- Use a Drain Snake/Zip-It Tool: These inexpensive plastic tools or small metal drain snakes can be inserted into the drain opening. Twist and pull to snag and remove the hairball. It’s often gross, but highly effective.
- Baking Soda and Vinegar: For less severe clogs, pour half a cup of baking soda down the drain, followed by half a cup of white vinegar. Let it sit for 30 minutes to an hour (or even overnight). Flush with hot water. This creates a fizzing reaction that can help break down some organic matter. It’s gentle and won’t harm pipes, unlike harsh chemical cleaners.
- When to Call a Pro: If the drain remains slow after multiple attempts, or if multiple drains in your home are slow, it might indicate a deeper main line clog or a vent stack issue, which requires professional attention.
- DIY Fix: Mechanical Removal.
2. Leaking Tub Drain
A leak beneath the tub can lead to significant water damage, including issues with subflooring or even mold, so addressing it promptly is crucial.
- The Culprit: Worn Gaskets or Loose Connections. Most leaks occur at the connection points: the drain shoe to the tub, or the overflow pipe to the drain shoe. Gaskets (rubber washers) can degrade over time, and nuts can loosen.
- DIY Fix: Inspect and Tighten.
- Access Under the Tub: You’ll usually need access from a basement, crawl space, or an access panel.
- Examine Connections: Look for drips around the large nut connecting the drain shoe to the tub, and the smaller nuts securing the overflow pipe.
- Tighten: Carefully tighten any loose nuts with a wrench. Do not overtighten, as this can crack PVC pipes or damage gaskets.
- Replace Gaskets: If tightening doesn’t stop the leak, the gaskets are likely worn. You’ll need to remove the drain shoe and/or overflow plate and replace the rubber washers. This often involves applying plumber’s putty or silicone sealant around the drain flange itself when reinstalling.
- When to Call a Pro: If you find a crack in a pipe or tub component, or if you’re uncomfortable working in tight spaces, it’s best to call a plumber.
- DIY Fix: Inspect and Tighten.
3. Broken or Stuck Stopper
A stopper that won’t open or close can be a major inconvenience.
- The Culprit: Linkage Issues (Pop-Up/Trip Lever) or Debris.
- DIY Fixes:
- Pop-Up/Trip Lever: If it’s a pop-up or trip lever, the linkage rod inside the overflow pipe can become misaligned, bent, or gunked up. Remove the overflow plate (usually two screws) and pull out the linkage assembly. Clean off any hair and debris. Inspect the rod for bends. You can often adjust the height of the stopper by loosening a screw on the linkage.
- Lift-and-Turn/Push-Pull/Toe-Touch: These stoppers are usually simpler. If stuck, it’s often due to hair or debris preventing free movement. Remove the stopper (some screw out, others simply lift once in the open position) and clean thoroughly.
- Replacement: If the stopper mechanism is visibly broken or bent beyond repair, you might need to replace just the stopper component, or in the case of pop-ups, the entire linkage assembly.
- DIY Fixes:
4. Foul Odors from the Drain
A persistent sewage smell is unpleasant and indicates a problem.
- The Culprit: Dry P-Trap or Biofilm Buildup.
- DIY Fixes:
- Dry P-Trap: If the tub hasn’t been used in a while, the water in the P-trap can evaporate, allowing sewer gases to enter. Run water down the drain for a minute or two to refill the trap.
- Biofilm: A buildup of bacteria, soap scum, and hair can also create odors. Use the baking soda and vinegar method mentioned above, or a specialized enzymatic drain cleaner (follow instructions carefully).
- When to Call a Pro: If the smell persists after refilling the P-trap and cleaning, it could indicate a deeper vent pipe issue or a compromised drain line, which warrants a plumber’s investigation.
- DIY Fixes:
Replacing Your Tub Drain: A Step-by-Step Overview
Replacing an entire tub drain waste and overflow kit is a moderate DIY project that requires patience and the right tools. This is a general guide; always refer to the specific instructions provided with your new drain kit.
Disclaimer: While this guide provides general steps, plumbing work can be complex. If you’re unsure at any point, it’s always best to consult a licensed professional plumber to avoid potential damage or leaks.
Tools You’ll Likely Need:
- Screwdriver (Phillips and/or flathead)
- Adjustable wrench or channel locks
- Plumber’s putty or silicone sealant
- Rag or old towel
- Drain wrench or spanner (for removing the old drain flange)
- Bucket
- Drop cloth or old towels
Steps for Replacement:
- Access the Drain: You’ll need access to the underside of your tub, usually through an access panel in an adjacent wall, from a crawl space, or a basement ceiling. Clear the area and lay down a drop cloth.
- Drain the Tub: Ensure the tub is completely empty.
- Remove the Old Overflow Plate: Unscrew the two screws on the overflow plate. Pull out the plate and, if it’s a pop-up or trip-lever system, pull out the stopper linkage assembly.
- Remove the Old Drain Flange: This is often the trickiest part. Use a specialized drain wrench or a pair of large pliers to unscrew the drain flange from inside the tub. You might need to hold the drain shoe underneath with a wrench to prevent it from spinning. If it’s heavily corroded, penetrating oil can help.
- Disconnect the Drain Shoe: From underneath, loosen the large nut that secures the drain shoe to the tub. Disconnect the overflow pipe from the drain shoe (it usually unscrews or has a compression fitting). Then, disconnect the entire waste and overflow assembly from the P-trap. Have a bucket ready, as some water may drain out.
- Clean the Area: Thoroughly clean the tub’s drain opening and the overflow opening, removing old plumber’s putty, grime, and debris.
- Install the New Drain Shoe:
- Roll a bead of plumber’s putty around the underside of the new drain flange.
- Insert the new drain flange into the tub’s drain opening.
- From underneath, push the rubber gasket and friction washer onto the drain shoe pipe, then thread on the large nut. Hand-tighten, then snug up with a wrench (don’t overtighten). Excess putty will squeeze out; wipe it away.
- Install the New Overflow Assembly:
- Attach the new overflow pipe to the drain shoe.
- Place the rubber gasket behind the overflow plate.
- Screw the overflow plate into the tub’s overflow opening. If it’s a pop-up, thread the linkage through the overflow pipe first.
- Connect to the P-Trap: Reconnect the new waste and overflow assembly to your existing P-trap. Ensure all connections are secure.
- Test for Leaks: Fill the tub with water, then open the drain. Carefully inspect all connections underneath the tub for any drips or leaks. Let the water run for a few minutes.
If no leaks are present, congratulations, you’ve successfully replaced your tub drain!
What Most People Get Wrong About Tub Drains
Even experienced DIYers can make common missteps when it comes to tub drains. Being aware of these can save you time, money, and future headaches.
- Over-reliance on Chemical Drain Cleaners: While they offer a quick fix, consistently pouring harsh chemical drain cleaners down your tub drain is a mistake. These chemicals are corrosive. Over time, they can damage PVC pipes, corrode metal components, and are generally bad for your septic system or municipal wastewater treatment plants. They also rarely fully clear a stubborn hair clog, instead just melting a small channel through it. Mechanical removal is almost always better.
- Ignoring the Overflow’s Importance: Many homeowners view the overflow as purely decorative or forget it exists. It’s a vital safety feature that prevents flooding. A clogged overflow pipe won’t do its job, and a leaky overflow plate gasket can cause significant water damage behind the tub wall. Regularly check that it’s clear and the plate is sealed.
- Not Regularly Cleaning the Stopper: Regardless of your stopper type, hair, soap scum, and oils accumulate around and under it. Many people wait until the drain is noticeably slow before cleaning. A simple monthly removal and wipe-down of the stopper and drain opening prevents most clogs from forming in the first place.
- Overtightening Fittings: When installing or repairing a tub drain, there’s a temptation to crank down on nuts to prevent leaks. Overtightening can crack plastic (PVC) pipes, strip threads, or compress rubber gaskets excessively, which ironically can lead to leaks or premature failure. Snug is enough; don’t force it.
- Neglecting Proper Sealing: Whether it’s the plumber’s putty around the drain flange or the gaskets for the overflow plate and shoe, proper sealing is critical. Skipping these steps or using the wrong type of sealant (e.g., silicone where plumber’s putty is recommended, or vice-versa) guarantees leaks.
- Assuming All Drains Are Identical: While many tubs use standard 1.5-inch drains, assuming universal compatibility for specialty tubs (like clawfoot, walk-in, or older tubs) can lead to purchasing the wrong kit and frustration. Always measure and verify.
Understanding these pitfalls allows you to approach tub drain maintenance and replacement with greater confidence and effectiveness.
Maintaining Your Tub Drain for Longevity
Proper maintenance can extend the life of your tub drain and prevent most common issues. These are simple habits that pay off significantly.
- Use a Hair Catcher: This is the simplest and most effective preventative measure. A silicone or metal hair catcher placed over the drain opening will catch most hair and debris before it goes down the pipe. Empty it after every bath or shower.
- Regular Flushing: Once a week, flush your tub drain with a few gallons of hot water. This helps to melt and flush away any grease, soap scum, and minor debris before it can build up.
- Baking Soda and Vinegar Treatment: As mentioned, this is a gentle, eco-friendly way to maintain clear drains. A monthly or bi-monthly treatment can help break down minor organic accumulations.
- Avoid Pouring Grease Down the Drain: While less common for tubs than kitchen sinks, ensure no greasy substances (e.g., from pet washing) are washed down the tub drain, as they solidify and create stubborn clogs.
- Clean Your Stopper Regularly: Make it a habit to remove and clean your tub stopper once a month. This takes less than a minute and removes the primary source of clogs before they have a chance to develop.
- Periodically Check for Leaks: Especially if you have an accessible panel, a quick visual check underneath the tub once or twice a year can catch minor drips before they become major problems.
Frequently Asked Questions (FAQ)
Here are some common questions people have about tub drains:
What’s the difference between a waste and overflow kit and just a drain shoe?
A waste and overflow kit is a complete assembly that includes the main drain shoe at the bottom of the tub, the overflow pipe that connects to it, and the overflow plate cover. A drain shoe typically refers only to the component that sits in the tub’s main drain opening and connects to the rest of the plumbing, without including the overflow system. Most tub drain replacements will involve a full waste and overflow kit.
Can I change my stopper type without replacing the whole drain?
Often, yes. Many drain shoe assemblies are designed to accept different stopper types. For instance, you can typically swap out a lift-and-turn stopper for a toe-touch stopper if the threads match. For pop-up or trip-lever systems, you might be able to remove the internal linkage and replace the entire drain flange with a push-pull or toe-touch stopper that has its own sealing mechanism. Always check compatibility and measurements.
How often should I clean my tub drain?
For optimal performance and to prevent clogs, aim to clean the visible parts of your tub drain (the stopper and just inside the opening) at least once a month. If you have long hair or use products that create a lot of residue, you might do it more frequently. Using a hair catcher significantly reduces the need for deeper cleaning.
When should I call a plumber for tub drain issues?
You should call a plumber if:
- Your DIY attempts at unclogging are unsuccessful.
- You have a persistent leak you can’t identify or fix.
- Multiple drains in your home are slow or clogged, suggesting a main line issue.
- You notice sewage smells that don’t go away after refilling the P-trap.
- You’re uncomfortable working with plumbing or don’t have the necessary tools.
Are all tub drains standard size?
While most modern bathtubs in the U. S. utilize a drain opening that fits a 1.5-inch nominal diameter drain shoe, there can be variations, especially with older or specialty tubs. Always measure your existing drain or consult your tub’s specifications to ensure you purchase a compatible replacement.
Ultimately, a well-chosen and properly maintained tub drain is more than just a functional part of your bathroom; it’s an investment in convenience, hygiene, and the longevity of your home’s plumbing. By understanding the different types, considering crucial factors before purchase, and adopting simple maintenance habits, you can ensure your tub drain remains truly impressive, year after year.