Stepping into the world of embroidery can feel both exciting and a little overwhelming, especially with the sheer volume of resources available today. If you’re looking to learn this timeless craft, finding the right starting point is crucial. Whether your goal is to personalize garments, create unique home decor, or simply enjoy a meditative new hobby, embroidery classes for beginners offer a structured path to mastering the fundamentals. In 2026, the options for learning are more diverse than ever, ranging from traditional in-person workshops to comprehensive online courses and even free tutorials that can get you started. This guide breaks down what you need to know to choose the best learning environment for your needs, ensuring you build a solid foundation in hand embroidery without the frustration of guesswork.
Why Learn Embroidery in 2026? A Craft for the Modern Creator
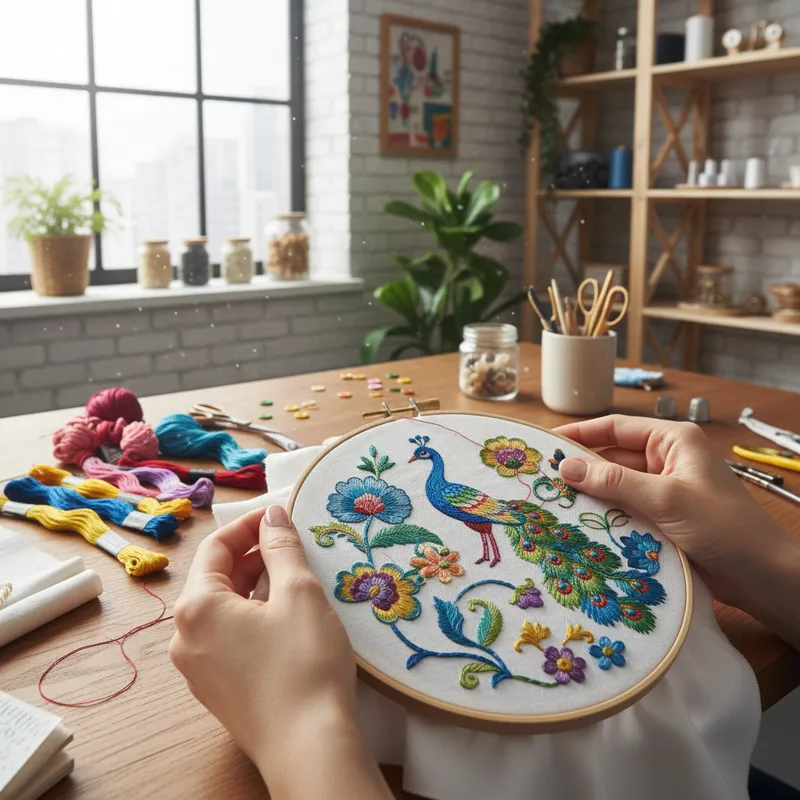
Embroidery, the art of decorating fabric or other materials with needle and thread, has seen a significant resurgence in recent years. It’s more than just a hobby; it’s a creative outlet that blends tradition with contemporary expression. In an increasingly digital world, the tactile nature of embroidery offers a welcome respite, providing a sense of accomplishment that comes from creating something tangible with your own hands.
For many, embroidery is a meditative practice, allowing for focus and mindfulness. It’s also an incredibly versatile skill. You can embroider anything from denim jackets and tote bags to intricate wall art and delicate gifts. With the rise of platforms celebrating handmade goods, learning embroidery can even open doors to a small business venture or a way to earn extra income. Moreover, there’s a thriving online community where enthusiasts share ideas, patterns, and support, making it a very social craft if you choose. For those interested in machine embroidery, understanding the basics of design and stitch types through hand embroidery can also provide valuable insight into selecting and customizing free machine embroidery designs for more complex projects.
Understanding Your Options: Online vs. Local Embroidery Classes for Beginners
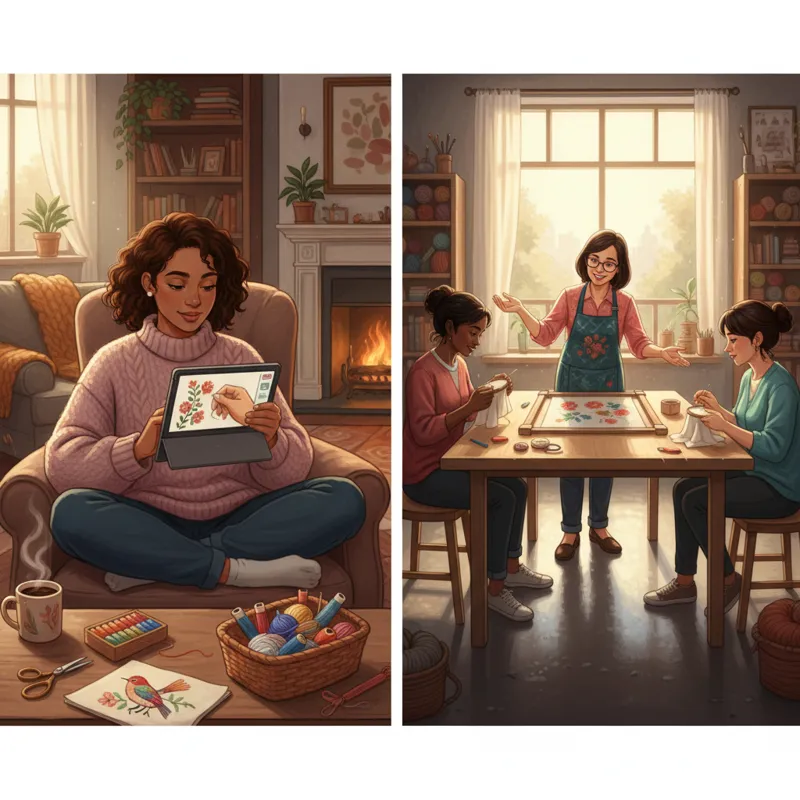
The first major decision for aspiring embroiderers is often whether to opt for online learning or a local, in-person class. Each approach has distinct advantages and disadvantages, and the best choice depends heavily on your personal learning style, schedule, and budget.
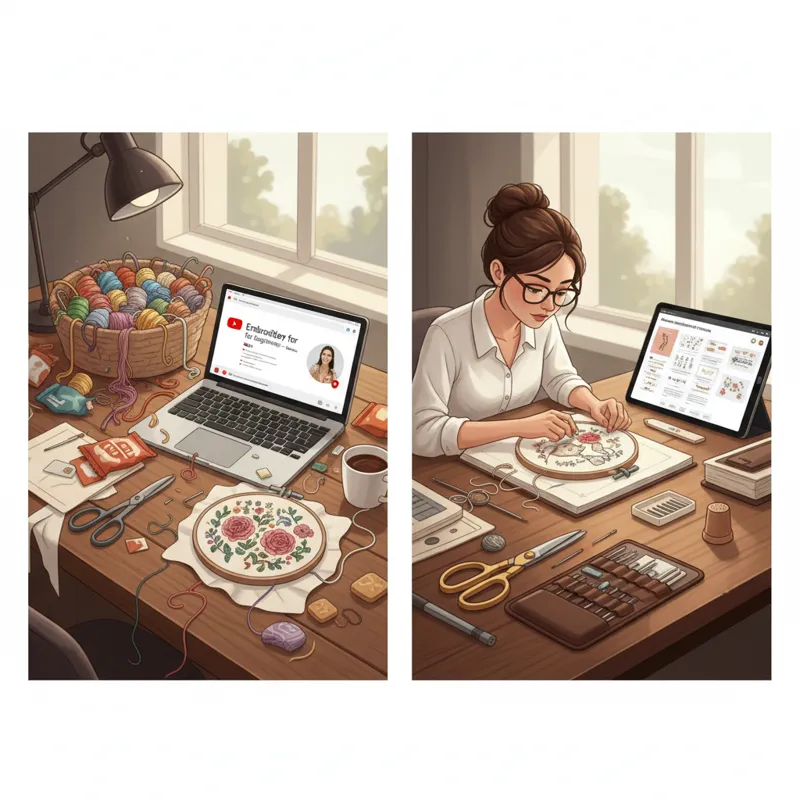
Online Embroidery Classes: Flexibility and Global Reach
Online classes have become a cornerstone of skill acquisition, and embroidery is no exception. These platforms offer an unparalleled level of flexibility, allowing you to learn from anywhere, at any time.
- Pros of Online Classes:
- Flexibility: You can learn at your own pace, pausing, rewinding, and re-watching lessons as needed. This is ideal for those with busy schedules, childcare responsibilities, or unpredictable working hours.
- Variety: The internet hosts a vast array of instructors and styles. You can find courses specializing in specific techniques (like surface embroidery, crewelwork, or even bead embroidery templates), or focus on particular aesthetics. This wide choice ensures you’re likely to find an instructor whose teaching style resonates with you.
- Accessibility: No matter where you live, you have access to top-tier instructors and comprehensive courses. This is particularly beneficial for those in rural areas without local craft studios.
- Cost-Effectiveness: While some premium courses can be pricey, many online platforms offer subscription models (e.g., Skillshare, Creativebug) that provide access to hundreds of classes for a monthly or annual fee, often making them more affordable than multiple in-person workshops.
- Community: Many online courses include dedicated forums or social media groups where students can share progress, ask questions, and connect with fellow learners.
- Cons of Online Classes:
- Lack of Immediate Feedback: This is arguably the biggest drawback. While some instructors offer email support or group critiques, you won’t get instant, hands-on corrections on your technique, such as thread tension or needle placement, which can be critical for beginners.
- Self-Discipline Required: Without fixed class times, you need to be self-motivated to keep up with the lessons and practice regularly.
- Technology Dependence: A stable internet connection and suitable device are necessary. Technical glitches can disrupt your learning experience.
- Material Sourcing: You’re usually responsible for sourcing all your materials, although many courses provide detailed supply lists.
Vetted Online Recommendations for Beginners (2026):
- Skillshare: Offers a vast library of creative classes, including many beginner embroidery courses. Their subscription model is great for exploring various instructors and styles without committing to a single high-cost course. Look for “Embroidery 101” or “Beginner Embroidery Stitches.”
- Creativebug: Similar to Skillshare but often more craft-focused, Creativebug features high-quality video tutorials from respected artists. They have excellent foundational embroidery series.
- Domestika: Known for its professionally produced courses taught by artists worldwide. Their “Introduction to Hand Embroidery” courses are often highly rated and cover a wide range of basic stitches and concepts.
- Etsy or Independent Artists’ Websites: Many independent embroidery artists offer digital patterns and accompanying video tutorials or full online courses. Searching “beginner embroidery kit with video tutorial” on Etsy often yields great results. This supports small businesses directly.
- YouTube (Free): For absolute zero-cost learning, channels like ‘Needle ‘n Thread’ (Mary Corbet) or ‘Cutesy Crafts’ offer extensive, high-quality tutorials on specific stitches and techniques. Be aware that YouTube content can be less structured than a dedicated course.
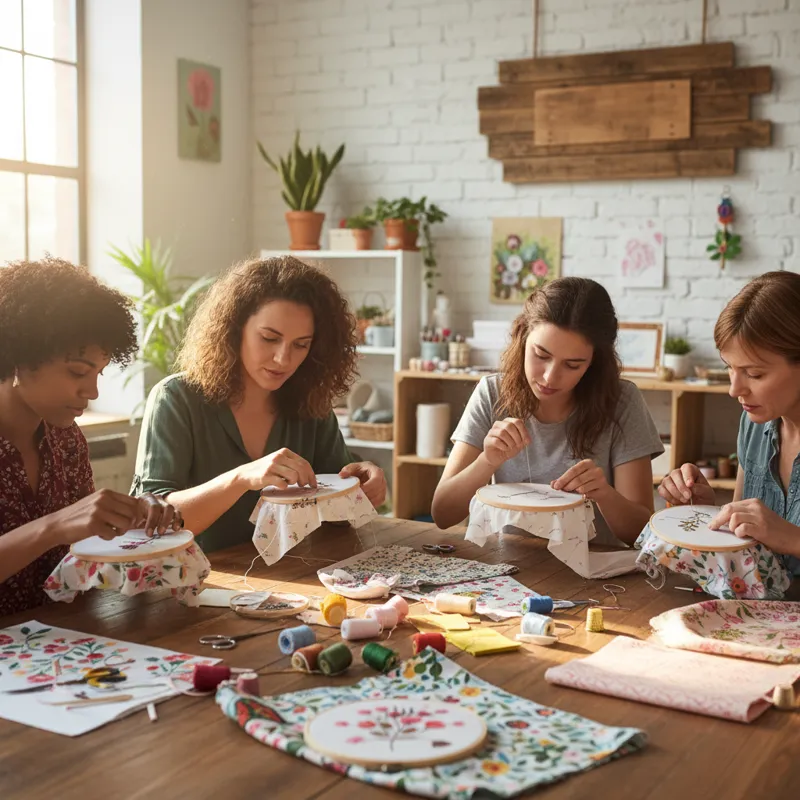
Local Workshops and In-Person Classes: Hands-On Guidance and Community
Traditional in-person classes offer a more immersive and interactive learning experience, which can be invaluable for beginners.
- Pros of Local Classes:
- Direct, Immediate Feedback: An instructor can physically demonstrate techniques, correct your grip, thread tension, or stitch formation in real-time. This immediate correction prevents bad habits from forming early on.
- Community and Social Interaction: Learning alongside others fosters a sense of community. You can share ideas, get motivated, and even make new friends who share your interest in crafting.
- Dedicated Learning Environment: Stepping into a studio removes you from daily distractions, allowing you to focus entirely on the craft.
- Materials Often Provided: Many local classes include a starter kit or provide all necessary materials, removing the guesswork of what to buy.
- Access to Tools and Equipment: Some advanced classes might provide access to specialized tools you might not own.
- Cons of Local Classes:
- Less Flexible Scheduling: Classes run on fixed days and times, which can be challenging to fit into a busy schedule.
- Geographical Limitations: You’re limited to what’s available in your immediate vicinity. Options might be scarce in smaller towns.
- Higher Cost Per Session: In-person workshops generally cost more per hour or per project than online alternatives due to overheads like studio space and direct instruction.
- Pace of Class: You learn at the pace of the group, which can be frustrating if you’re a fast learner or feel rushed if you need more time.
Where to Find Local Embroidery Classes (2026):
- Local Craft Stores: Major chains like JOANN, Michaels, and Hobby Lobby often host beginner embroidery classes. Smaller, independent yarn or fabric shops are also excellent resources. They typically post schedules on their websites or in-store.
- Community Centers & Art Schools: Many community centers, adult education programs, and local art schools offer beginner textile arts courses. Check your city or county’s Parks & Recreation department listings.
- Private Studios: Some individual embroidery artists run their own studios and offer workshops. A quick local search for “embroidery workshops [your city]” or “textile art classes [your city]” often reveals these hidden gems.
- Museums and Historical Societies: Sometimes, these institutions offer craft workshops tied to historical textile arts.
Free vs. Paid Embroidery Classes: What’s the Real Difference?
As you explore your options for embroidery classes for beginners, you’ll encounter a spectrum of free and paid resources. While free content is enticing, understanding its limitations compared to paid offerings is key to setting realistic expectations.
Free Embroidery Resources: Getting Started Without Investment
For those hesitant to invest money upfront, numerous free resources can introduce you to the basics of embroidery.
- Examples: YouTube tutorials, craft blogs, Pinterest guides, free patterns, online forums (like Reddit’s r/Embroidery), and even local library books.
- Pros:
- No Cost: The most obvious benefit is the lack of financial commitment, making it accessible to everyone.
- Immediate Access: You can start learning instantly with a quick search.
- Exploration: It’s a great way to dip your toes in, see if you enjoy embroidery, and discover different styles before spending money.
- Supplement to Paid Learning: Free resources are excellent for practicing specific stitches or finding inspiration even after taking a formal class.
- Cons:
- Lack of Structure: Free content is often fragmented. You might find great tutorials for individual stitches, but piecing together a comprehensive curriculum can be challenging and lead to gaps in knowledge.
- Varying Quality: The quality of instruction, video production, and accuracy can differ wildly. It can be hard for a beginner to discern good advice from less helpful information.
- No Personalized Feedback: You’re largely on your own. There’s no instructor to answer specific questions about your technique or troubleshoot issues.
- Information Overload: The sheer volume of free content can be overwhelming, making it difficult to know where to begin or which advice to trust.
Paid Embroidery Classes: Structured Learning and Expert Guidance
Paid classes, whether online or in-person, offer a more curated and supportive learning experience designed for progression.
- Examples: Dedicated online courses on platforms like Domestika or Creativebug, in-person workshops at craft stores, private studio classes, or even premium downloadable courses from independent artists.
- Pros:
- Structured Curriculum: Paid classes typically follow a logical progression, building skills systematically from basic stitches to more complex techniques and projects.
- Expert Instruction: You’re learning from experienced embroiderers who know common beginner pitfalls and how to guide students effectively.
- Curated Content: All necessary information is usually provided in one place, often with accompanying materials, patterns, and resource lists.
- Feedback and Support: Most paid courses offer some level of instructor interaction, whether through direct Q&A, forum participation, or in-person critique.
- Community: Many paid online courses include dedicated student groups, while local classes naturally foster peer interaction.
- Higher Production Quality: Online paid courses often feature professional video, clear audio, and well-designed learning materials.
- Accountability: The financial investment can be a motivator to complete the course and practice.
- Cons:
- Cost: This is the primary barrier for some. Prices can range from $20 for a basic online module to several hundred dollars for an extensive in-person workshop series.
- Time Commitment: Structured classes, especially in-person, require specific time allocations.
Conclusion on Free vs. Paid: For absolute beginners, a structured, paid class (especially an in-person one for immediate feedback) often provides the most efficient and least frustrating learning experience. Free resources are excellent for initial exploration, practicing individual stitches, or supplementing a formal course. Think of paid classes as investing in a clear roadmap and expert navigation, while free resources are like browsing scattered maps and directions.
What to Look for in an Embroidery Class for Beginners
When you’re ready to commit to embroidery classes for beginners, knowing what makes a good class can save you time and ensure a positive learning experience. Here’s what to prioritize:
1. Comprehensive Curriculum Covering the Fundamentals
A strong beginner class should cover the absolute essentials to give you a solid foundation. Look for courses that promise:
- Basic Stitches: At a minimum, this includes stitches like the running stitch, backstitch, stem stitch, satin stitch, French knot, and chain stitch. These are the building blocks for countless designs.
- Material Understanding: Information on different types of fabric suitable for embroidery, various thread types (DMC cotton floss is standard), and needle sizes.
- Tool Usage: How to properly use an embroidery hoop, transfer designs to fabric, and the function of different scissors.
- Finishing Techniques: How to secure your threads, clean your finished piece, and display it.
- Practice Projects: A good class will guide you through a simple project, like a stitch sampler or a small design, to apply what you’ve learned.
2. Instructor Experience and Teaching Style
A great embroiderer isn’t always a great teacher. Look for instructors who:
- Demonstrate Clearly: Especially for online classes, clear, close-up video demonstrations are non-negotiable. For in-person, watch how they interact with students.
- Explain Concepts Simply: They should break down complex steps into manageable chunks and use clear language.
- Offer Constructive Feedback: Can they identify common beginner mistakes and offer actionable advice?
- Have Patience: Learning a new skill takes time, and a patient instructor makes a huge difference.
- Showcase Their Own Work: This gives you a sense of their expertise and aesthetic.
3. Class Structure and Feedback Mechanism
Consider how the class is organized and how you’ll get support:
- Pacing: Is it self-paced (online) or fixed-pace (in-person)? Which suits your learning style better?
- Class Size (for In-Person): Smaller classes generally allow for more personalized attention.
- Q&A Opportunities: Do online courses offer forums, email support, or live Q&A sessions? For in-person, is the instructor available for questions during class?
- Project-Based Learning: Classes that culminate in a finished project can be very motivating.
4. Included Materials and Supply Lists
Knowing what you need is half the battle. A good class will either:
- Provide a Kit: This is common for in-person workshops and some online courses, ensuring you have all the right tools to start immediately.
- Offer a Detailed Supply List: For courses where you source your own materials, the list should be specific about thread brands, fabric types, needle sizes, and other essentials. This is critical for getting off to a good start, as using the wrong materials can make learning much harder.
5. Reviews and Testimonials
Always check reviews from previous students. Look for comments on:
- Clarity of instruction.
- Instructor’s responsiveness and helpfulness.
- Value for money.
- Whether students felt confident enough to continue embroidering after the class.
Essential Tools and Starter Kits for Beginners
Before you even step into an embroidery class or press play on an online tutorial, you’ll need some basic supplies. Starting with the right tools makes a significant difference in your initial experience and overall enjoyment. You don’t need to spend a fortune, but investing in a few quality items is wise.
The Absolute Essentials:
- Embroidery Hoop: This holds your fabric taut, making it easier to stitch evenly. Wooden hoops are generally preferred over plastic ones for better grip and durability. A 5-inch or 6-inch hoop is a great starting size.
- Embroidery Needles: These have a larger eye than sewing needles to accommodate embroidery floss and a sharp point to penetrate fabric. A variety pack (sizes 3-9) is ideal.
- Embroidery Floss (Thread): Six-strand divisible cotton floss is the most common. DMC is the industry standard for its quality and vast color range. Start with a few basic colors to practice.
- Fabric: A plain-weave cotton or linen fabric is best for beginners. Look for something that isn’t too tightly woven (hard to push the needle through) or too loosely woven (stitches won’t hold shape). A fat quarter (18×22 inches) is usually enough for several small projects.
- Small, Sharp Scissors: Dedicated embroidery scissors (often called snips) are ideal for cleanly cutting floss. Regular craft scissors can work, but avoid using dull ones.
- Design Transfer Method: You’ll need a way to get your pattern onto the fabric. Options include water-soluble pens, heat-transfer pens, light boxes, or even tracing with a pencil (very lightly).
Helpful Add-ons (Once You Get Going):
- Thimble: Protects your finger when pushing the needle through thicker fabrics.
- Needle Threader: Can be a lifesaver for those with less-than-perfect eyesight.
- Pinch Bowl or Magnet: To keep your needles from getting lost.
- Embroidery Stand or Lap Hoop: Frees up both your hands for more intricate stitching, especially useful as you progress.
Starter Kits: Your All-in-One Solution
For ultimate convenience, an embroidery starter kit is often the best choice for beginners. These kits typically include a hoop, fabric, a selection of floss colors, needles, and a pre-printed or transferrable pattern, along with basic instructions. Many also include snips and a needle threader.
Recommended Starter Kits (2026):
- DMC Embroidery Kits: DMC, a well-known name in embroidery floss, offers excellent beginner kits. These often come with high-quality floss, fabric, needles, a hoop, and a clear pattern.
- Dimensions Needlecrafts Kits: These are widely available and come in various designs, often featuring clear instructions and all necessary materials. They are a reliable choice for learning.
- Independent Artist Kits (Etsy, Craft Fairs): Many small businesses on platforms like Etsy curate beautiful beginner kits. These often feature unique, modern designs and sometimes include access to online tutorials or written guides. Searching for “modern beginner embroidery kit” or “embroidery kit with video tutorial” can yield some lovely options.
Where to Purchase Supplies:
- Major Craft Retailers: Stores like JOANN, Michaels, and Hobby Lobby are readily available across the United States. They carry a wide range of floss (DMC, Anchor), hoops, fabrics, and kits.
- Online Retailers: Amazon offers a massive selection of individual supplies and kits. Specialized online craft stores like 123Stitch.com or Etsy provide a more curated experience, especially for unique patterns and indie kits.
- Local Yarn/Fabric Shops: Don’t overlook smaller, independent shops. They often have high-quality supplies and knowledgeable staff who can offer personalized advice.
Navigating Common Pitfalls: What Most Beginners Get Wrong
Embroidery is a journey, and like any new skill, you’ll encounter challenges. Knowing common beginner mistakes can help you avoid unnecessary frustration and accelerate your learning. Here’s what many new embroiderers often miss or get wrong:
1. Jumping into Complex Projects Too Soon
It’s tempting to want to recreate that intricate floral piece you saw online, but starting with overly ambitious designs is a recipe for discouragement. Beginners often struggle with:
- Solution: Begin with simple stitch samplers or small, graphic designs that use only a few basic stitches. Master these fundamentals before tackling anything with multiple colors, complex outlines, or challenging stitch combinations. Remember, even experienced embroiderers started small.
2. Using Poor Quality Materials
While saving money is appealing, extremely cheap floss, flimsy fabric, or rough hoops can make learning incredibly difficult.
- Solution: Invest in decent quality materials from the start. DMC floss is affordable and consistent. A sturdy wooden hoop holds tension better. Plain cotton or linen fabric that’s not too stiff or too stretchy is ideal. Good tools reduce friction and help you focus on the technique, not fighting your supplies.
3. Ignoring Thread Tension
Inconsistent thread tension is a frequent culprit behind puckered fabric, loose stitches, or stitches that don’t lay flat. It’s often not something explicitly taught in every basic tutorial.
- Solution: Practice pulling your thread with consistent, gentle pressure. Your stitches should lie flat against the fabric without pulling it tight or leaving slack loops. Your embroidery hoop should also be tightened securely to prevent fabric distortion. This is where hands-on feedback from an instructor in how hard is embroidery a class can be incredibly beneficial.
4. Not Practicing Enough (or Practicing Randomly)
Embroidery is a muscle memory skill. Watching tutorials isn’t enough; you need to put needle to fabric.
- Solution: Dedicate regular, short practice sessions. Instead of randomly trying stitches, focus on perfecting one or two stitches at a time on a scrap piece of fabric. Repetition builds confidence and improves consistency.
5. Forgetting to Secure Threads Properly (Beginning and End)
Many beginners make the mistake of using large knots on the back of their work or not securing their threads well, leading to unraveling.
- Solution: Learn proper methods for starting and ending threads, such as the waste knot method or weaving the thread tails discreetly through existing stitches on the back of your work. The goal is a clean, secure finish without bulky knots that can show through to the front.
6. Over-Threading the Needle
Using a very long piece of floss might seem efficient, but it can lead to tangles, knots, and fraying, especially for beginners.
- Solution: Cut your floss to a manageable length, typically around 18-24 inches (45-60 cm). This reduces wear and tear on the thread and prevents frustrating tangles. You’ll re-thread more often, but your stitching will be smoother.
By being aware of these common pitfalls, you can approach your beginner embroidery classes with a more informed perspective, allowing you to focus on mastering the craft itself.
Getting Started: A Step-by-Step Approach to Your First Class
Ready to jump in? Here’s a practical sequence to help you navigate choosing and starting your first embroidery class:
- Define Your Goal: What do you want to achieve? Is it just a hobby, learning a specific technique (like creating embroidery letters free patterns), or creating gifts? Your goal will influence whether online or local, free or paid, is best.
- Assess Your Learning Style & Schedule: Do you thrive with direct feedback (local class) or prefer self-paced flexibility (online)? How much time can you realistically commit each week?
- Research Options:
- For local: Search “beginner embroidery classes near me” or check local craft store websites, community centers, and art school listings.
- For online: Explore platforms like Skillshare, Creativebug, Domestika, or reputable independent artist sites. Browse YouTube for free introductory content.
- Read Reviews and Check Curriculums: Pay close attention to what previous students say and ensure the class covers the fundamental stitches and techniques you want to learn.
- Gather Your Supplies: If the class doesn’t provide a kit, use their supply list or our essential tools guide above to purchase what you need. Opt for a beginner-friendly kit if you’re unsure.
- Prepare Your Workspace: Whether at home or in a studio, ensure you have good lighting, a comfortable chair, and a clear surface. Having everything you need within reach minimizes interruptions.
- Start Simple and Be Patient: Embrace the learning process. Your first stitches might not be perfect, and that’s entirely normal. Focus on understanding the mechanics of each stitch rather than achieving immediate perfection.
- Practice Consistently: Short, regular practice sessions are far more effective than infrequent, long ones. Even 15-20 minutes a few times a week will build muscle memory.
Remember, the most important step is simply to start. Embroidery is a rewarding craft that offers endless creative possibilities, and taking that first class is your gateway to exploring them.
Beyond the Basics: Your Embroidery Journey Continues
Successfully completing your first embroidery classes for beginners is just the start. The world of embroidery is vast and continually evolving, offering a lifetime of learning and creative exploration. Once you’ve mastered the foundational stitches, you can delve into a myriad of specialized techniques and applications. You might find yourself drawn to the delicate beauty of hand embroidery on intricate fabrics, or perhaps you’ll want to explore different styles like blackwork, stumpwork, goldwork, or even modern abstract embroidery. Many embroiderers also move on to creating unique embroidery mini designs for practical items like keychains or small patches.
Don’t hesitate to join online communities, attend local craft meetups, or follow inspiring artists on social media. These platforms are excellent for discovering new patterns, sharing your progress, getting constructive feedback, and staying motivated. As your skills grow, you’ll be able to tackle more complex projects, design your own patterns, and truly infuse your personality into your textile art. The key is to keep experimenting, keep practicing, and most importantly, keep enjoying the process of creating with needle and thread.
For a deeper dive into the historical and cultural significance of embroidery, the Wikipedia page on Embroidery offers a rich overview. The craft’s enduring appeal lies in its blend of tradition and endless potential for innovation.
Frequently Asked Questions About Embroidery Classes for Beginners
How long does it take to learn basic embroidery?
Learning the absolute basics – how to thread a needle, start and end stitches, and execute 5-7 fundamental stitches (like backstitch, running stitch, satin stitch, French knot) – can often be achieved within a few hours of focused instruction and practice. A beginner class might span 2-4 sessions, each lasting 2-3 hours. However, mastering these stitches to a point of consistent quality takes more time and regular practice. It’s a skill that builds gradually.
Is embroidery hard to learn?
Embroidery is generally considered a relatively easy craft to pick up. The initial learning curve for basic stitches is quite gentle. The main challenge often lies in developing consistent tension and neatness, which comes with practice. Unlike some crafts that require expensive equipment or complex setup, hand embroidery needs only a few inexpensive tools to start. Anyone with reasonable dexterity and patience can learn embroidery. To understand more about this, you can read about how hard is embroidery in detail.
What’s the best first embroidery project?
The best first project is a simple stitch sampler. This allows you to practice individual stitches repeatedly without the pressure of completing a complex design. Alternatively, a small, graphic design with clear lines and minimal color changes, using only 2-3 basic stitches, is also excellent. Avoid projects with intricate details, blending, or a large number of different stitches until you’re more comfortable.
Do I need a sewing machine for hand embroidery?
No, you do not need a sewing machine for hand embroidery. Hand embroidery, as the name suggests, is done entirely by hand using a needle and thread. A sewing machine is used for machine embroidery, which is a different technique, though both fall under the broader umbrella of embroidery. Your hand embroidery classes will focus solely on techniques executed without mechanical assistance.
Can I make money from embroidery?
Yes, many embroiderers turn their passion into a source of income. This can range from selling finished embroidered items (like custom clothing, wall art, or accessories) on platforms like Etsy or at craft fairs, to creating and selling patterns, or even teaching workshops. Building a successful embroidery business takes time, skill development, market research, and effective marketing, but it’s a very viable path for those dedicated to the craft.


