Displaying your hand-stitched creations can be incredibly rewarding. After pouring hours into intricate patterns and delicate threads, seeing your work presented beautifully in a frame truly elevates it from a project to a piece of art. However, knowing how to properly frame hand embroidery—considering everything from the right type of glass to the ideal size & format for your piece—can feel overwhelming. Many assume professional framing is the only answer, but with the right knowledge and tools, you can achieve stunning, archival-quality results right at home. This guide will walk you through the practical aspects of framing your textile art, ensuring it looks its best and lasts for years to come.
Why Proper Framing Matters for Your Hand Embroidery
Framing isn’t just about making your embroidery look good; it’s about protecting the fabric and threads from environmental damage, dust, and handling. A well-framed piece ensures your hard work stands the test of time, preserving its colors and integrity.
Beyond Aesthetics: Protecting Your Investment
Hand embroidery involves delicate materials. Exposure to direct sunlight, fluctuating humidity, and even airborne pollutants can cause irreversible damage like fading, discoloration, and fiber degradation. Proper framing acts as a critical barrier, shielding your artwork from these common threats.
Using archival-quality materials, such as acid-free mat board and backing, is crucial. These materials prevent chemical reactions that can yellow or weaken your fabric over time. Think of it as investing in the longevity of your artistic effort.
The Visible Difference: Presentation and Professionalism
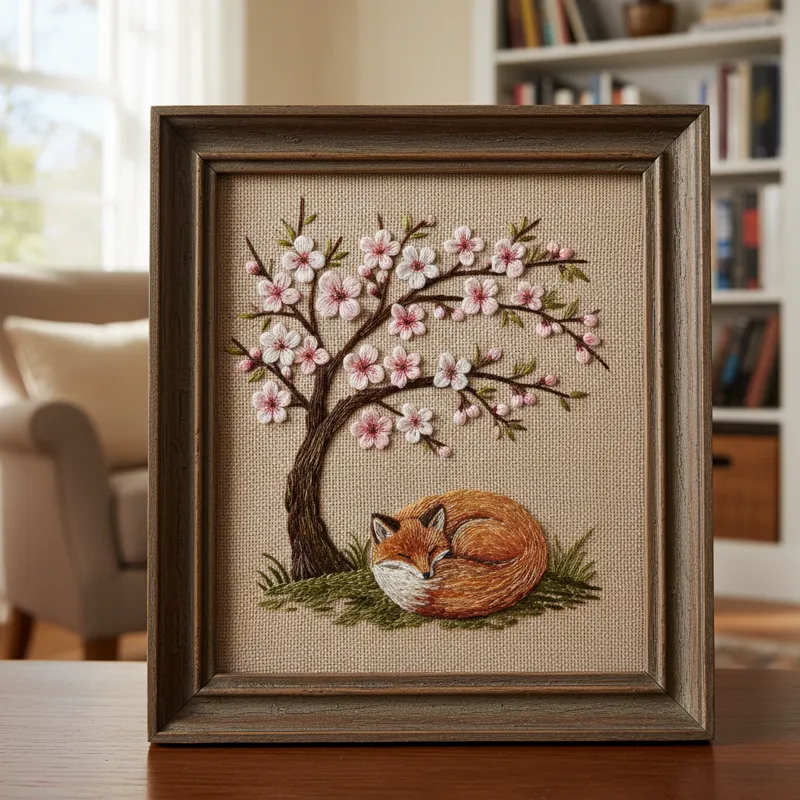
A thoughtfully framed piece of embroidered wall art instantly elevates its perceived value and visual impact. It transforms a loose piece of fabric into a finished, display-ready artwork.
The right frame and matting can complement the embroidery’s colors and textures, drawing the viewer’s eye to the intricate details. It signals a level of care and professionalism that enhances appreciation for the craft itself.
Understanding Your Options: Professional vs. DIY Framing
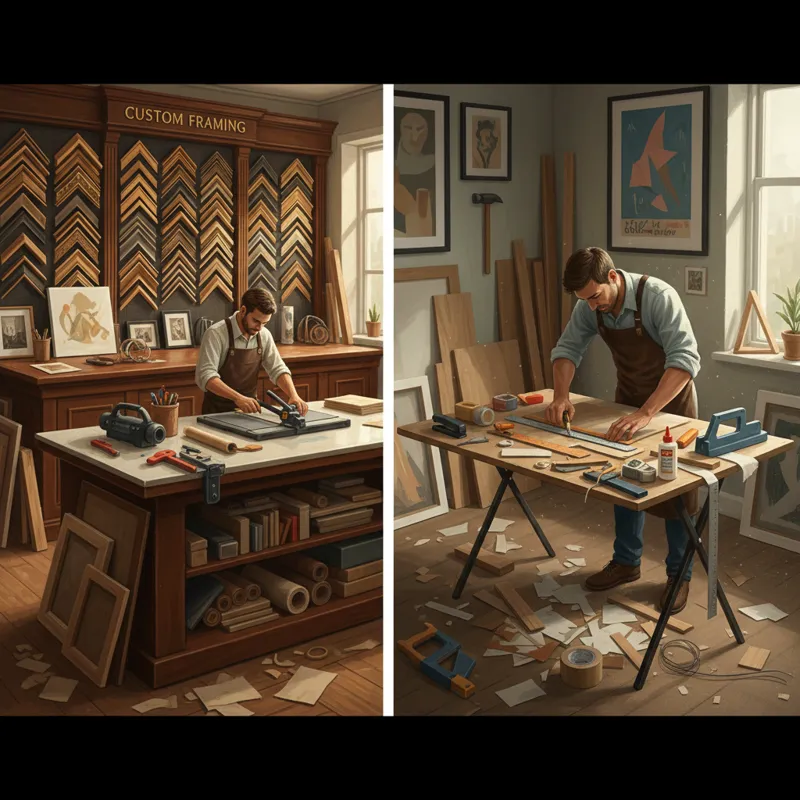
When it comes to framing your hand embroidery, you generally have two main paths: entrusting it to a professional framer or taking on the project yourself. Both options have their merits and drawbacks, largely depending on your budget, skill level, and the specific piece you’re framing.
The Professional Route: When to Splurge
Professional framers bring expertise, specialized equipment, and access to a wider range of custom materials. They’re ideal for intricate, large, or particularly valuable pieces of hand embroidery that require precise handling and museum-quality preservation.
A professional can advise on the best glass types (like UV-filtering or anti-reflective), matting colors, and frame styles to truly enhance your work. While it’s typically more expensive, the peace of mind and superior finish can be worth the investment for heirloom pieces or complex projects.
The DIY Approach: Empowering Your Inner Framer
Framing hand embroidery at home is a rewarding and cost-effective option for many projects. With readily available materials and a bit of patience, you can achieve excellent results. This approach gives you full creative control over the final presentation.
It’s particularly suitable for smaller works, gifts, or when you have a specific vision that might be difficult to articulate to someone else. The learning curve isn’t steep, and the satisfaction of completing the entire process yourself is considerable.
Essential Materials for DIY Framed Hand Embroidery
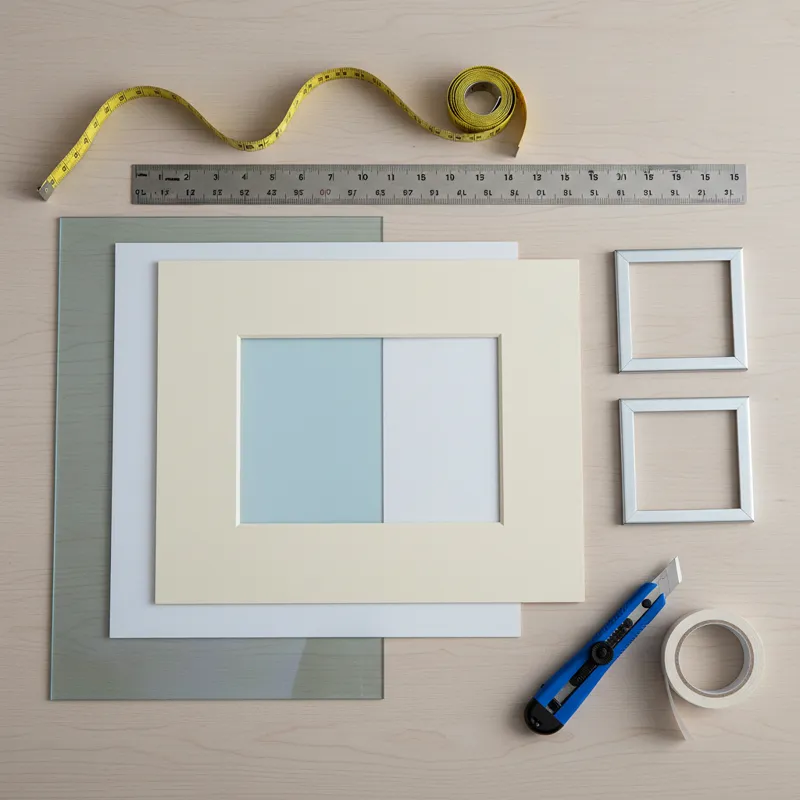
Successful DIY framing starts with selecting the right materials. Opting for archival-quality components is paramount for the long-term preservation of your stitched artwork. Skimping on these can lead to damage down the line.
Choosing the Right Frame
The frame itself is the most visible component. Consider the style of your embroidery and the decor of the space where it will hang. Frames come in countless materials (wood, metal), finishes, and profiles.
For DIY, ready-made frames are a convenient starting point. Ensure the frame opening is slightly larger than your mounted embroidery, especially if you plan to use a mat. Always check for sturdy construction and secure hanging hardware.
Archival Matting and Backing
A mat board creates a visual border around your embroidery and, crucially, prevents the fabric from touching the glazing. This air gap is vital for textile preservation, preventing condensation and potential mold growth.
Always use acid-free or conservation-grade mat board and backing board. These materials are pH-neutral and won’t leach harmful acids into your fabric over time. Cotton rag mat boards are often considered the gold standard for archival quality.
Glazing: Glass vs. Acrylic
The glazing (glass or acrylic) protects your embroidery from dust, dirt, and physical damage. Each has pros and cons.
- Glass: Offers superior clarity and scratch resistance. Options include regular, non-glare, and UV-filtering glass. UV-filtering glass is highly recommended for embroidery to prevent fading, blocking up to 99% of harmful UV rays.
- Acrylic (Plexiglas): Lighter and shatter-resistant, making it safer for larger pieces or in homes with children. It also comes in UV-filtering varieties. However, acrylic can scratch more easily and attract dust due to static.
Fasteners and Hangers
You’ll need reliable methods to secure your embroidery within the frame and to hang the finished piece. Look for:
- Frame points or flexible tabs: These hold the backing board, embroidery, and mat firmly inside the frame.
- Picture wire and D-rings: The most common and secure method for hanging frames.
- Bumpers: Small adhesive felt or rubber pads applied to the bottom corners of the frame back. They protect your wall and help the frame hang straight.
Preparing Your Embroidery for Framing
The preparation phase is critical for achieving a professional finish. Any wrinkles, distortions, or dust present before framing will be magnified once the piece is under glass.
Cleaning and Pressing Your Work
Before framing, ensure your embroidery is clean. Gently hand wash if necessary, using a mild, pH-neutral soap and lukewarm water, then air dry flat on a clean towel. Avoid harsh detergents or machine washing.
Once dry, press the embroidery from the back using a clean, dry iron on a low setting, placing a pressing cloth between the iron and the fabric. This removes creases and smooths the fabric, but be careful not to flatten the stitching itself, especially if it has texture.
The Art of Stretching and Mounting
This is arguably the most crucial step for a professional look. You need to stretch your embroidery tautly and evenly to eliminate puckering and ensure it lies flat.
- Lacing: For intricate or valuable pieces, lacing the fabric over an acid-free foam core board is preferred. You sew around the edges of the embroidery to the board, pulling it taut. This method is fully reversible and avoids adhesives.
- Pinning: For simpler pieces, you can stretch the embroidery over an acid-free foam core or mat board, securing the edges with stainless steel pins. Ensure pins don’t rust over time.
- Adhesives (Caution): While spray adhesives exist, they are generally not recommended for hand embroidery. They are rarely reversible, can cause discoloration, and may damage the fibers long-term. Always prioritize reversible methods.
Centering and Alignment
Once mounted, carefully center your embroidery on the backing board or within the mat opening. Measure from all sides to ensure even spacing. Use a ruler and a pencil (lightly, on the backing, not the fabric) to mark your positions. Proper alignment prevents a crooked appearance and ensures the mat frames the work perfectly.
Step-by-Step: Assembling Your Framed Hand Embroidery
With your embroidery prepared, it’s time to bring all the components together. Take your time with each step; precision here makes all the difference.
Cutting the Mat (If Using)
If you’re using a mat, you’ll need to cut its opening. This requires a mat cutter, a specialized tool for creating clean, beveled edges. Measure your embroidery and decide how much of a border you want.
A common guideline is to have the mat opening about 1/8 to 1/4 inch smaller on all sides than your actual artwork, ensuring the edges of the embroidery are neatly covered. Practice on scrap board if you’re new to mat cutting.
Securing the Artwork
Place your mounted embroidery (on its backing board) behind the mat board. If you’re not using a mat, simply place your mounted embroidery directly onto the frame’s backing board.
Use archival linen tape or artist’s tape to hinge the top edge of your mounted embroidery to the mat or backing board. This allows the embroidery to hang freely without shifting, preventing bowing or warping. Do not tape all four sides, as fabric needs to “breathe” slightly.
Installing the Glazing and Backing
Clean your chosen glazing (glass or acrylic) thoroughly on both sides using a lint-free cloth and a glass cleaner (or a mild soap and water solution for acrylic). Ensure there are no dust particles or smudges.
Carefully place the glazing into the frame, followed by the mat (if using), then your prepared embroidery on its backing board. Make sure everything is stacked neatly and centered. Press down gently to ensure everything is flush.
Sealing and Finishing the Back
Once all layers are in place, use your frame points or flexible tabs to secure the backing board firmly. Be careful not to press too hard, which could compress the embroidery.
For added protection against dust and insects, you can seal the back of the frame with brown paper tape or a specialized dust cover paper. Apply the tape along all edges, overlapping slightly onto the frame itself. Finally, attach your D-rings and picture wire for hanging, ensuring they are securely fastened and rated for the weight of your framed piece. Add felt bumpers to the bottom corners of the frame’s back to protect your wall.
Preservation Techniques for Long-Term Display
Framing is the first step in preservation, but how you display and care for your framed hand embroidery significantly impacts its longevity. Environmental factors play a huge role.
Managing Light Exposure
Light, especially direct sunlight and fluorescent light, is a primary culprit for fading dyes and weakening fibers. Even UV-filtering glass only slows the process, it doesn’t stop it entirely.
Hang your framed embroidery on walls that don’t receive direct sunlight. Rotate pieces occasionally if possible, and use curtains or blinds to control light levels. Consider using specialized art lighting that emits minimal UV radiation.
Temperature and Humidity Control
Textile art is sensitive to changes in temperature and humidity. Extreme fluctuations can cause fabric to expand and contract, leading to stress, warping, and potential mold growth.
Aim for stable room conditions. Avoid hanging framed embroidery in bathrooms, kitchens, or directly above radiators or air conditioning vents. An ideal environment is typically around 68-72°F (20-22°C) with 45-55% relative humidity. For more detailed information on textile preservation, you can consult resources like the Library of Congress’s guidelines on caring for textiles.
Avoiding Pests and Contaminants
Insects like moths, carpet beetles, and silverfish are attracted to natural fibers. A well-sealed frame provides a good barrier, but regular inspections are still wise.
Keep the display area clean and free of dust. Avoid using harsh chemical cleaners near your framed pieces, as fumes can potentially harm the materials. The dust cover paper on the back of the frame is particularly effective at keeping tiny invaders out.
What Most People Get Wrong When Framing Hand Embroidery
Even with good intentions, several common pitfalls can compromise the appearance and longevity of your framed hand embroidery. Being aware of these can save you a lot of trouble.
Using Non-Archival Materials
This is probably the biggest mistake. Regular cardboard, paper tape, and standard mat board contain acids that will slowly degrade and discolor your embroidery over time. The yellowing you sometimes see around old prints is often due to acidic backing material.
Always seek out “acid-free” or “conservation-grade” supplies for mats, backing, and mounting tapes. This simple choice makes a monumental difference in preservation.
Incorrect Stretching or Mounting
Failing to stretch the fabric evenly can result in puckering, sagging, or distorted stitches. Conversely, stretching too aggressively can damage the fabric’s weave or strain the threads.
Using improper mounting techniques, like applying glues directly to the fabric, creates irreversible damage. Always prioritize reversible methods such as lacing or carefully pinning onto an acid-free board.
Ignoring Airspace (Matting)
Many novice framers skip the mat to save space or cost. However, allowing the embroidery to touch the glass can cause several problems:
- Condensation can form, leading to moisture damage or mold.
- Fibers can stick to the glass, especially if moisture is present.
- Over time, the embroidery might press against the glass and become permanently distorted or flattened.
A mat board or spacers are essential to create that critical air gap.
Underestimating UV Damage
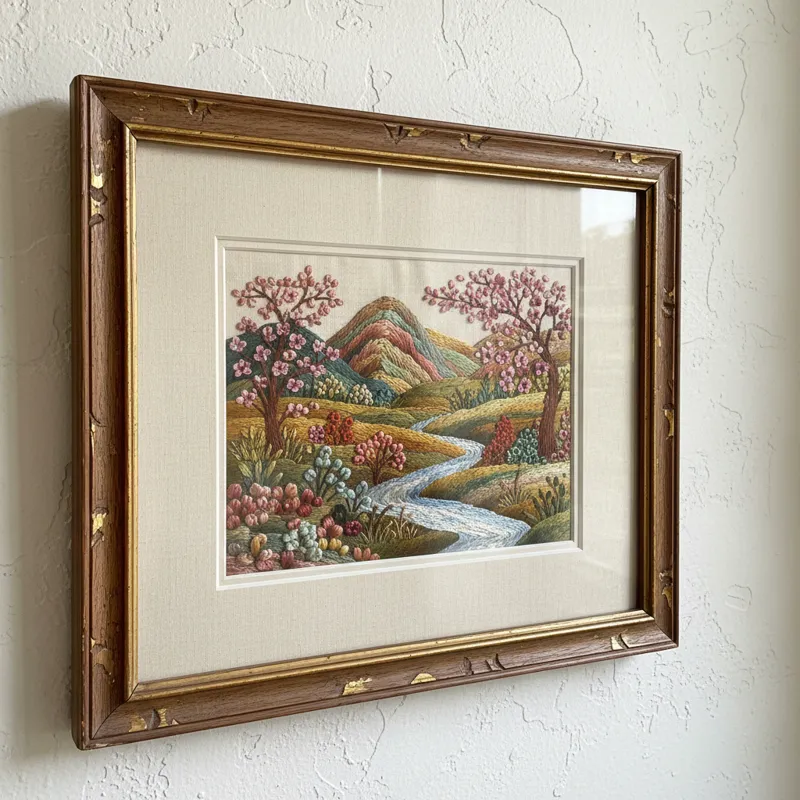
Assuming “indirect light” is good enough, or that regular glass offers sufficient protection, is a common misconception. Even indirect sunlight contains UV rays that fade textiles.
Investing in UV-filtering glass or acrylic is one of the most impactful choices you can make for preserving color. For especially delicate or antique pieces like vintage framed embroidery, it’s a non-negotiable.
Over-Tightening or Damaging the Fabric
When securing the embroidery within the frame, it’s easy to overtighten fasteners or apply too much pressure. This can compress the textile, flatten stitches, or even create impressions on the fabric.
The goal is to hold the components firmly but gently. Always handle your embroidery with clean hands and avoid anything that could snag or distort the stitches.
Creative Display Ideas for Framed Hand Embroidery
Once your hand embroidery is beautifully framed, the next step is finding the perfect place to showcase it. Displaying textile art creatively can enhance your home decor and highlight your personal style.
Gallery Walls
A gallery wall is an excellent way to combine multiple framed hand embroidery pieces, perhaps alongside other forms of art, photographs, or mementos. Mix different frame styles and sizes for an eclectic look, or stick to a cohesive color palette for a more uniform display.
This approach allows you to tell a story or showcase a collection of your work, from intricate designs to simple embroidery designs.
Groupings by Theme or Color
Consider grouping related pieces together. If you have a series of botanical embroideries, display them as a cluster. Similarly, pieces worked in a specific color scheme can create a striking visual impact when arranged close to each other.
This strategy creates focal points and brings a sense of order to your display, making your collection feel curated and intentional.
Integrating with Horizontal Wall Decor
Framed hand embroidery doesn’t have to be the sole star of the show. It can beautifully complement other forms of horizontal wall decor, such as shelves, long mirrors, or even framed textiles like embroidered wallpaper that might feature similar motifs.
Placing a framed piece above a console table or as part of a larger built-in display adds depth and texture to your living space, creating a rich visual experience.
FAQ: Your Questions About Framed Hand Embroidery Answered
Here are some common questions people have when considering how to frame and care for their hand embroidery.
Can I frame embroidery without glass?
Yes, you can. Framing without glass gives textiles a softer, more tactile appearance and avoids reflections. However, it leaves your embroidery exposed to dust, dirt, pollutants, and potential physical damage. If you choose this option, ensure the piece is in a low-traffic area, regularly dust it gently with a soft brush, and accept that it will require more frequent cleaning and may degrade faster over time.
How do I clean framed embroidery?
For framed embroidery under glass, regularly dust the frame and glass with a soft, lint-free cloth. If the glass needs cleaning, spray glass cleaner onto the cloth (not directly onto the frame) to avoid liquid seeping into the frame and damaging the artwork. For embroidery framed without glass, use a very soft, clean brush (like a cosmetic brush) to gently whisk away surface dust. Avoid rubbing or applying pressure.
What’s the best way to store unframed embroidery?
Store unframed embroidery flat, if possible, in an acid-free box or wrapped in acid-free tissue paper. Avoid folding, as creases can become permanent. Keep it in a cool, dark, dry place, away from direct light, temperature fluctuations, and pests. Never store in plastic bags long-term, as they can trap moisture and chemicals.
Can I use simple embroidery designs for framing?
Absolutely. Simple embroidery designs, even just a few minimalist stitches or a single motif, can look incredibly impactful when properly framed. The frame and mat can add significant presence to an otherwise understated design, making it feel complete and intentional. It’s often the framing that elevates a simple design into a refined piece of art.
Where can I learn more about archival framing standards?
For in-depth information on archival framing, you can consult professional framing organizations or conservation resources. The Conservation Wiki, maintained by the American Institute for Conservation, offers comprehensive guidelines on best practices for framing and preserving artworks, including textiles.
The Last Stitch: Displaying Your Textile Art with Confidence
Framing your hand embroidery is more than just putting it in a box; it’s the final act of creation, elevating your stitched masterpiece to its rightful place as cherished artwork. By understanding the principles of proper preparation, selecting archival materials, and mastering the assembly process, you gain the confidence to showcase your textile art beautifully and responsibly.
Whether you choose to DIY or go professional, the ultimate goal remains the same: to protect your intricate work while allowing its beauty to shine for years to come. Your framed hand embroidery isn’t just a craft project; it’s a statement of skill, patience, and creativity, worthy of being displayed with pride.


