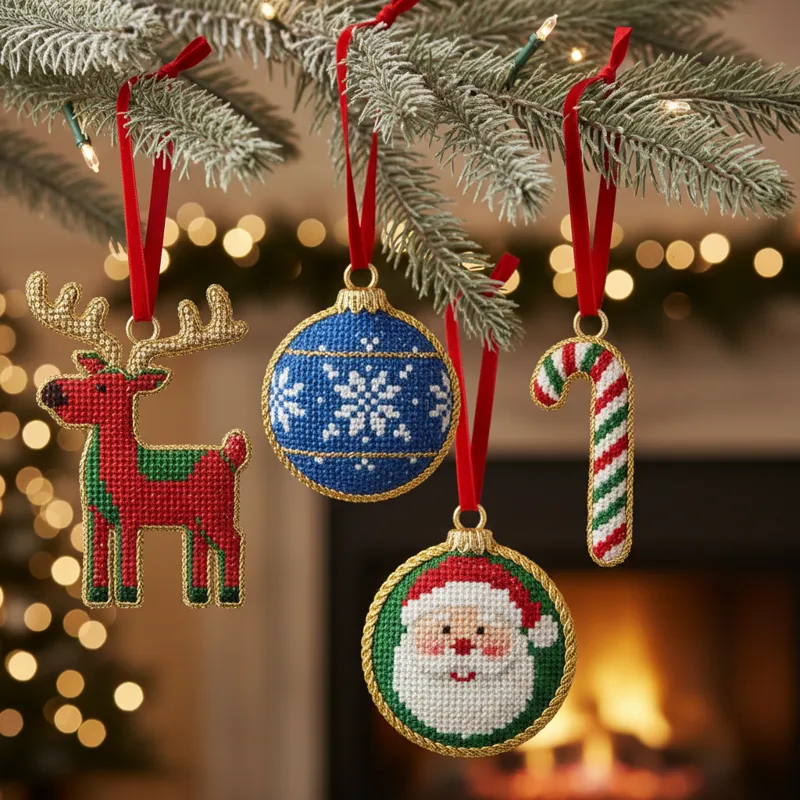
Needlepoint ornaments offer a unique blend of intricate fabric art for wall decor and personal expression, making them cherished pieces in any home. If you’re looking to understand the material & technique involved, or simply appreciate the artistry, finding quality needlepoint ornaments can be a rewarding journey. These small-scale projects, often measuring just a few inches, provide an accessible entry point into the broader world of needlepoint while allowing for incredible detail and creative freedom. They’re not just for the holiday season anymore; many enthusiasts now design and display needlepoint ornaments year-round, integrating them into diverse home aesthetics. With the right approach, anyone can craft or collect these charming textile treasures.
The Enduring Charm of Needlepoint Ornaments
Needlepoint ornaments hold a special place in the realm of handcrafted decor. Their appeal stems from a combination of factors: their manageable size, the satisfaction of creating something beautiful by hand, and their versatility. While traditionally associated with Christmas trees, modern interpretations have broadened their scope considerably, transforming them into year-round accents that speak to individual tastes and styles.
More Than Just Holiday Decor
In 2026, the notion of needlepoint ornaments solely belonging to December is increasingly outdated. Contemporary crafters and designers recognize their potential to add texture, color, and personality to any space, any time. Imagine a small, perfectly stitched geometric pattern hanging from a minimalist wall hook in a living room, or a botanical design adorning a bookshelf. These pieces can contribute to a layered aesthetic, offering subtle nods to craftsmanship and personal interest without overpowering a room.
Their compact nature also makes them ideal for small apartments or spaces where larger decor items might feel overwhelming. A collection of themed needlepoint ornaments can tell a story, reflecting travels, hobbies, or personal milestones throughout the year, far beyond seasonal festivities.
Why Crafting Your Own Holds Value
The act of creating needlepoint ornaments yourself offers immense satisfaction. It’s a tactile, meditative process that allows you to slow down and focus. Unlike larger projects, an ornament can often be completed in a reasonable timeframe, providing a sense of accomplishment without the commitment of a huge undertaking. This makes them particularly appealing for those new to needlepoint or busy individuals seeking a creative outlet.
Furthermore, a handmade ornament carries a unique emotional weight. Whether you’re making it for your own home or as a gift, the hours of careful stitching imbue it with personal value. It’s a tangible expression of care and creativity, something mass-produced items simply can’t replicate. Each stitch tells a small part of its story.
Getting Started: Essential Material & Technique for Needlepoint Ornaments
Embarking on your first needlepoint ornament project requires understanding the fundamental materials and techniques. The good news is that the basics are straightforward, and the skills you learn are transferable to larger needlepoint endeavors. With just a few key components, you’re ready to begin creating.
Choosing Your Canvas: Understanding Counts and Types
The foundation of any needlepoint project is the canvas. For needlepoint ornaments, you’ll typically work with smaller pieces, often pre-cut or sold as part of a kit. Canvas comes in various “counts,” which refers to the number of threads per inch. Common counts for ornaments range from 13-mesh (thirteen threads per inch) to 18-mesh (eighteen threads per inch).
- 13-mesh: This is a good starting point for beginners. The holes are larger, making it easier to see your stitches and work with slightly thicker threads. It results in a quicker project with a slightly more rustic appearance. Many needlepoint sampler kits often utilize this mesh size for ease of learning.
- 18-mesh: This offers a finer, more detailed finish. It’s excellent for intricate designs and allows for more nuanced shading and smaller motifs. While it takes longer to stitch due to the smaller holes, the refined result is often worth the extra effort.
- Painted Canvas Ornaments: For those who prefer to jump straight into stitching, a painted canvas is an excellent choice. The design is pre-printed directly onto the canvas, indicating where each color should go. This eliminates the need for following a separate chart and significantly simplifies the process, especially for complex designs. Many dedicated needlepoint ornament canvas options are available with pre-painted designs.
The canvas material itself is usually cotton or linen, often stiffened to maintain its shape during stitching. You can purchase blank canvas and chart your own designs, or opt for the convenience of a pre-printed or Ehrman tapestry kit.
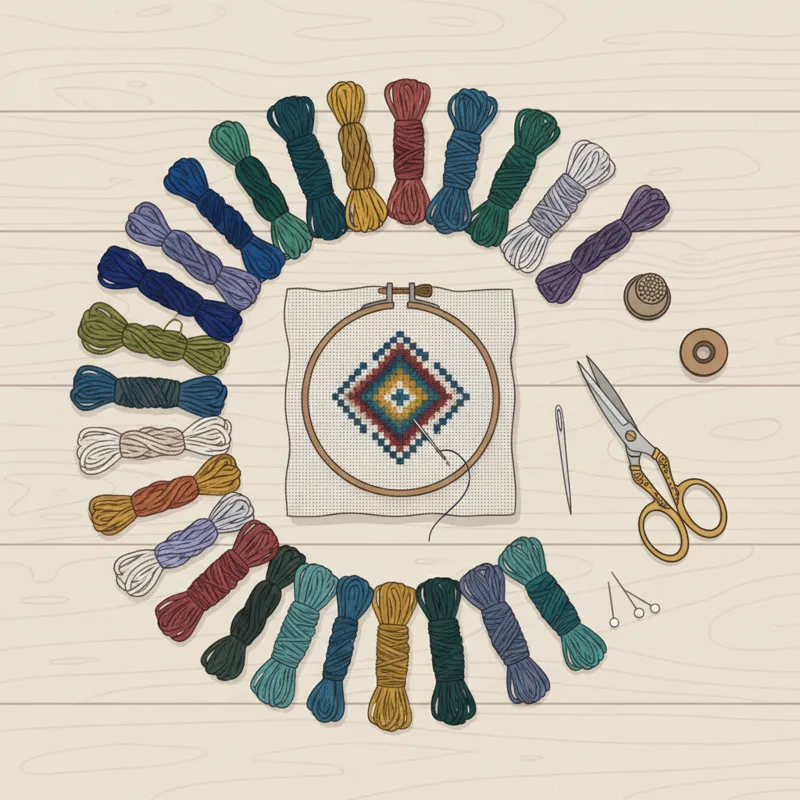
Thread Selection: A World of Fiber
The threads you choose dramatically impact the final look and feel of your needlepoint ornament. A wide array of fibers is available, each with unique characteristics:
- Tapestry Wool: This is a traditional choice, known for its durability, matte finish, and excellent coverage. It’s ideal for 13-mesh canvas and creates a classic, cozy look.
- Pearl Cotton (Perle Cotton): Available in various weights (sizes), pearl cotton has a subtle sheen and twisted construction. It’s durable and comes in a vast color palette, working well on finer meshes like 18-mesh.
- Silk Threads: For a luxurious and vibrant finish, silk threads are unparalleled. They offer a beautiful luster and drape, though they can be a bit more delicate to work with.
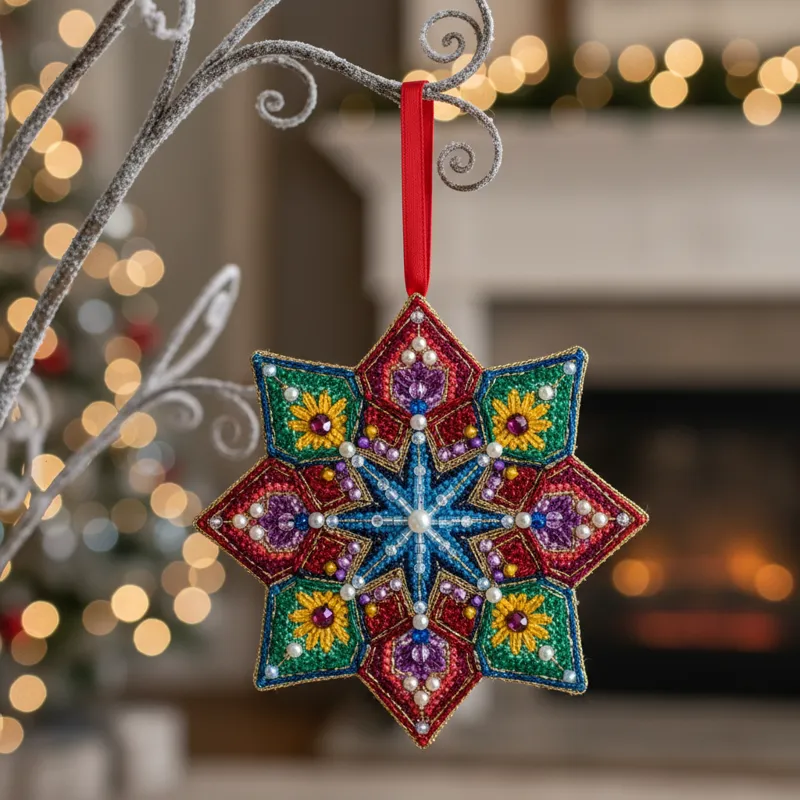
- Metallics and Novelty Threads: To add sparkle, texture, or unique effects, consider metallic threads, specialty silks, or even ribbons. These are often used for accents rather than full coverage.
The key is to match your thread to your canvas mesh and the desired aesthetic. You want the thread to completely cover the canvas threads without overcrowding the holes or looking sparse.
Essential Stitches for Ornaments
While needlepoint offers a vast library of stitches, most ornaments can be effectively completed using a few fundamental ones. The most common is the Tent Stitch, which has three variations:
- Continental Stitch: This is worked in horizontal or vertical rows, creating a strong, diagonal stitch on the front and a long diagonal stitch on the back. It uses more thread but results in a very durable fabric.
- Half-Cross Stitch: The simplest of the tent stitches, it creates a diagonal stitch on the front and a vertical stitch on the back. It uses less thread, making it suitable for quick projects, but it’s not as durable as Continental.
- Basketweave Stitch: This is considered the best for large areas. It alternates Continental stitches, creating a diagonal weave on the back of the canvas. This method helps prevent canvas distortion and creates a smooth, even texture.
Beyond the Tent Stitch, you might incorporate decorative stitches for specific details, such as the French Knot for small dots or the Bargello stitch for textured patterns. However, for most ornaments, mastering the Tent Stitch variations provides a solid foundation.
Beginner-Friendly Kits
For those just starting, a needlepoint sampler kit or a dedicated needlepoint ornament kit beginner set is an excellent investment. These kits typically include a pre-printed or charted canvas, all necessary threads, needles, and clear instructions. They remove the guesswork from material selection, allowing you to focus purely on the stitching process. Many such kits focus on simple, charming designs perfect for a first ornament.
Finding and Adapting Unique Needlepoint Ornament Patterns
The true joy of crafting needlepoint ornaments often lies in the patterns themselves. Moving beyond generic designs allows you to create truly unique pieces that resonate with your personal style or that of the recipient. The availability of diverse patterns has never been greater, thanks to both traditional and digital resources.
Exploring Digital and Print Resources
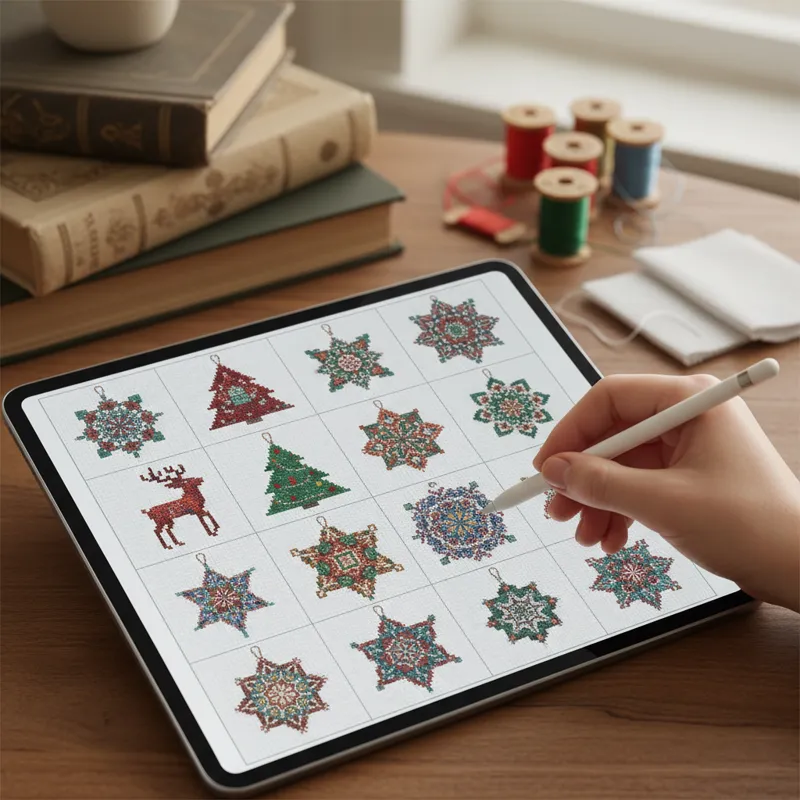
In 2026, the internet is a treasure trove for needlepoint patterns. Websites like Etsy, independent designers’ blogs, and specialized needlepoint stores offer thousands of digital charts, often available for immediate download. This means you can find anything from whimsical animals and intricate botanicals to abstract geometrics and personalized monograms. Searching for “painted canvas ornaments” or “needlepoint ornament canvas” will often reveal a vibrant marketplace of unique designs ready to be stitched.
Traditional print resources, such as needlepoint magazines and pattern books, still hold their own. They offer curated collections and often include detailed instructions and inspirational photography. Many craft stores also stock a selection of pre-packaged canvases with printed designs, making it easy to pick up a project on the fly.
Don’t overlook historical patterns either. Libraries and online archives can provide inspiration from different eras, allowing you to recreate vintage charm or adapt classic motifs into modern needlepoint ornaments.
Custom Designs: Making It Truly Yours
For the more adventurous crafter, designing your own needlepoint ornament is incredibly rewarding. You don’t need to be an artist to start. Simple grid paper or even free online charting tools can help you translate an image or idea into a stitchable pattern. Consider themes like:
- Personalized Initial: A monogram for a family member.
- Favorite Pet: A stylized rendition of a dog or cat.
- Landmark: A simplified image of a memorable travel destination.
- Abstract Shape: Modern, minimalist forms that complement contemporary decor.
Working on a blank needlepoint ornament canvas, you can sketch directly with a fabric marker or follow a printed chart. This level of customization ensures your ornament is truly one-of-a-kind.
Adapting Larger Designs for Ornament Scale
Sometimes you’ll find a beautiful design meant for a larger piece of needlepoint framed art or a pillow, but you envision it as a small ornament. This is entirely possible with some careful adaptation:
- Simplify Details: Remove minor elements or combine colors to reduce complexity.
- Crop the Image: Focus on a specific, strong motif within the larger design.
- Change Canvas Count: Using a finer mesh (e.g., 18-mesh instead of 13-mesh) will allow you to retain more detail in a smaller physical space.
The goal is to capture the essence of the original design in a condensed format that fits the ornament’s dimensions. It’s a creative challenge that often yields stunning results.
The Finishing Touch: Turning Your Stitching Into a Lasting Ornament
Completing the stitching is only half the journey. The finishing process transforms your canvas into a tangible, durable needlepoint ornament ready for display. This step requires precision and care, but it’s where your hours of work truly come to life.
Professional Finishing vs. DIY Methods
You generally have two options for finishing your needlepoint ornaments:
- Professional Finisher: Many needlepoint shops offer professional finishing services. You send them your stitched canvas, and they return a fully assembled ornament. This is often the best choice for intricate designs, odd shapes, or if you prefer a perfectly polished, factory-like finish. Professionals have specialized equipment and experience with various materials like cording, tassels, and intricate backings.
- DIY Finishing: Finishing your own ornaments is a popular and cost-effective option, particularly for standard shapes like circles, squares, or rectangles. It allows for complete creative control over the backing fabric, trim, and hanging method. While it takes practice, the satisfaction of completing the entire project yourself is immense.
For those making multiple needlepoint ornaments, learning basic DIY finishing techniques can save both time and money in the long run.
Common Finishing Techniques
Most DIY ornament finishing involves a few core steps:
- Blocking: After stitching, your canvas might be slightly distorted. Blocking is the process of gently wetting and then pinning your canvas to a flat surface (like a foam board) to square it up and even out the stitches. This is crucial for a professional-looking finish.
- Trimming: Once blocked and dry, carefully trim the excess canvas, leaving a consistent margin (usually 0.5 to 1 inch) around your stitched design.
- Adding Backing Fabric: Choose a complementary fabric for the back of your ornament. Velvet, felt, or a coordinating cotton print are popular choices. Cut the backing slightly larger than your stitched piece.
- Assembly: This is where methods vary.
- Whipstitching: Pin the backing and stitched piece wrong sides together. Create a hanging loop from ribbon or cording. Then, use a fine needle and matching thread to whipstitch the edges together, enclosing the hanging loop as you go.
- Corded Edge: If you want a more decorative edge, you can whipstitch the pieces together first, then attach a decorative cord around the perimeter with an adhesive or by sewing it on.
- Pillow-style: Some ornaments are finished like tiny pillows, stuffed lightly before closing.
Online tutorials and books specifically dedicated to needlepoint finishing can provide visual guidance and more advanced techniques.
Adding Embellishments
To truly personalize your needlepoint ornaments, consider adding embellishments. Small beads, sequins, or charms can add sparkle and texture. Tassels can be attached to the bottom for an elegant touch. Remember, the goal is to enhance, not overpower, your careful stitching. A thoughtfully chosen embellishment can elevate a simple design into a truly special piece, much like how bead embroidery templates add sparkle to fabric art.
Displaying Needlepoint Ornaments Beyond the Holiday Tree
While needlepoint ornaments are a festive staple during holidays, their beauty and versatility lend themselves perfectly to year-round display. Thinking creatively about how and where to showcase these small works of art can transform them from seasonal decorations into permanent fixtures in your home decor.
Year-Round Decor Ideas
Integrating your needlepoint ornaments into everyday decor can add warmth, texture, and a touch of handcrafted charm. Here are a few ideas:
- Cabinet Knobs and Door Handles: Hang a small ornament from a drawer pull in a kitchen or on a bedroom door handle. It’s a subtle, unexpected detail.
- Shelf Styling: Drape an ornament over a stack of books, nestle it in a decorative bowl, or hang it from the edge of a floating shelf. This adds a personal, tactile element to your vignettes.
- Window Treatments: Attach a few ornaments to tie-backs or curtain rods to add a decorative accent to your windows. They catch the light beautifully.
- Gallery Walls: Instead of traditional frames, use small embroidery hoops or mini shadow boxes to display your needlepoint ornaments as part of a larger framed wall paintings or textile art collection. This creates an eclectic and visually interesting display.
- Vases and Bottles: Tie a needlepoint ornament around the neck of a decorative vase or an interesting glass bottle. This adds character to simple vessels.
- Plant Adornments: For larger, sturdy houseplants, a small, lightweight ornament can hang from a branch, adding an unexpected pop of color or design.
The key is to treat each ornament as a miniature piece of fiber art wall hanging, finding places where its beauty can be appreciated daily.
Creative Groupings and Arrangements
Don’t limit yourself to single displays. Grouping needlepoint ornaments can create a more impactful statement:
- Branches and Twigs: Collect an interesting branch, spray paint it, and hang multiple needlepoint ornaments from its smaller twigs. This creates a natural, sculptural display that can be a centerpiece on a table or mantelpiece.
- Wreaths and Garlands: While often seasonal, a simple green wreath or a garland of fairy lights can be a beautiful base for hanging a collection of coordinating ornaments year-round.
- Shadow Boxes or Bell Jars: For more delicate or cherished needlepoint ornaments, display them individually or in small groups within a shadow box or under a glass bell jar to protect them from dust and provide a focal point.
- Dress Up Gifts: Instead of a traditional bow, tie a small, hand-stitched needlepoint ornament onto a wrapped gift. It becomes part of the present itself, offering a personal touch.
Experiment with different textures and heights when arranging your ornaments. Combining them with other small decorative objects like vintage keys, dried botanicals, or small ceramic figures can create rich, curated displays.
Gifting Your Hand-Stitched Creations
Handmade needlepoint ornaments make incredibly thoughtful gifts. They are personal, unique, and carry the warmth of human effort. Consider tailoring the design to the recipient’s interests – a favorite animal, a symbolic motif, or even a monogram. Packaging them nicely in a small box with tissue paper, perhaps with a handwritten note about the design or the joy of stitching it, adds to their appeal. These are gifts that are often kept and treasured for years, becoming family heirlooms.
Things People Often Overlook in Needlepoint Ornament Crafting
Even experienced crafters can sometimes overlook details that significantly impact the quality and longevity of their needlepoint ornaments. Being aware of these common pitfalls can help ensure your projects turn out beautifully and stand the test of time.
The Importance of Proper Tension
One of the most crucial, yet often underestimated, aspects of needlepoint is maintaining consistent thread tension. If your tension is too loose, stitches might appear gappy, allowing the canvas to show through. If it’s too tight, your canvas can pucker and distort, making it difficult to block and finish evenly. This issue is particularly noticeable with smaller items like needlepoint ornaments.
Practice helps, but conscious effort during stitching is key. Aim for stitches that lie smoothly and uniformly, covering the canvas without pulling too tightly. If you find your canvas distorting, pause and adjust your technique. Using a frame or stretcher bars can also help maintain canvas tension and prevent warping during the stitching process.
Thinking About the Back of Your Work
While the front of your needlepoint ornament is where the beauty shines, the back is equally important, especially if you’re not planning a full professional finish. A neat back:
- Prevents Bulk: Excessively long “traveling” threads or messy knots can create bulk, making the ornament lumpy and difficult to finish flat.
- Ensures Durability: Securely burying thread ends rather than knotting them creates a stronger, more stable fabric less prone to unraveling.
- Shows Craftsmanship: A tidy back is a hallmark of a skilled needlepointer, reflecting attention to detail throughout the entire process.
Avoid carrying threads long distances across the back of the canvas, especially with dark threads under light canvas areas where they might show through. Try to end and begin new threads close to where you need them. This meticulous approach elevates the overall quality of your needlepoint ornaments.
Not Rushing the Finishing Process
It’s tempting to rush through the finishing steps once the stitching is complete, but this is often where mistakes happen. The finishing can make or break an ornament. Take your time with:
- Blocking: Don’t skip blocking. Even a slightly distorted canvas will result in an uneven finished piece.
- Accurate Cutting: Precision is key when trimming the canvas and backing fabric. Irregular edges are hard to hide.
- Secure Stitching/Adhesion: Ensure your backing is firmly attached, whether by sewing or adhesive. Loose edges will quickly fray or detach.
Treat the finishing as an integral part of the creative process, giving it the same care and attention you gave to the stitching itself. This ensures your needlepoint ornaments become cherished items for years to come.
The Evolution and Future of Needlepoint Ornaments
Needlepoint, a craft with roots stretching back centuries, continues to evolve, and its ornament category is no exception. From traditional motifs to cutting-edge digital designs, needlepoint ornaments reflect current artistic trends while maintaining their timeless appeal.
Modern Trends and Interpretations
In 2026, needlepoint ornaments are seeing a surge in popularity, driven by a renewed interest in handcrafted items and personal expression. Modern trends include:
- Geometric and Abstract Designs: Clean lines, bold color blocks, and minimalist patterns are popular, offering a contemporary aesthetic.
- Pop Culture References: Crafters are increasingly stitching characters, symbols, and quotes from movies, TV shows, and video games, making ornaments truly personal and often humorous.
- Sustainable Materials: A growing demand for eco-friendly options sees more artists using organic cotton, recycled wool, and sustainably sourced silk threads. The focus isn’t just on the finished product but the entire creation process.
- Mixed Media: Some artists incorporate other elements like tiny beads (similar to techniques in framed hand embroidery), metallic threads, or even small fabric appliques directly onto their needlepoint ornaments for added texture and visual interest.
This dynamic blend of tradition and innovation keeps needlepoint vibrant and relevant, appealing to a broader demographic than ever before. For a deeper dive into the history of needlepoint, including its development and various styles, the Wikipedia page on Needlepoint offers a comprehensive overview.
The Online Community and Resources
The internet has profoundly influenced the needlepoint community. Online platforms like Instagram, Pinterest, and dedicated forums serve as hubs for sharing inspiration, patterns, and tips. Crafters can connect globally, participate in virtual stitch-alongs, and discover new designers and techniques with ease. This connectivity has fueled innovation and made the craft more accessible.
Online marketplaces also provide unparalleled access to unique materials and tools, from hand-dyed threads to specialized needlepoint ornament canvas designs that might not be available in local stores. This global access to resources supports both independent artisans and hobbyists, ensuring the craft continues to thrive and evolve. The ease of access to these resources also facilitates the sharing of knowledge, making it easier for a beginner to pick up a needlepoint sampler kit and get started.
Frequently Asked Questions About Needlepoint Ornaments
What’s the best needlepoint ornament kit for beginners?
For beginners, look for kits that explicitly state they are “beginner-friendly” or “for first-timers.” These usually feature 13-mesh canvas, pre-printed designs (eliminating the need for charting), and include all necessary threads, needles, and clear instructions. Designs with larger, simpler color blocks are easier to master than those with fine details. A good quality needlepoint ornament kit beginner set will set you up for success.
How do I clean and store needlepoint ornaments?
For cleaning, gently dust your needlepoint ornaments with a soft brush or a lint roller. If necessary, very light spot cleaning with a damp cloth and mild soap can be done, but test on an inconspicuous area first. Avoid harsh chemicals or excessive wetting. For storage, wrap each ornament individually in acid-free tissue paper or soft cloth to protect the fibers and prevent tangling or snagging. Store them in a cool, dry place away from direct sunlight and humidity to preserve colors and prevent mildew.
Can I design my own needlepoint ornament patterns?
Absolutely! Designing your own patterns is a fantastic way to personalize your needlepoint ornaments. You can start with simple ideas like initials, geometric shapes, or stylized outlines of objects. Use graph paper or online charting software to translate your image into a grid of squares, where each square represents a stitch. Experiment with colors and thread types to bring your unique vision to life on a blank needlepoint ornament canvas.
What’s the difference between needlepoint and cross-stitch ornaments?
While both are forms of embroidery, needlepoint and cross-stitch differ fundamentally. Needlepoint typically uses a canvas with evenly spaced holes and involves making stitches that cover the entire canvas, often using wool or thicker threads. Stitches can vary but often involve diagonal “tent” stitches. Cross-stitch, on the other hand, is usually worked on Aida fabric or linen, which has a distinct weave that forms visible squares. The defining stitch is an ‘X’ shape. Needlepoint tends to create a denser, more textured fabric, while cross-stitch often has a more graphic, pixelated appearance. Both can create beautiful ornaments, but the material and technique are distinct.
Needlepoint ornaments, whether purchased or meticulously crafted by hand, are more than mere decorations. They represent a fusion of tradition, skill, and personal narrative. From the thoughtful selection of a painted canvas ornament to the final, precise stitch, each piece is a testament to the enduring appeal of textile arts. As we move through 2026, the versatility of needlepoint ensures these charming creations will continue to find new ways to adorn our homes and mark our most cherished moments, proving that sometimes, the smallest art makes the biggest impact.


